Learn how to install mini split systems with our comprehensive guide covering tools, preparation, and step-by-step instructions for indoor and outdoor units.Installing a mini split system can be a rewarding project that enhances the comfort of your home, but it requires the right tools and preparation to ensure a successful installation. Mini splits offer energy-efficient heating and cooling solutions, making them a popular choice among homeowners. In this blog post, we will explore the essential tools you need to install a mini split system, from basic hand tools to specialized equipment. We’ll also discuss how to properly prepare your installation area and guide you through the steps of mounting the indoor unit and connecting it to the outdoor unit. Whether you’re a seasoned DIY enthusiast or a first-time installer, our comprehensive guide will help you navigate the process with confidence and achieve professional results. Ready to get started? Let’s dive in!
Understanding Mini Split Systems
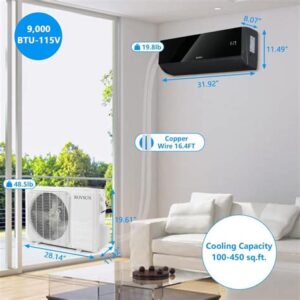
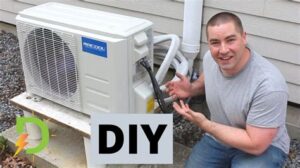
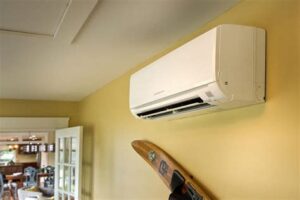
Mini split systems are an efficient and versatile choice for heating and cooling residential and commercial spaces. These systems consist of two main components: the indoor unit and the outdoor unit. Together, they work to maintain a comfortable environment without the need for extensive ductwork.
One of the most significant advantages of mini split systems is their ability to provide both heating and cooling, making them an excellent year-round solution. Moreover, they are designed for energy efficiency, often leading to lower utility bills compared to traditional HVAC systems. An added benefit is the zoning capability, which allows users to control the temperature in specific areas of a building, enhancing comfort and reducing energy waste.
Before diving into the installation process, it is important to familiarize yourself with the essential tools needed for a successful mini split installation. Having the right tools will help ensure that the installation is performed safely and efficiently, leading to a system that operates at peak performance!
Selecting the Right Tools
When it comes to installing a mini split system, selecting the right tools is essential to ensure a successful and efficient installation. Here is a list of the key tools you will need:
- Drill – For making holes in the wall to run the refrigerant lines.
- Level – To make sure your indoor and outdoor units are perfectly horizontal.
- Wrench set – For tightening connections and securing fittings.
- Vacuum pump – To remove air and moisture from the refrigerant lines before charging the system.
- Pipe cutter – For cutting the refrigerant lines to the desired lengths.
- Refrigerant gauge set – To check and monitor refrigerant pressure during installation.
- Flaring tool – Necessary for creating flared connections on the refrigerant lines.
- Wire stripper – To prepare electrical wires for connecting the systems.
- Safety gear – Always wear gloves and safety goggles for protection during the installation process.
Take the time to gather all these tools before starting your installation. This preparation will not only enhance your efficiency but also reduce the likelihood of project delays. Having the right tools available allows you to focus on the installation process rather than searching for missing equipment.
Additionally, each tool serves a specific purpose. For instance, the vacuum pump is vital for ensuring the integrity of your unit by removing any trapped air and moisture. On the other hand, using a level is crucial to ensuring that your indoor unit operates effectively without any issues.
In conclusion, having the proper tools at your disposal is foundational to a smooth installation of your mini split system. Investing in high-quality tools will also reflect positively in the long-term reliability of your HVAC system.
Preparing the Installation Area
Preparing the installation area is a critical step in ensuring that your mini split system installation goes smoothly. Proper preparation not only makes the installation process easier but also enhances the system’s overall efficiency and longevity. Here are some essential steps to consider:
- Choose the Right Location: Ensure that the indoor unit is located in a space where it can effectively distribute air throughout the room.
- Ensure Accessibility: Make certain that the area around the unit is accessible for maintenance and repairs in the future.
- Check for Structural Integrity: Verify that the wall or surface where the indoor unit will be installed is strong enough to hold the unit’s weight.
Before installation, it is also advisable to clear the area of any furniture or obstructions that could hinder the process. Having a clean workspace not only helps you be more efficient but also minimizes the risk of accidental damage during installation.
Another important aspect to consider is the outdoor unit placement. Make sure to allow sufficient space around the outdoor unit for airflow and maintenance access. The unit should be positioned in a shaded area to prevent overheating and should comply with local regulations regarding setbacks from property lines.
By taking the time to properly prepare the installation area, you ensure that your mini split system will be positioned optimally for both performance and longevity. This foresight will pay off in the long run by reducing the need for adjustments or modifications post-installation.
Installing the Indoor Unit
Installing the indoor unit of a mini split system is a crucial step that requires precision and the right tools. To ensure a successful installation, you’ll need to gather several essential tools. These tools will not only make the process easier but also ensure that the indoor unit operates efficiently.
Here’s a list of tools you’ll typically need:
- Drill – For making holes in the wall for mounting the unit.
- Screwdriver Set – Both Phillips and flathead screwdrivers are essential.
- Level – To ensure your indoor unit is mounted correctly.
- Stud Finder – To locate wall studs for secure mounting.
- Piping Kit – Includes insulation and various fittings necessary for installation.
- Measurement Tape – For accurate measurements when positioning the unit.
- Safety Goggles – To protect your eyes during installation.
Once you have gathered the necessary tools, the first step is to select an appropriate location for the indoor unit. Ideally, it should be mounted high on the wall where air circulation is optimal. After determining the location, use the stud finder to locate the wall studs. This will ensure that your unit is securely anchored.
Next, use the drill to create holes in the wall, and then position the indoor unit with the help of the level to ensure that it is straight. Using the screwdrivers, securely attach the unit to the wall, making sure that all screws are tightened properly. Once the indoor unit is securely mounted, you can proceed with the necessary piping and wiring connections to complete the installation process.
Connecting the Outdoor Unit
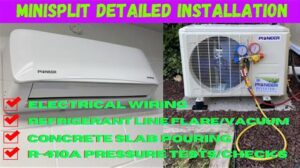
Connecting the outdoor unit of your mini split system is a crucial step in the installation process. This unit is responsible for expelling the heat absorbed from your indoor space, making the connection process vital for the overall efficiency of the system. Here are the essential tools and steps you’ll need to ensure a successful connection.
Essential Tools Required
- Refrigerant Line Set: This includes the liquid and suction lines that will connect the indoor and outdoor units.
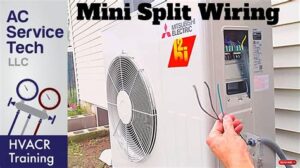
- Electrical Wiring: A suitable gauge of electrical wire is necessary for power connections.
- Line Set Cover: To protect the refrigerant lines from environmental damage.
- Pipe Insulation: To prevent energy loss and avoid condensation issues.
- Power Disconnect Box: To safely disconnect power when needed.
- Manifold Gauges: For checking the system pressure during the installation process.
Once you have gathered the required tools, follow these steps to connect the outdoor unit:
Steps to Connect the Outdoor Unit
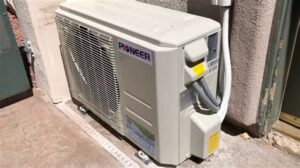
- Position the Outdoor Unit: Ensure the unit is on a stable, level surface with adequate clearance for air flow.
- Attach the Refrigerant Lines: Connect the liquid and suction lines securely to the outdoor unit using the appropriate fittings.
- Install Electrical Connections: Connect the electrical wires from the unit to the power source, ensuring all connections are tight and properly insulated.
- Seal Connections: Use pipe insulation to protect the refrigerant lines and prevent any potential energy loss.
After successfully connecting the outdoor unit, it’s crucial to perform tests to check for any leaks and ensure the connections are secure. Using manifold gauges can help you monitor the pressure levels, making sure your mini split system runs smoothly and efficiently.
Frequently Asked Questions
What is a mini split system?
A mini split system is a type of heating and cooling system that consists of an outdoor compressor unit and one or more indoor air handling units, providing efficient climate control in specific areas of a building.
What tools are essential for installing a mini split system?
Essential tools for installing a mini split include a drill, screwdrivers, pipe wrenches, a level, a refrigerant gauge, a vacuum pump, and a measuring tape.
Do I need any special equipment for handling refrigerant?
Yes, handling refrigerant safely requires a refrigerant recovery machine, recovery tanks, and protective gear to comply with safety regulations and prevent harm.
Can I install a mini split system myself?
While some handy individuals may attempt a DIY installation, it is recommended to hire a licensed professional due to the complexities involved, especially with electrical and refrigerant lines.
What safety precautions should I take during installation?
Safety precautions include wearing proper safety gear, ensuring the power is turned off during installation, and working with refrigerants only if properly certified.
How long does it typically take to install a mini split system?
Installation time can vary, but on average, a mini split system can be installed in 4 to 8 hours depending on the complexity of the setup and the number of indoor units.
What maintenance tools might I need after installation?
Post-installation, maintenance tools like a vacuum cleaner, filter cleaning tools, and basic screwdrivers will be helpful to ensure the system runs efficiently over time.
