Learn how to select, install, and maintain your Senville Mini Split for optimal efficiency and longevity with our comprehensive guide.Installing a Senville mini split can transform your home’s heating and cooling experience, offering efficient climate control tailored to your needs. With a sleek design and advanced technology, these systems provide comfort while being energy efficient. However, choosing the right unit and ensuring a successful installation demands careful planning and preparation. In this blog post, we will guide you through every stage of the process, from selecting the ideal Senville mini split for your space to the step-by-step installation procedure. We will also cover essential testing and troubleshooting strategies to ensure your system functions flawlessly, and share tips on maximizing its efficiency and longevity. Whether you’re a seasoned DIY enthusiast or a first-time installer, this comprehensive guide will equip you with the knowledge and confidence you need to achieve a successful installation. Let’s get started on your path to a more comfortable home!
Selecting the Right Senville Mini Split
When it comes to choosing the right Senville Mini Split system, there are several important factors to consider to ensure you get the most efficient and effective unit for your needs. Whether you are looking to cool a single room or an entire home, understanding the specifics of your requirements can greatly influence your overall satisfaction.
One of the most crucial elements in selecting the right Senville Mini Split is determining the BTU (British Thermal Units) required for your space. The BTU rating indicates the cooling or heating capacity of the unit. A general rule of thumb is:
| Room Size (Square Feet) | Recommended BTUs |
|---|---|
| 100 – 300 | 7,000 – 9,000 |
| 300 – 600 | 9,000 – 12,000 |
| 600 – 1,000 | 12,000 – 18,000 |
In addition to BTUs, consider the energy efficiency ratio (EER) and seasonal energy efficiency ratio (SEER). Higher ratings mean more energy-efficient systems, which can lead to lower energy bills over time. Look for Senville Mini Split models with a SEER rating of at least 16, as they are designed to operate efficiently in varying conditions.
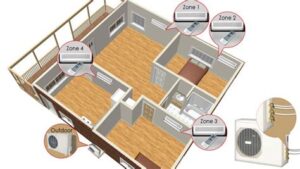
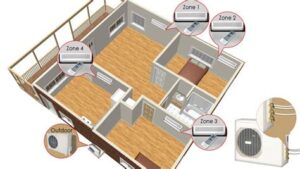
Lastly, take note of the design and features you need, such as multiple zones, smart home compatibility, and noise levels. The right Senville Mini Split system should not only meet your cooling and heating requirements but also fit seamlessly into your home while providing comfort and convenience.
Preparing Your Space for Installation
When it comes to installing a Senville Mini Split system, proper preparation of the installation space is crucial for optimal performance. Ensuring that your location is adequately prepared can save you time and hassle during installation. Below are essential steps to help you get your space ready.
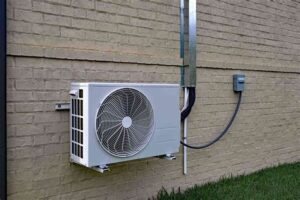
1. Choose the Right Location: Selecting an appropriate location for your indoor and outdoor units is vital. The indoor unit should be mounted high on a wall, away from obstructions and direct sunlight. The outdoor unit needs sufficient airflow and should be on a stable surface, ideally elevated to avoid water pooling.
2. Clear the Area: Before installation, remove any furniture or obstacles from the vicinity. The area should be clean and spacious enough to allow easy access for the installation team or yourself. This ensures safety and efficiency during the actual installation process.
3. Check Electrical Requirements: Verify that the desired installation location has the appropriate electrical supply to support the Senville Mini Split system. You may need to consult an electrician to ensure your electrical setup can handle the unit’s power needs without complications.
| Preparation Steps | Considerations |
|---|---|
| Choosing the Right Location | Away from sunlight and obstructions |
| Clearing the Area | Accessible and clean installation space |
| Checking Electrical Supply | Proper voltage and amperage for the unit |
Following these preparation tips will help ensure that your Senville Mini Split installation goes smoothly, allowing for a more efficient cooling and heating experience in your space.
Step-by-Step Installation Process
Installing a Senville mini split system can seem daunting, but with the right guidance, it can be a straightforward process. Below is a step-by-step installation guide that will help you successfully install your mini split unit and enjoy a comfortable environment in your home. By following these steps, you can ensure efficient operation and longevity of your system.
Materials You Will Need:
- Mini split system
- Mounting bracket
- Drill with appropriate bit
- Refrigerant lines
- Electrical wiring
- Insulation tape
- Level
- Safety goggles and gloves
Step 1: Choose Your Installation Location
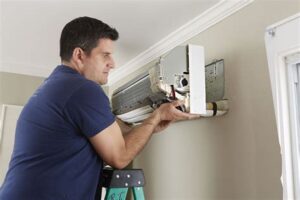
First, you need to decide where to install your indoor and outdoor Senville mini split units. Consider factors like airflow, accessibility, and proximity to electrical sources. The indoor unit should be mounted on a wall about 7 feet off the ground, while the outdoor unit needs ample clearance for airflow.
Step 2: Prepare the Wall and Install the Mounting Bracket
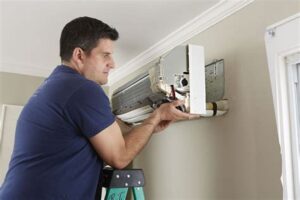
Using a level, mark the desired height for your indoor unit on the wall. Install the mounting bracket securely using your drill, making sure it can support the weight of the mini split unit. Check again with the level to ensure it is straight.
Step 3: Drill a Hole for Refrigerant Lines
Drill a hole through the wall where you will pass the refrigerant lines, ensuring it is slightly sloped downward towards the outdoor unit to facilitate drainage. The hole should be wide enough to accommodate the lines and any insulation that will be added.
Step 4: Connect the Refrigerant Lines and Electrical Wiring
Carefully connect the refrigerant lines to the indoor unit, ensuring you follow the manufacturer’s guidelines. Next, connect the electrical wiring. It is essential to make sure all connections are secure to prevent leaks and ensure proper functionality.
Step 5: Mount the Indoor Unit and Complete the Outdoor Installation
Once everything is connected, mount your indoor unit onto the installed bracket. Next, move to the outdoor unit and follow the same process to secure it in place, making sure it is level and stable. Connect the refrigerant lines from the indoor unit to the outdoor unit, ensuring all connections are tight.
Step 6: Test the System
After installation, turn on the power to the system and check for any leaks. Ensure both the indoor and outdoor units are functioning correctly. Adjust the settings on your thermostat to complete the setup.
Following these step-by-step instructions will help you successfully install your Senville mini split system. With a job well done, you’ll be
Testing and Troubleshooting the System
Once you have successfully installed your Senville Mini Split, the next crucial step is to ensure that the system is functioning properly. Testing and troubleshooting are vital to diagnose any potential issues early on, allowing you to enjoy optimal cooling and heating performance.
To begin the testing process, power on the unit and check for any visible signs of operation, such as air blowing from the vents. Ensure that the thermostat is set to the desired temperature. You can also refer to the following checklist to streamline your testing:
| Check | Action |
|---|---|
| Thermostat Settings | Verify that the desired temperature is set correctly. |
| Remote Control | Ensure the remote is functioning and properly communicating with the unit. |
| Air Flow | Check if air is blowing freely and not obstructed. |
| Sound Levels | Listen for any unusual noises that may indicate a problem. |
If the system does not cool or heat effectively, you may need to troubleshoot. Here are some steps to follow:
- Check the Air Filter: A dirty air filter can restrict airflow. Clean or replace if necessary.
- Inspect the Refrigerant Levels: Low refrigerant can cause inefficiency. Contact a professional if you suspect a leak.
- Examine the Condenser Unit: Ensure the outdoor unit is free from debris and has adequate airflow.
- Look for Error Codes: Many Senville Mini Splits have digital displays that show error codes for quick diagnosis.
Testing and troubleshooting effectively will keep your Senville Mini Split running smoothly, ensuring longevity and efficiency in your home. Should your efforts to troubleshoot the system fail, do not hesitate to contact a certified technician for further assistance.
Maximizing Efficiency and Longevity
To ensure your Senville mini split functions at peak performance for many years, it’s essential to focus on maximizing its efficiency and longevity. Here are some key practices to help you achieve this:
- Regular Maintenance: Schedule regular maintenance checks at least once a year. This includes cleaning filters, inspecting the coils, and checking refrigerant levels.
- Optimal Placement: Make sure the indoor and outdoor units are installed in locations that allow for proper airflow, avoiding direct sunlight and obstructions.
- Smart Thermostat Use: Utilize a smart thermostat to program your Senville mini split efficiently, adjusting settings based on your routine.
- Sealing Ducts: If your system includes ductwork, ensure all ducts are well-sealed and insulated to minimize energy loss.
Additionally, it is important to monitor your mini split system for any unusual noises or signs of wear. Addressing these issues early can prevent more significant problems down the line.
Investing in a quality unit and understanding how to maintain it can lead to significant energy savings. By implementing these best practices, you’ll not only improve efficiency but also extend the overall lifespan of your Senville mini split.
Remember, the better care you provide for your system, the better it will serve you, keeping your space comfortable while saving energy costs in the long run.
Frequently Asked Questions
What tools are required for installing a Senville mini split?
You will need a level, drill, screwdrivers, refrigerant gauges, a vacuum pump, wrenches, and a pipe cutter.” },
{
Do I need professional help to install a Senville mini split?
While some homeowners with DIY skills can tackle the installation, hiring a professional is often recommended to ensure proper setup and compliance with local codes.
How long does it take to install a Senville mini split system?
The installation process typically takes between 4 to 8 hours, depending on the complexity of the job and the experience of the installer.
What are the common mistakes to avoid during the installation?
Common mistakes include improper refrigerant charging, incorrect electrical connections, and failure to properly insulate the lines.
Where is the best location to install the indoor unit?
The indoor unit should be installed in a location with good airflow and away from direct sunlight, typically on an interior wall near the ceiling.
Can I install a mini split in a rental property?
Yes, but you should seek permission from your landlord and ensure that the installation complies with any rental agreements or local regulations.
What is the relationship between the indoor and outdoor units in a mini split system?
The indoor and outdoor units are connected by refrigerant lines, which allow the system to transfer heat; the indoor unit pulls heat from inside the space to cool it, while the outdoor unit expels the heat externally.
