Discover the benefits of self-installing a mini-split system, and follow our guide for choosing, preparing, and executing a successful installation.Are you looking to enhance your home’s comfort while saving on installation costs? A self-install mini split heat pump may be the perfect solution for you! These versatile systems provide efficient heating and cooling, allowing you to customize your indoor climate. In this blog post, we will explore the benefits of self-installation, helping you understand how to save money and gain valuable DIY skills. We’ll guide you through choosing the right mini split for your space, ensuring you make an informed decision. Once you’ve selected your unit, we’ll prepare you for installation with helpful tips and a detailed step-by-step guide. Lastly, we’ll address post-installation concerns by discussing testing and troubleshooting techniques. Get ready to embark on a rewarding journey towards improved home comfort and energy efficiency!
Benefits of Self-Installation
When it comes to installing a mini split heat pump, opting for a self-installation can provide numerous advantages. One of the primary benefits is cost savings. By choosing to install the system yourself, you avoid the hefty labor costs associated with hiring professionals.
Another significant benefit is the flexibility it offers. Self-installation allows you to choose the timing that works best for you, accommodating your schedule without being tied to a contractor’s availability. You can work at your own pace and focus on getting the system set up correctly without feeling rushed.
Additionally, taking on the installation of your mini split heat pump can lead to a deeper understanding of your heating and cooling system. This knowledge can be invaluable for future maintenance, making you more self-sufficient and proactive about your home’s climate control. Understanding how everything works allows for ea
Choosing the Right Mini Split
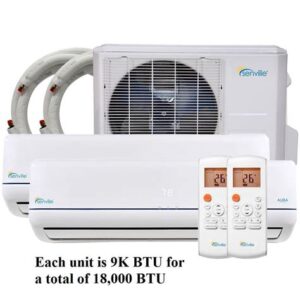
When it comes to selecting the right mini split heat pump, there are several factors to consider that will ensure optimal performance and comfort in your space. First and foremost, it’s vital to assess the cooling and heating capacity that you need. This is commonly measured in BTUs (British Thermal Units), and selecting an appropriately sized unit is crucial. Too small a unit won’t effectively heat or cool your space, while one that is too large will cycle too frequently, leading to inefficiency.
Another important criterion to consider is the energy efficiency of the mini split system. Look for units with a high SEER (Seasonal Energy Efficiency Ratio) rating, which signifies better energy consumption performance. A higher SEER translates to lower energy bills and a smaller carbon footprint. Additionally, consider the noise levels; mini splits often operate quietly, but reviewing specifications for noise output will guarantee a peaceful environment.
Installation flexibility is also a key component in choosing the right mini split. Different models offer various installation options, such as wall-mounted or floor-mounted units. Ensure that you pick a system that not only suits your aesthetic preferences but also aligns with your space’s layout for optimal air circulation. Lastly, always check for warranty options and customer support offered by manufacturers, which can provide peace of mind and essential guidance during your self-installation process.
Preparing for Installation
Preparing for the installation of a self-install mini split heat pump is crucial for ensuring a smooth and successful setup process. Proper preparation not only saves time but also can help avoid potential pitfalls that could arise during the installation. Here are some essential steps to take:
- Gather Necessary Tools and Materials: Before you begin, ensure you have all the tools required for the installation. Common tools include a drill, level, screwdrivers, and a vacuum pump.
- Read the Manual: Take the time to carefully read through the manual that comes with your mini split heat pump. It contains valuable information regarding the installation procedure, electrical connections, and maintenance tips.
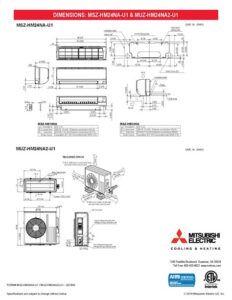
- Choose the Right Location: Select a location for both the indoor and outdoor units that will optimize performance. Ensure that there are no obstructions that could hinder airflow.
By gathering all necessary materials beforehand, you’ll streamline the process and avoid interruptions during installation. Furthermore, understanding the device’s requirements and specifications will lead to a more efficient setup.
Once you’ve adequately prepared, it’s time to move on to the installation phase. Following these preparation steps will set a solid foundation for successfully installing your mini split heat pump.
Remember, taking the time to prepare will dramatically simplify your experience with self-installation, allowing you to enjoy the benefits of efficient heating and cooling in no time!
Step-by-Step Installation Guide
Installing a mini split heat pump can seem daunting, but with the right tools and guidance, you can accomplish it yourself. This step-by-step guide will break down the process into manageable parts, ensuring you feel confident and ready to tackle your installation.
Before diving in, make sure you have the necessary materials, which typically include:
- Mini split heat pump unit
- Mounting bracket
- Refrigerant lines
- Electrical wiring
- Drill and drill bits
- Level
- Pipe insulation
- Safety goggles and gloves
Follow these steps to successfully install your mini split heat pump:
- Choose the installation location: Select a suitable indoor and outdoor location that allows for unobstructed airflow and easy access for maintenance.
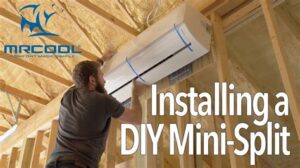
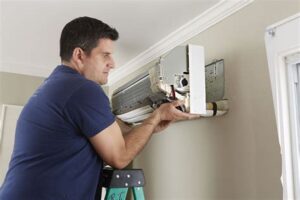
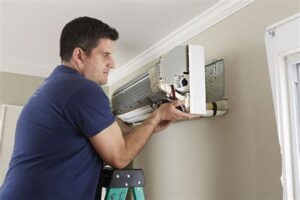
- Install the mounting bracket: Secure the indoor unit’s mounting bracket to the wall using a level to ensure it is straight.
- Drill a hole: Carefully drill a hole through the wall to connect the indoor unit to the outdoor unit, ideally at a downward angle for drainage.
- Connect refrigerant lines: Run the refrigerant lines through the hole and connect them to the indoor unit. Make sure to use pipe insulation to prevent condensation.
- Connect the wiring: Wire the indoor unit according to the manufacturer’s instructions, ensuring all connections are secure and insulated.
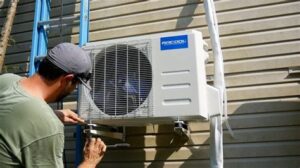
- Install the outdoor unit: Follow similar steps to install the outdoor unit, ensuring it is elevated and positioned to avoid water pooling.
- Test the system: Turn on the mini split heat pump and check for refrigerant leaks and proper operation by adjusting settings.
Remember to refer to your specific model’s manual for any unique installation requirements. Following this step-by-step guide will help ensure your mini split heat pump operates efficiently while giving you the satisfaction of completing the installation yourself.
Testing and Troubleshooting
Once you have completed the self-installation of your mini split heat pump, the next crucial step is testing and troubleshooting. This phase ensures that your system is working efficiently and effectively. Here are some steps to help guide you through this process.
First, check for any visible leaks. Inspect the connections between the indoor and outdoor units. If you notice any refrigerant leaks, it may require professional intervention. Additionally, verify that all electrical connections are secure and that there are no signs of wear or damage.
Next, turn on the system and monitor its performance. Pay attention to the following aspects:
- Airflow: Ensure that the airflow from the indoor unit is strong and consistent.
- Noise Level: Listen for any unusual sounds that could indicate a problem.
- Temperature Setting: Check if the temperature settings are functioning as desired, both for heating and cooling.
If you encounter issues during testing, consider these common troubleshooting tips:
- Insufficient Cooling/Heating: Make sure the air filter is clean and that the outdoor unit is not obstructed.
- Frequent Cycling: This could indicate that the system is too large for your space; consult the manual for the recommended size.
- Error Codes: If your unit displays an error code, consult the manufacturer’s handbook for specific troubleshooting guidance.
By performing thorough testing and addressing any issues promptly, you can ensure that your mini split heat pump operates at peak performance, providing optimum comfort in your home.
Frequently Asked Questions
What is a mini split heat pump?
A mini split heat pump is a type of heating and cooling system that consists of an outdoor compressor unit and one or more indoor air handling units, allowing for efficient temperature control in individual rooms.
What are the benefits of self-installing a mini split heat pump?
Self-installing a mini split heat pump can save you money on installation costs, provide you with a greater understanding of your system, and offer flexibility in choosing the placement of the units.
What tools do I need for a self-installation?
For a self-installation, you will typically need tools such as a drill, wrenches, screwdrivers, a vacuum pump, refrigerant gauges, and a level.
Is it difficult to install a mini split heat pump myself?
While it is possible to install a mini split heat pump yourself, it can be challenging and requires some technical knowledge, especially with electrical and refrigerant handling.
How do I choose the right size mini split for my space?
To choose the right size mini split for your space, calculate the BTU (British Thermal Units) required by considering room dimensions, insulation quality, and climate factors to ensure efficient heating and cooling.
What are common mistakes people make during installation?
Common mistakes during mini split installation include improper refrigerant charging, incorrect placement of indoor and outdoor units, neglecting to follow manufacturer guidelines, and failing to seal connections properly.
Do I need a professional to handle the electrical work?
Depending on local regulations and your comfort level, you may need a licensed electrician to handle the electrical connections for the mini split heat pump to ensure safety and compliance with codes.
