Discover key steps for installing an RV mini split, from selecting the right model to troubleshooting for optimal performance.Installing a mini split system in your RV can revolutionize your travel experience, bringing comfort and climate control wherever the road takes you. As more RV enthusiasts seek ways to enjoy their home-like comforts on the go, a mini split air conditioning and heating system offers an efficient and effective solution. This blog post will guide you through the entire process, from selecting the right RV mini split model tailored to your needs to meticulously preparing the installation site. We’ll provide step-by-step instructions for installing both the indoor and outdoor units, ensuring your setup is secure and functional. Lastly, we’ll cover essential testing and troubleshooting tips to help you achieve optimal performance. Whether you’re a seasoned DIYer or a novice looking to enhance your RV, this guide will equip you with the knowledge to transform your mobile living experience.
Selecting the Right RV Mini Split Model
When it comes to choosing the right RV mini split model, there are several factors to consider to ensure optimal performance and comfort. First and foremost, it’s essential to determine the cooling and heating capacity needed for your RV. This is usually measured in BTUs (British Thermal Units), which indicates how much heat the unit can remove from the air in an hour. For RVs, models typically range from about 9,000 to 18,000 BTUs.
Another important aspect to evaluate is the energy efficiency rating of the unit. Look for models with a high SEER (Seasonal Energy Efficiency Ratio) rating, as these will consume less power and lead to cost savings over time. Additionally, consider the noise level of the indoor unit; many modern mini splits are designed to operate quietly, allowing for a more pleasant living environment.
Finally, don’t overlook the installation requirements of the mini split system. Some models may require more complicated setups or specific tools. Always ensure that the model you choose is compatible with your RV’s dimensions and layout. By carefully considering these factors, you can confidently select the best RV mini split model tailored to your needs.
Preparing the Installation Site
When it comes to installing a mini split air conditioning unit in your RV, proper preparation of the installation site is essential. This ensures optimal performance and efficiency of your new system. Here are some key steps to follow to prepare your RV for a successful mini split installation:
- Choose the Right Location: Identify a suitable spot for the indoor unit, ideally where airflow is unobstructed and close to the outdoor unit.
- Check for Space: Ensure there is adequate space for both the indoor and outdoor units, both horizontally and vertically.
- Electrical Requirements: Verify that there is a nearby power source that meets the voltage requirements of your mini split system.
- Plumbing Considerations: If your chosen model requires drainage, plan the route for condensation drainage appropriately.
- Wall Integrity: Inspect the wall where you will mount the indoor unit. It should be sturdy enough to support the weight without risk of damage.
Once you have selected the ideal location, it’s time to clear the area of any obstacles. This can include furniture, decorative items, or even outdoor equipment that might interfere with the installation process or daily operation of the mini split system.
Before moving forward, consider the climate in which you operate your RV. If you’re in a humid area, make sure your installation site allows for adequate ventilation. The effectiveness of a mini split system can greatly depend on proper airflow, so avoid tight, enclosed spaces that could hinder performance.
Lastly, consult the manufacturer’s guidelines to ensure that all installation site criteria are met. Following these steps will greatly facilitate a smooth installation process, allowing you to enjoy the benefits of your new RV mini split in no time!
Installing the Indoor Unit
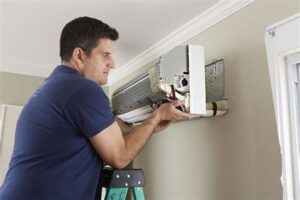
When it comes to installing an RV mini split system, the indoor unit is a crucial component that directly affects your comfort and efficiency. Proper installation ensures optimal performance and longevity of your unit. Here’s a step-by-step guide to help you successfully install the indoor unit of your RV mini split system.
Step 1: Choose the Right Location
Select an appropriate spot for the indoor unit. Ideally, it should be centrally located for even air distribution while avoiding walls with obstructions or heat sources. The mounting height should be around 7-8 feet off the ground, ensuring it is away from direct sunlight and not obstructed by furniture or curtains.
Step 2: Prepare the Wall
First, locate and mark the position of the mounting bracket on the wall using a level, ensuring it is straight. Drill holes into the wall as instructed in your mini split installation manual. Ensure you check for any electrical wiring or plumbing behind the wall before drilling. After that, install the mounting bracket securely.
| Tools Required |
|---|
| Drill |
| Level |
| Screwdriver |
| Stud Finder |
Step 3: Connect the Refrigerant Lines
Once your indoor unit is mounted, carefully connect the refrigerant lines. Make sure to follow the manufacturer’s instructions for connecting these lines, as improper connections can lead to leaks and reduced efficiency. Ensure that the lines are well-insulated to prevent energy loss.
Step 4: Electrical Connections
Next, turn your attention to the electrical connections. Using the required wire gauge, connect the indoor unit to the power source, ensuring all connections are secure. Follow safety precautions by turning off the power supply while working on the electrical parts.
Step 5: Final Steps
After you have made all the connections, check for any signs of leaks or issues at the connections points. Once everything looks secure, you can move to the next steps of the installation, such as mounting the outdoor unit and setting up the system for testing. Remember, a properly installed indoor unit will maximize the effectiveness of your RV mini split system.
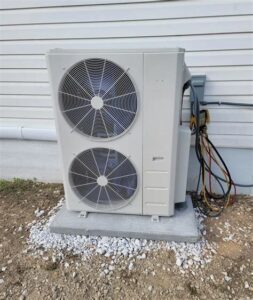
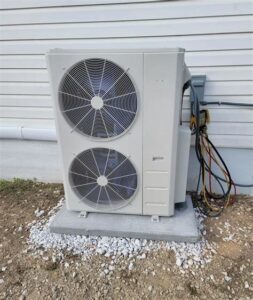
Mounting the Outdoor Unit
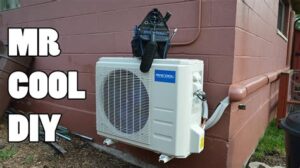
Mounting the outdoor unit of your RV mini split is a crucial step in ensuring optimal performance and longevity of your cooling system. Proper installation not only affects efficiency but also protects your unit from potential damage due to weather or physical disturbances.
Here are some essential steps to consider when mounting the outdoor unit:
- Select a suitable location: Choose a spot that is away from obstructions such as trees, fences, or buildings that could impede airflow.
- Ensure stability: The outdoor unit should be placed on a solid surface, like a concrete slab or a mounting platform, to help reduce vibrations and noise.
- Follow local regulations: Always check your local building codes and regulations to ensure that you’re compliant with zoning and installation standards.
Don’t forget to leave enough space around the unit for maintenance purposes. A good rule of thumb is to allow at least 24 inches on all sides.
Once you have chosen an appropriate location, be sure to secure the unit correctly using the appropriate brackets and fasteners. This is to prevent movement during travel or adverse weather conditions.
Finally, double-check all your connections, making sure there are no loose fittings that could lead to performance issues down the line. Proper mounting will set the foundation for a reliable and efficient RV mini split system.
Testing and Troubleshooting the RV Mini Split
After successfully installing your RV mini split system, it’s crucial to ensure that everything operates as intended. Testing and troubleshooting can help identify any potential issues early on, ensuring optimal performance and comfort.
Begin by turning on the system and observing the initial operation. Check the thermostat settings to ensure they are set correctly for your desired temperature. To assist in this process, here are some essential checks:
- Ensure the outdoor unit is running quietly without any unusual sounds.
- Verify that air is flowing smoothly from the indoor unit vents.
- Monitor the refrigerant lines for any signs of leaks or frost accumulation.
If you experience any issues, consider these common troubleshooting tips:
1. Lack of cooling or heating: Check for any obstructed air filters and clean or replace them as necessary.
2. Unusual noises: Confirm that the unit is level and that there are no loose components.
3. Error codes: Refer to the manufacturer’s manual for code explanations and follow the recommended steps for resolving them.
By systematically testing and addressing any problems with your RV mini split system, you can ensure a reliable and comfortable environment in your recreational vehicle.
Frequently Asked Questions
What is an RV mini split system?
An RV mini split system is a ductless heating and cooling solution designed specifically for recreational vehicles, providing efficient temperature control without the need for extensive ductwork.
What are the benefits of installing a mini split in an RV?
The benefits include energy efficiency, quiet operation, zoned temperature control, and the ability to provide both heating and cooling from a single unit.
How much does it cost to install a mini split system in an RV?
The cost can vary widely depending on the brand, capacity, and installation complexity, but typically ranges from $1,500 to $4,000 including both the unit and labor.
Can I install a mini split system in my RV myself?
While it’s possible to install a mini split system yourself, it’s recommended to hire a professional to ensure proper installation and avoid potential issues with wiring, refrigerant lines, and local codes.
What size mini split unit do I need for my RV?
The size of the mini split unit needed depends on the square footage of your RV and your cooling/heating requirements; a load calculation can help determine the appropriate BTU capacity.
Are mini split systems energy efficient for RV use?
Yes, mini split systems are known for their high energy efficiency ratings, often providing better performance than traditional RV air conditioning units.
What maintenance is required for an RV mini split system?
Maintenance includes regular filter cleaning or replacement, checking refrigerant levels, ensuring proper drainage, and having professional inspections at least once a year.
