Discover how to install your Mitsubishi Mini Split System with our step-by-step guide, safety tips, troubleshooting advice, and expert performance optimization strategies.Welcome to our ultimate guide on the Mitsubishi Mini Split installation process! Mini split systems have gained popularity for their energy efficiency, flexibility, and the comfort they provide in heating and cooling residential spaces. Whether you are a seasoned DIYer or a first-time installer, understanding the intricacies of your Mitsubishi Mini Split system is crucial for a successful installation. In this blog post, we will walk you through detailed step-by-step instructions, emphasizing important safety precautions to consider and common troubleshooting issues you might face along the way. Additionally, we will share professional tips to ensure your system operates at its optimal performance, giving you peace of mind and comfort in your living space. Let’s dive in and get started on creating a perfectly climate-controlled environment in your home!
Understanding the Mitsubishi Mini Split System
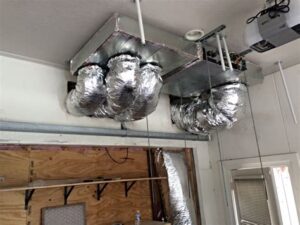
The Mitsubishi Mini Split System is an efficient and flexible heating and cooling solution that operates without the need for ducts. Unlike traditional HVAC systems, this system comprises an outdoor compressor unit and one or more indoor air handling units. This design allows for customized climate control in different areas of a home or office.
One of the significant advantages of the Mitsubishi Mini Split System is its efficiency. These systems use inverter technology to adjust the speed of the compressor according to the temperature, thus saving on energy costs while maintaining comfort levels. Additionally, they provide better dehumidification compared to traditional systems.
When considering a Mitsubishi Mini Split System, it’s essential to evaluate the size and layout of the space you wish to cool or heat. The placement of indoor units, the installation of refrigerant lines, and the proper sizing of the outdoor unit are crucial factors that can influence the performance and efficiency of the system.
| Key Components | Description |
|---|---|
| Outdoor Unit | Contains the compressor and fan, responsible for releasing heat absorbed from indoors. |
| Indoor Unit | Where air is distributed into the room; options include wall-mounted, ceiling-mounted, or floor-mounted units. |
| Refrigerant Lines | Connects the indoor and outdoor units, carrying refrigerant to facilitate the heat exchange process. |
| Thermostat Control | Regulates the temperature and provides user-friendly operation for specific zones. |
Step-by-Step Installation Instructions
Installing a Mitsubishi Mini Split system can seem daunting, but with the right instructions, it becomes manageable for many DIY enthusiasts. Here is a step-by-step guide to ensure a smooth installation process.
Step 1: Gather Your Materials
- Mitsubishi Mini Split Unit
- Mounting bracket
- Refrigerant lines
- Electrical wiring
- Drill and drill bits
- Level
- Measuring tape
- Safety goggles and gloves
Step 2: Choose a Location
Find a suitable location for both the indoor and outdoor units. It is essential to ensure that the units are away from direct sunlight and obstacles that may obstruct airflow. The indoor unit should be at least 6 to 8 inches below the ceiling and 4 to 5 inches from the wall for best performance.
Step 3: Install the Mounting Bracket
Use your level and measuring tape to mark the appropriate height for the installation of the mounting bracket. Secure the bracket to the wall using a drill and appropriate anchors to ensure that it can support the weight of the unit.
Step 4: Prepare for the Refrigerant Lines
Drill a hole through the wall for the refrigerant lines and electrical wires. Ensure this hole slopes downward toward the outdoor unit to prevent any water accumulation.
Step 5: Connect the Indoor Unit
Carefully attach the refrigerant lines and electrical connections to the indoor unit following the manufacturer’s instructions. Make sure to check for any signs of leaks once the connections are tightened.
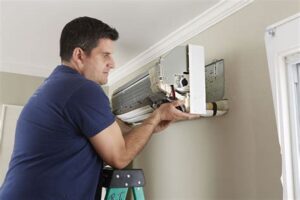
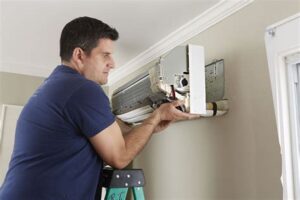
Step 6: Mount the Indoor Unit
Lift the indoor unit and hang it on the bracket. Ensure it is securely in place and adjust until it is positioned perfectly level.
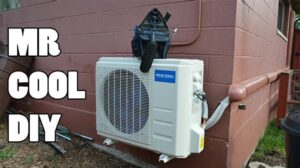
Step 7: Install the Outdoor Unit
Position the outdoor unit on a flat, stable surface. Connect the refrigerant lines and electrical wiring between the indoor and outdoor units, ensuring they are properly insulated to prevent energy loss.
Step 8: Test the System
Once everything is connected, turn on the system to check for proper operation. Ensure that both units are functioning correctly and that there are no unusual sounds or signs of leaks.
By following these steps carefully, you’ll ensure a proper and effective installation of your Mitsubishi Mini Split system, leading to optimal performance and comfort in your space.
Important Safety Precautions to Consider
When it comes to installing a Mitsubishi Mini Split System, ensuring safety should be your top priority. Adhering to proper procedures can prevent accidents and ensure a successful installation. Here are some essential safety precautions to keep in mind before and during the installation process.
1. Use Personal Protective Equipment (PPE)
- Always wear safety goggles to protect your eyes from debris.
- Use gloves to prevent cuts and abrasions from sharp edges.
- Non-slip footwear is crucial, especially when working on ladders or slippery surfaces.
2. Verify Electrical Requirements
Before you begin, make sure that the electrical supply meets the system’s requirements. Improper voltage can lead to malfunctions or electrical hazards. If you’re unsure, consult with a licensed electrician.
3. Proper Ventilation
Ensure that the installation area is well-ventilated. Inadequate airflow can lead to the accumulation of harmful gases or exhaust fumes, which can pose health risks.
4. Secure the Unit Properly
Make sure the outdoor unit is installed on a level surface to avoid vibrations and potential damage. Additionally, secure all lines and cables properly to prevent any accidents from loose components.
By taking these safety precautions, you not only protect yourself but also ensure the longevity and efficiency of your Mitsubishi Mini Split System. Always prioritize safety, and consult the installation manual or a professional if you have any doubts.
Troubleshooting Common Installation Issues
Installing a Mitsubishi mini split system can be a rewarding experience, especially when it leads to improved home comfort and energy efficiency. However, even seasoned DIYers can encounter issues during installation. Here, we will address some common installation problems and provide solutions.
One frequent issue is improper alignment of the indoor and outdoor units. If these components are misaligned, it can lead to inefficient operation and potential damage. Always ensure that the units are level and properly supported throughout the installation process. Use a spirit level to verify their positioning.
Another common challenge is refrigerant leaks. A leak can compromise the system’s performance and efficiency. To check for leaks, use a solution of soap and water on all connections and joints. If bubbles form, you’ve identified a leak. Make necessary adjustments or consider consulting a professional if the issue persists.
Lastly, electrical connections can cause headaches if not handled correctly. Ensure that all wires are securely connected, and double-check your power source. If the system does not start, re-evaluate your electrical connections for any loose or damaged wires.
By being aware of these common issues, you can troubleshoot effectively and ensure your Mitsubishi mini split system operates optimally from the start.
Professional Tips for Optimal Performance
When installing a Mitsubishi Mini Split System, there are several professional tips you can follow to ensure optimal performance and efficiency. By adhering to these guidelines, you’ll not only enhance the system’s functionality but also prolong its lifespan.
1. Proper Sizing: It’s crucial to select a unit that matches the size of your space. An undersized unit will struggle to maintain a comfortable temperature, while an oversized unit may cycle on and off too frequently, leading to energy inefficiency. Use a load calculation to determine the ideal capacity for your needs.
2. Location Matters: The placement of your indoor and outdoor units significantly affects performance. Make sure the indoor unit is installed high on the wall to allow for optimal airflow. Additionally, place the outdoor unit in a shaded area whenever possible to prevent overheating in direct sunlight.
3. Insulate Properly: Ensure all refrigerant lines and electrical components are well-insulated. This step helps in minimizing energy loss and maximizing efficiency. Use appropriate insulation materials and seal any potential leaks to maintain performance.
4. Regular Maintenance: Schedule regular maintenance checks to keep the system in optimal working condition. Cleaning or replacing filters, inspecting ductwork, and checking refrigerant levels are all essential tasks to keep your system running efficiently.
5. Use Smart Controls: Utilize advanced control systems, like programmable thermostats, to optimize energy use. This technology allows you to set schedules and create zones, ensuring comfort and efficiency while reducing energy costs.
By following these professional tips, you can ensure that your Mitsubishi Mini Split operates at peak performance
Frequently Asked Questions
What is a Mitsubishi mini split system?
A Mitsubishi mini split system is an energy-efficient heating and cooling system that consists of an outdoor unit and one or more indoor units, allowing for flexible temperature control in individual rooms.
What tools do I need for Mitsubishi mini split installation?
For installing a Mitsubishi mini split, you will typically need tools such as a drill, screwdrivers, wrenches, line set tools, a vacuum pump, and refrigerant gauges.
How do I choose the right location for the indoor unit?
Choose a location where the indoor unit can distribute air effectively, avoiding direct sunlight and ensuring that there are no obstructions like furniture or appliances.
What are the key steps in installing the outdoor unit?
Key steps for installing the outdoor unit include selecting a stable and level surface, mounting the unit securely, and connecting it to the indoor unit using insulated refrigerant lines.
Do I need to hire a professional for installation?
While some handy individuals may opt for DIY installation, hiring a professional is recommended for ensuring the proper setup, efficiency, and compliance with local codes.
What maintenance is required for a Mitsubishi mini split system?
Regular maintenance includes cleaning or replacing air filters, checking refrigerant levels, removing debris from the outdoor unit, and scheduling professional inspections periodically.
What warranty options are available for Mitsubishi mini split systems?
Mitsubishi typically offers a warranty of 5 years on parts and up to 7 years on compressors, but it’s advisable to check specific warranty details based on the model and installation.


