Learn how to choose, prepare for, and install a mini split system with our step-by-step guide, including troubleshooting tips for optimal performance.When it comes to efficient heating and cooling solutions in New Hampshire, mini split systems have become increasingly popular among homeowners. These versatile units offer personalized comfort while saving space and energy. However, successfully installing a mini split system requires careful planning and execution. In this blog post, we will guide you through the process of mini split installation in NH, starting with tips on choosing the right system to meet your needs. We will delve into essential pre-installation considerations, prepare you for the installation space requirements, and present a detailed step-by-step installation process. Finally, we’ll cover how to test your system and troubleshoot potential issues to ensure your mini split operates at peak performance. Whether you’re a DIY enthusiast or planning to hire a professional, this comprehensive guide will equip you with the knowledge needed for a smooth installation experience.
Choosing the Right Mini Split System
When it comes to selecting the right mini split system for your home or business, there are several important factors to consider. A mini split system is an excellent choice for efficient heating and cooling, particularly in regions like NH, where temperature fluctuations are common. Here are the key considerations you should keep in mind:
1. Size of the Space: It’s crucial to choose a system that can effectively handle the size of the area you want to heat or cool. Conducting a load calculation will help determine the appropriate capacity in BTUs you require. This way, you can avoid under-sizing or over-sizing your system.
2. Efficiency Ratings: Look for models with high SEER (Seasonal Energy Efficiency Ratio) ratings. A higher SEER rating indicates greater energy efficiency, which can lead to significant savings on your utility bills over time. In NH, where heating is as important as cooling, consider units that perform well in both categories.
3. Noise Levels: Mini split systems can be quieter than traditional HVAC systems. However, it’s still essential to check the decibel (dB) ratings of different models. Consider installing the indoor unit in a location where noise will not disrupt your daily activities.
4. Features and Controls: Some mini split systems come with smart home integration, allowing you to control your heating and cooling remotely. Look for features such as programmable thermostats and zone control options to enhance comfort and convenience.
By carefully assessing these elements, you can ensure that you select the best mini split system to meet your needs in NH.
Pre-Installation Considerations
Before embarking on the journey of mini split installation in NH, there are several key considerations to keep in mind. Proper planning can help ensure a smooth installation process and optimize the system’s performance.
1. Assess Your Cooling and Heating Needs: Evaluate the size of the area you want to heat or cool. This assessment determines the capacity of the mini split system you’ll need. Generally, BTUs (British Thermal Units) will help you identify appropriate units suited for your specific space.
2. Location Matters: Choose an ideal location for both the indoor and outdoor units. Factors to consider include the position of windows, sun exposure, and accessibility for maintenance. It’s crucial that the indoor unit is placed where airflow can circulate effectively throughout the room.
3. Electrical Requirements: Check the electrical specifications of the mini split system. Ensure that you have the correct wiring and circuit breakers in place. A licensed electrician can help verify that your home’s electrical infrastructure can support the new system.
4. Permit Regulations: Familiarize yourself with local building codes and any required permits. Certain areas may have specific regulations regarding HVAC installations. Ensuring compliance will save you from potential fines and unnecessary complications down the road.
| Consideration | Description |
|---|---|
| Cooling/Heating Needs | Determine BTUs for your space. |
| Location | Indoor/outdoor unit placement for optimal airflow. |
| Electrical Requirements | Ensure proper wiring & circuit capacity. |
| Permit Regulations | Check local codes for compliance. |
Taking these pre-installation considerations into account will not only help you in selecting the right system but also facilitate a hassle-free installation experience.
Preparing the Installation Space
When it comes to mini split installation in NH, preparing the installation space is a crucial step that can significantly impact the efficiency and performance of the system. Before you begin the installation process, it’s essential to evaluate the designated area for both the indoor and outdoor units. This ensures that your mini split system operates effectively and lasts for many years.
Firstly, make sure that the indoor unit is placed in a location that allows for optimal air flow. Avoid corners or areas obstructed by furniture. Ideally, you should select a central location on an exterior wall to ensure even distribution of the cooled or heated air. Additionally, check for any potential obstructions, such as vents or electrical outlets, that could hinder the efficacy of your system.
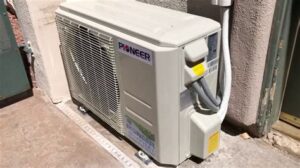
Secondly, for the outdoor unit, ensure that there is sufficient clearance around the unit. It requires space for proper ventilation and functioning, generally suggested to have at least 12 inches of clearance on the sides and a few feet above the unit. This is crucial, especially in New Hampshire where snow can accumulate during winter months. You may want to consider building a platform or choosing a sheltered spot to prevent damage and ensure easy access for maintenance.
| Installation Space Considerations | Recommendations |
|---|---|
| Indoor Unit Location | Centralized, clear from obstructions |
| Outdoor Unit Clearance | 12 inches side clearance, few feet above |
| Sheltered Spot | Platform to prevent snow accumulation |
Lastly, inspect the wall where you’ll mount the indoor unit for any plumbing or electrical installations that might interfere with the installation process. Having a clean, accessible space will significantly reduce the challenges during installation and help in troubleshooting later if issues arise.
Step-by-Step Installation Process
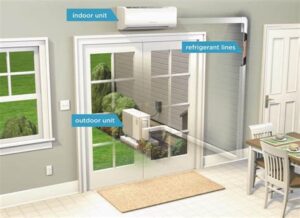
Installing a mini split system in New Hampshire can be a rewarding DIY project if done correctly. Below, we’ve outlined a comprehensive step-by-step installation process to guide you through each phase of your mini split system installation.
Before you begin, it’s crucial to gather all necessary materials and tools, including the mini split unit, mounting brackets, pipes, electrical wiring, and refrigerant. Here’s a brief outline of the installation steps:
- Step 1: Choose the location for the indoor and outdoor units.
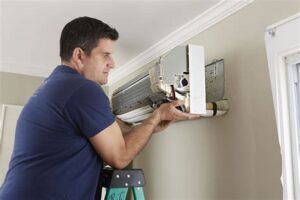
- Step 2: Install the mounting bracket on the wall for the indoor unit.
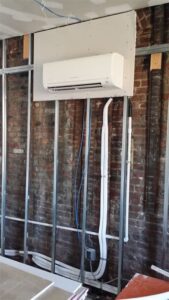
- Step 3: Drill a hole in the wall for the refrigerant lines and electrical wiring.
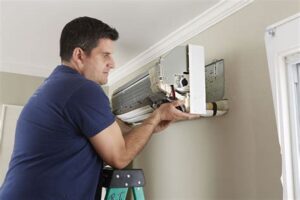
- Step 4: Mount the indoor unit on the bracket.
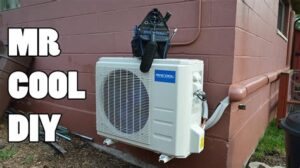
- Step 5: Install the outdoor unit on a stable surface, ensuring proper clearance and ventilation.
- Step 6: Connect the refrigerant lines, wiring, and drain line between the indoor and outdoor units.
- Step 7: Vacuum the refrigerant lines to remove any air before charging the system.
- Step 8: Recharge the system with the appropriate refrigerant.
- Step 9: Test the system for functionality and ensure it’s cooling/heating as expected.
Each of these steps requires attention to detail and compliance with local NH building codes. Make sure to review the manufacturer’s instructions that accompany your mini split system for any specific requirements.
If you encounter difficulties during the installation process, consider referring to online resources, instructional videos, or consulting with a professional HVAC technician for assistance. Good luck with your mini split installation!
Testing and Troubleshooting the System
Once you have completed the installation of your mini split system in NH, it is crucial to perform thorough testing to ensure everything operates smoothly. Testing can help identify any potential issues early on, allowing for timely troubleshooting and minimizing disruption to your comfort.
To start, turn on the system and set it to heating or cooling mode, depending on your needs. Monitor the unit’s response to commands from the remote control or wall-mounted thermostat. Pay attention to the following aspects:
- Airflow: Check if the airflow from the indoor unit is consistent and strong.
- Noise Levels: Listen for any unusual sounds that may indicate a problem.
- Temperature Consistency: Ensure that the room gradually reaches the desired temperature set on the thermostat.
If you encounter issues during testing, refer to the troubleshooting guide provided by the manufacturer. Common problems may include:
| Issue | Possible Cause | Solution |
|---|---|---|
| No Heat or Cool Air | Incorrect settings or malfunctioning compressor | Verify settings and contact a technician if necessary |
| Weak Airflow | Clogged filters or blocked vents | Clean or replace filters and clear any obstructions |
| Noisy Operation | Loose components or debris in the unit | Tighten loose parts and clean inside the unit |
In the event that these troubleshooting steps do not resolve the problem, it’s advisable to consult a professional technician. They can provide a more in-depth analysis and ensure that your mini split system operates efficiently, providing the comfort you desire in NH.
Frequently Asked Questions
What is a mini split system?
A mini split system is a type of heating and cooling system that consists of an outdoor compressor unit and one or more indoor air handlers, allowing for efficient temperature control in multiple rooms.
What are the benefits of installing a mini split system in New Hampshire?
Mini split systems are energy efficient, allow for zone control, and can be a great option for homes without ductwork, making them ideal for New Hampshire’s varied climate.
Do I need professional help for mini split installation in NH?
Yes, it is recommended to hire a professional for mini split installation to ensure proper setup, efficiency, and compliance with local building codes.
What factors should I consider before installing a mini split system?
Consider factors like your home’s insulation, square footage, the number of zones needed, and the energy efficiency ratings of the units.
How long does the installation process take?
The installation process for a mini split system usually takes between 4 to 8 hours, depending on the complexity and number of indoor units being installed.
Are there any rebates or incentives for mini split installation in NH?
Yes, New Hampshire offers various energy efficiency programs that may provide rebates or incentives for installing energy-efficient mini split systems.
What maintenance is required for a mini split system?
Regular maintenance for a mini split system includes cleaning or replacing filters, checking the system’s refrigerant levels, and scheduling professional inspections annually.
