Learn to install mini split systems safely with tips on electrical requirements, circuit breakers, wiring, and testing connections for optimal performance.When it comes to efficient home heating and cooling, mini split systems have gained immense popularity due to their versatility and energy efficiency. However, the success of their performance heavily relies on proper electrical installation. In this blog post, we will guide you through essential steps for a successful mini split electrical installation, ensuring your system runs smoothly and safely. From understanding the components of mini split systems to planning for electrical requirements, selecting appropriate circuit breakers, and effectively wiring both indoor and outdoor units, we will cover all the crucial aspects you need to consider. We’ll also emphasize the importance of testing and verifying electrical connections to prevent potential issues. Whether you’re a DIY enthusiast or preparing to hire a professional, this guide will equip you with the knowledge necessary to tackle mini split electrical installation confidently. Let’s dive in!
Understanding Mini Split Systems
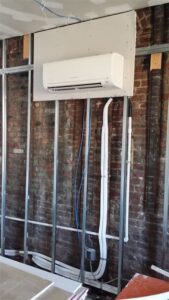
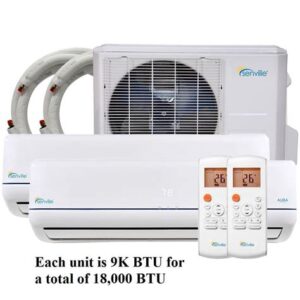
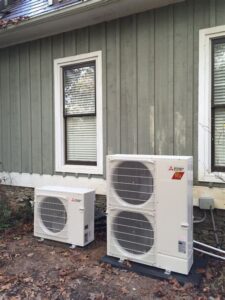
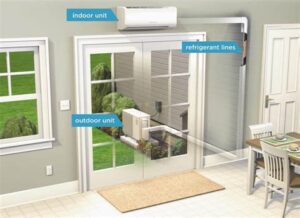
A mini split system is an excellent solution for cooling and heating specific areas of your home or commercial space. Unlike traditional HVAC systems, mini splits are designed to be more energy-efficient and allow for greater control over individual room temperatures. These systems consist of an outdoor compressor and one or more indoor air-handling units, connected by refrigerant lines and electrical wiring.
One of the key advantages of mini split systems is their flexibility. They can be installed in various configurations, allowing homeowners to choose the best setup to suit their space. Some common configurations include single-zone and multi-zone systems, which provide heating and cooling to different levels or rooms without the need for extensive ductwork.
Another benefit is the energy efficiency they offer. Mini splits use inverter technology, which adjusts the compressor speed based on the cooling or heating demand, leading to significant energy savings. This technology not only enhances comfort but also reduces electricity bills, making it a more sustainable choice for climate control.
When considering a mini split system, it’s essential to properly evaluate your space requirements and choose the right capacity for your needs. Consulting with a professional can help determine the optimum system for your space, ensuring efficient operation and comfort throughout the year.
Planning for Electrical Requirements
Installing a mini split system requires careful consideration of electrical requirements to ensure optimal performance and safety. Understanding the power needs of both the indoor and outdoor units is crucial for a successful installation. A detailed evaluation of the voltage, circuit capacity, and electrical connections must be conducted before commencing with the installation process.
Before installation, it is essential to assess the following key factors:
- Voltage Requirements: Mini split systems typically operate on either 115V or 230V. Check the specifications of your unit to determine the required voltage to avoid compatibility issues.
- Dedicated Circuit: A dedicated circuit is a must-have for mini split installations to ensure that the unit receives consistent power without overload. Determine the amperage requirements in the user manual to select the appropriate circuit size.
- Electrical Panel Capacity: Ensure that your electrical panel can handle the additional load from the mini split system. A licensed electrician can help evaluate the panel’s capacity and if necessary, recommend upgrades.
Furthermore, adherence to the local electrical codes and regulations is essential. It’s advisable to consult with a certified electrician to ensure that your mini split’s electrical installation is compliant and safe. Prior planning and proper assessment can mitigate potential electrical issues, leading to a hassle-free operation of your new cooling and heating system.
Selecting the Right Circuit Breaker
When installing a mini split system, one of the crucial steps is selecting the right circuit breaker. Choosing the appropriate breaker ensures that your system operates safely and efficiently without the risk of electrical overload. The circuit breaker acts as a safety mechanism, protecting both your mini split units and your home’s electrical system.
To determine the appropriate circuit breaker for your mini split installation, follow these steps:
- Read the Manufacturer’s Specifications: Always refer to the installation manual provided by the manufacturer. It contains valuable information about the recommended circuit size and breaker type.
- Understand the Electrical Load: Calculate the total electrical load by adding up the amperage (amps) required by both the indoor and outdoor units. Choose a breaker that can handle this load appropriately.
- Consider Breaker Types: Typically, a double-pole circuit breaker is needed for a mini split system since most require 240 volts. Ensure it is compatible with your home’s electrical panel.
Consulting a professional can also be invaluable. An electrician can provide insights into the best practices for mini split electrical installation and help you avoid potential hazards. Remember, selecting the right breaker is a fundamental aspect of ensuring the longevity and safety of your mini split system.
Wiring the Indoor and Outdoor Units
Wiring the Indoor and Outdoor units of a mini-split system is a crucial step in ensuring efficient functioning. Proper electrical connections not only facilitate the optimized performance of the system but also uphold safety standards. To effectively wire these units, it’s essential to follow a structured approach.
First, ensure that you have all the necessary tools and materials, including electrical wire, connectors, and cable ties. The wiring typically involves connecting the thermostat, compressor, and fan in the outdoor unit to the respective components in the indoor unit. The following table outlines the standard wiring connections:
| Component | Indoor Unit Connection | Outdoor Unit Connection |
|---|---|---|
| Power Supply | L1, L2 | L1, L2 |
| Compressor | Compressor Terminal | Compressor Terminal |
| Fan | Fan Terminal | Fan Terminal |
Next, it’s vital to pay close attention to the wiring gauge and voltage ratings specified in your unit’s manual. Using the wrong gauge can lead to overheating and potential system failure. Ensure connections are securely fastened to prevent future electrical issues. Once the wiring is completed, always double-check alignments
Testing and Verifying Electrical Connections
After completing the mini split electrical installation, it is crucial to ensure that all electrical connections are functioning optimally. This step not only guarantees the system will operate efficiently but also prevents potential hazards, such as electrical shorts and system failures.
To commence the testing process, follow these essential steps:
- Inspect All Connections: Before powering on the unit, double-check all connections for tightness and proper placement. Any loose connections can lead to voltage drops or electrical arcing.
- Use a Multimeter: This tool is essential for measuring voltage, current, and resistance. Begin by checking the voltage at the disconnect switch to ensure it matches the required input for your mini split system.
- Test the Grounding: A proper grounding system is vital for safety. Use a multimeter to confirm that the ground wire is securely connected and that there is no voltage present between the ground and neutral.
Once the initial checks are complete, it’s time to power on the system:
- Check Control Voltage: Verify the control voltage at the indoor unit to ensure it’s receiving the correct input.
- Observe Operation: Turn on the system and listen for any abnormal noises which could indicate wiring problems.
- Monitor Performance: Ensure that the indoor and outdoor units communicate effectively, and test the temperature differential to confirm efficient operation.
Regular testing and verifying of electrical connections can significantly enhance the longevity and performance of your mini split system. Taking the time to perform these checks will lead to a smoother operation and reduce the likelihood of costly repairs in the future.
Frequently Asked Questions
What are mini split systems?
Mini split systems are heating and cooling systems that consist of an outdoor compressor unit and one or more indoor air-handling units.
What is the main advantage of mini split installation?
The main advantage of mini split installation is the ability to control the temperature in individual rooms, leading to increased energy efficiency and comfort.
What tools are required for mini split electrical installation?
The tools required typically include wire strippers, a drill, a level, a refrigerant gauge, and various electrical hand tools.
Are there specific electrical requirements for mini split systems?
Yes, mini split systems require a dedicated electrical circuit, and the voltage and amperage specifications should match the manufacturer’s recommendations.
Can I install a mini split system myself?
While some aspects of installation can be DIY-friendly, it’s highly recommended to hire a licensed professional for proper installation, especially electrical connections.
What safety precautions should be taken during installation?
Safety precautions include turning off power at the breaker, using insulated tools, wearing appropriate safety gear, and ensuring proper ventilation during installation.
How long does a typical mini split installation take?
A typical mini split installation can take anywhere from a few hours to a full day, depending on the number of indoor units and the complexity of the setup.
