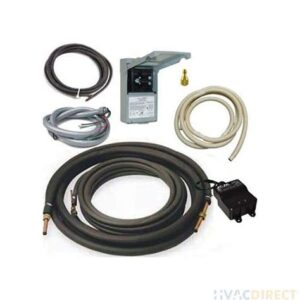
Learn how to install a mini split efficiently with our guide on location selection, tool gathering, mounting, connecting drain lines, and troubleshooting.Installing a mini split condensate pump can significantly enhance your air conditioning system’s efficiency by effectively managing moisture and preventing water damage. Whether you’re a seasoned DIY enthusiast or a first-time installer, understanding the steps involved is crucial for a successful installation. This guide will walk you through the essential aspects, starting with selecting the right location for your pump to ensure optimal performance. We’ll then cover the necessary tools you’ll need, followed by detailed instructions on mounting the mini split itself. From connecting the drain line to testing the system to troubleshoot any issues, each section is designed to equip you with the knowledge and confidence to tackle this project. Let’s dive into the world of mini split condensate pump installation and make your cooling experience worry-free!
Selecting the Right Location
When it comes to installing a mini split condensate pump, selecting the right location is crucial for ensuring optimal performance and longevity. The pump must be positioned where it can effectively manage the condensate produced by your HVAC system while remaining easily accessible for maintenance.
Here are some key considerations for choosing the ideal location:
- Proximity to the Mini Split Unit: Place the pump close to the mini split condensate drain to minimize the distance that water needs to travel, reducing the potential for blockage.
- Elevation: Install the pump at a lower elevation than the drain outlet to allow gravity to assist in the movement of condensate.
- Accessibility: Ensure that the pump is easily accessible for future maintenance, such as cleaning and troubleshooting.
Additionally, consider the following when selecting your location:
| Factor | Recommendation |
|---|---|
| Surface Type | Choose a stable and level surface to prevent vibrations during operation. |
| Noise Levels | Avoid placing the pump in spaces where noise could be an issue, such as bedrooms or living areas. |
| Drainage Path | Plan a clear path for the discharge line to prevent blockages and ensure smooth water flow. |
In summary, careful consideration of the location for your mini split condensate pump can significantly affect its efficiency and your comfort level. By assessing proximity, elevation, and accessibility, along with the other factors outli
Gathering Necessary Tools
When undertaking a mini split condensate pump installation, having the right tools gathered ahead of time is essential for a smooth and efficient process. This ensures that you can focus on the installation itself rather than running back and forth to collect needed items. Here’s a list of the necessary tools you’ll typically require:
- Drill: To make holes for mounting brackets or lines.
- Screwdriver Set: Both Phillips and flathead screwdrivers will be needed for various screws.
- Wrenches: Adjustable and socket wrenches for tightening connections.
- Level: A level helps in ensuring that the unit is properly installed.
- Measuring Tape: To accurately measure necessary distances for installation.
- Wire Stripper: Essential for preparing electrical connections.
- Safety Gear: Such as gloves and goggles to protect yourself during installation.
Additionally, it is wise to have plumbing tape to ensure leak-proof connections and sealant or caulk for insulating any gaps around the unit. You might also need a bucket to catch any excess water during the installation process.
Being well-prepared with these tools not only saves time but also helps prevent mistakes during the installation of your mini split condensate pump. Always double-check that you have everything on hand before starting your project to help streamline the process.
Mounting the Mini Split
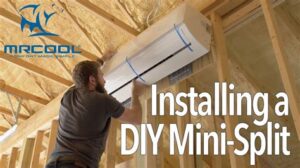
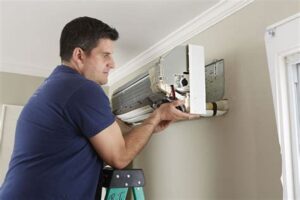
Mounting a mini split system involves several essential steps to ensure it operates effectively and efficiently. Choosing the right location for your unit is critical, as it affects the overall performance of your air conditioning system. Make sure the wall or floor you choose can support the weight and vibrations of the mini split.
Before you start the installation, gather all necessary tools, including a drill, level, and stud finder. Ensure you have the correct mounting bracket provided by the manufacturer. Using a level during installation will help maintain alignment, which is vital for proper drainage and aesthetic appeal.
Once you have selected the location and gathered your tools, proceed with the mounting process. Start by marking the position of the mounting bracket on the wall, ensuring it is at the appropriate height and angle. Drill holes for the anchors, insert them carefully, and secure the bracket tightly. After the bracket is mounted, ensure it is level before attaching the mini
Connecting the Drain Line
When installing a mini split system, connecting the drain line is a crucial step that often requires careful consideration. The drain line is responsible for directing any condensate produced by the system away from the indoor unit. This is essential to avoid water damage and ensure efficient operation. In this section, we will cover the steps involved in successfully connecting the drain line.
First, it’s important to choose the right type of drain line. A common choice is a PVC or vinyl piping that is compatible with your mini split system. Most manufacturers recommend using a line with a diameter of at least ¾ inch to allow for adequate drainage. Additionally, it’s vital to use a level during installation to ensure proper drainage and to prevent any potential water pooling.
Once you have your materials ready, you will need to create a sloped path from the indoor unit to the desired drainage location. The slope should typically be about ¼ inch per foot to facilitate the gravity flow of condensation. Secure the drain line using appropriate fasteners, making sure to seal any joints with silicone to prevent leaks.
“Proper installation of the drain line is pivotal in avoiding water-related issues in your home and ensuring the longevity of your mini split system.”
Lastly, always check for obstructions in the drain line and ensure it leads to an appropriate drain outlet, such as a floor drain or outdoors. Once all connections are secure, run the system to test for any leaks and ensure everything is functioning effectively.
Testing and Troubleshooting
After successfully completing the mini split condensate pump installation, it is essential to conduct thorough testing and troubleshooting to ensure everything is functioning properly. This step is critical to avoid potential issues down the line that could lead to inefficiencies or damage.
Start by checking the power supply to the unit. Make sure that the pump is plugged in and that any circuit breakers are reset. Then, verify that the pump switch is turned on. If the pump is not operating, you may need to investigate further to identify the issue.
Next, inspect the drain line for any blockages. Clear any debris that may have obstructed the flow, ensuring that water can move freely through the tubing. Additionally, examine all connections to confirm they are secure. A loose connection can cause leaks or reduced efficiency in the system, so it is vital to ensure that each part is connected tightly.
In case of operational issues, utilize a multimeter to check for electrical faults. Measure voltage levels at the pump to confirm they match the manufacturer’s specifications. If the readings are low or zero, you may need a professional to assess the electrical components of the system.
Finally, monitor the system closely during the first few days of operation. Look for any unusual sounds or water pooling around the unit, which may indicate problems. If you notice any issues during this time, don’t hesitate to revisit your installation to troubleshoot further.
Frequently Asked Questions
What is a mini split condensate pump?
A mini split condensate pump is a device designed to remove the condensation produced by mini split air conditioning systems, ensuring proper drainage and preventing water damage.
Why is it important to install a condensate pump?
Installing a condensate pump is crucial as it helps manage the water buildup from the air conditioning system, preventing leaks and potential mold growth.
What tools do I need to install a mini split condensate pump?
You will typically need a screwdriver, pipe cutter, adjustable wrench, PVC pipe fittings, and possibly a drill depending on your installation setup.
How do I determine the right location for the condensate pump?
The pump should be installed close to the indoor unit to minimize the length of the condensate line, and in an area where it can safely discharge the water away from the building.
Can I install a mini split condensate pump myself?
Yes, if you have basic plumbing and electrical skills, you can install a mini split condensate pump yourself by following the manufacturer’s instructions.
What are common mistakes to avoid during installation?
Common mistakes include improper sizing of the discharge pipe, incorrect placement of the pump, and failing to check for leaks post-installation.
How often should I maintain my condensate pump?
It is recommended to check and maintain your condensate pump every six months to ensure it is functioning properly and to avoid any drainage issues.

