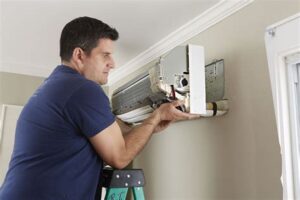
Learn how to install an indoor unit with our guide on choosing the right location, preparing the area, and connecting refrigerant lines.When it comes to enhancing your home’s comfort, LG mini split systems offer an efficient and versatile solution for heating and cooling. However, successful installation is key to maximizing their benefits. In this blog post, we will guide you through the essential steps to ensure a seamless installation process. From choosing the right location for optimal air distribution to gathering the necessary tools and materials, each step plays a crucial role. We’ll cover the installation of the indoor unit and provide insights into connecting the refrigerant lines effectively. Whether you’re a seasoned DIY enthusiast or a novice looking to take on a new project, this comprehensive guide will set you up for success in installing your LG mini split system efficiently and safely. Let’s dive in!
Choosing the Right Location
When it comes to LG mini split installation, one of the most crucial steps is choosing the right location for your indoor unit. The placement of your unit can greatly affect its efficiency and effectiveness in cooling or heating your space. Here are a few key considerations to keep in mind:
- Distance from the Outdoor Unit: Ideally, the indoor unit should be placed relatively close to the outdoor unit. This minimizes the length of the refrigerant lines, which can improve overall efficiency.
- Height and Airflow: Mount the unit high enough on the wall to allow for proper air circulation. Avoid placing it near obstacles that could block airflow.
- Room Usage: Consider the primary use of the room. If it’s a common area, position the unit where it can distribute air evenly throughout the space.
Another important factor is to ensure that the chosen location has easy access to electrical outlets. This ensures that the installation process is smoother and minimizes the need for additional electrical work.
Moreover, think about the aesthetic aspect. The indoor unit should blend well with the room’s design and not interfere with your décor. Finding a balance between functionality and aesthetics will lead to a more satisfying installation outcome.
In summary, taking the time to carefully evaluate the surroundings and choose the right location is essential for optimizing your LG mini split installation. The wrong placement can lead to inefficiencies and higher energy costs.
Preparing the Installation Area
When it comes to installing an LG mini split system, one of the most crucial steps is preparing the installation area. A well-prepared space not only ensures the efficiency of the unit but also facilitates a smoother installation process. Below are some essential steps to follow.
- Choose an Appropriate Location: Ensure the installation space has ample clearance and is easily accessible for maintenance.
- Check for Electrical Supply: Make sure there is a working electrical supply nearby to avoid additional wiring complications.
- Ensure Proper Ventilation: The area should be well-ventilated to maximize the system’s performance.
Before starting the installation, it is essential to ensure the wall is sturdy enough to hold the indoor unit’s weight. Additionally, it should be free from any obstructions that could hinder airflow or cause installation issues. Prepare the surface by cleaning it thoroughly and ensuring that any applicable drywall or insulation is in good condition.
Finally, keeping the installation area organized can significantly enhance productivity. Lay out the tools and materials you’ve gathered in a logical manner, so everything is easily accessible when needed. A tidy workspace not only helps accelerate the process, but also minimizes the risk of accidents during installation.
Gathering Necessary Tools and Materials
Before you begin your LG mini split installation, it’s essential to gather all the necessary tools and materials to ensure the process goes smoothly. Having everything on hand will save you time and prevent any interruptions during the installation.
The following is a list of tools and materials you’ll typically need for this project:
| Tools | Materials |
|---|---|
| Drill | Refrigerant lines |
| Screwdriver (flat and Philips) | Mounting brackets |
| Pipe cutter | Insulation material |
| Level | Electrical wiring |
| Measuring tape | Drain line |
It’s also beneficial to have a power meter to check electrical connections during installation. Depending on your installation’s complexity, you may also need advanced tools like a vacuum pump for evacuating the refrigerant lines.
By gathering these tools and materials ahead of time, you’ll be well-prepared for your LG mini split installation, allowing you to focus on achieving a successful setup without any last-minute rush.
Installing the Indoor Unit
When it comes to lg mini split installation, one of the most critical steps is installing the indoor unit. This process requires careful planning and execution to ensure optimal performance and efficiency of your system. Below are the key steps you should follow during the installation process.
First and foremost, select a suitable location for the indoor unit. The ideal spot is usually on an interior wall, ideally near the ceiling, to facilitate efficient airflow. Remember to avoid locations that might obstruct airflow, such as behind furniture or curtains. It is also important to keep the unit away from direct sunlight, as this can interfere with temperature regulation.
Once you have chosen the location, it’s time to prepare for the installation. You will need the following necessary tools and materials: a drill, stud finder, level, screwdriver, and wall bracket. Moreover, make sure to gather the user’s manual for your specific model, as it will provide essential guidelines tailored to your lg mini split.
After preparing your tools, proceed with mounting the indoor unit. Use a level to ensure it’s straight, and mark the drilling points through the wall bracket. Once the holes are drilled, secure the bracket tightly using the screws provided. Finally, with the bracket securely in place, lift the indoor unit onto it and lock it into place according to the manufacturer’s instructions.
In conclusion, the optimal installation of the indoor unit is crucial in ensuring the efficiency and longevity of your lg mini split system. Following these steps will set you on the right path to a successful installation.
Connecting the Refrigerant Lines
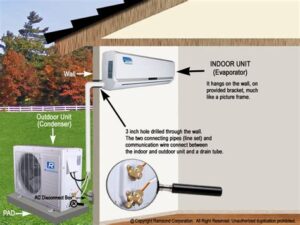
When installing an LG mini split system, one of the most crucial steps is connecting the refrigerant lines. This process ensures that the indoor and outdoor units can effectively transfer heat, providing optimal cooling and heating performance.
Before you begin, ensure that you have the right tools and materials at hand, including copper tubing, flare fittings, a torque wrench, and a vacuum pump. It’s essential to choose the correct size of copper line as specified in the manufacturer’s guidelines to avoid any performance issues.
Start by carefully measuring and cutting the copper tubing, ensuring that you minimize bends to avoid restricting refrigerant flow. Once the lines are cut to the specified lengths, use a tubing cutter for clean edges. Next, flare the ends of the copper tubes with a flaring tool, which will allow for proper connections to the indoor and outdoor units. Remember to use a torque wrench to tighten the flare fittings securely, but avoid over-tightening to prevent damage.
After making all connections, it’s imperative to test for leaks. Use a leak detector or soap solution to check all joints and fittings. A thorough inspection at this stage can save you time and prevent issues down the line. Following these steps will ensure your LG mini split installation is successful, resulting in a highly efficient heating and cooling system.
Frequently Asked Questions
What is a mini split system?
A mini split system is a type of heating and cooling system that consists of an outdoor unit and one or more indoor units, providing flexible and efficient climate control without needing ductwork.
What are the benefits of installing a mini split?
The benefits of installing a mini split include energy efficiency, individual temperature control for different rooms, ease of installation, and the ability to add zones or units over time.
What tools are required for lg mini split installation?
Essential tools for installing an LG mini split include a drill, wrenches, screwdrivers, a level, vacuum pump, refrigerant gauge set, and possibly a ladder for outdoor unit installation.
Can I install a mini split system myself?
While it is possible for a handy individual to install a mini split system, it is recommended to hire a professional to ensure proper installation, adherence to local codes, and warranty protection.
How high should the indoor unit be mounted?
The indoor unit of a mini split should typically be mounted about 6-8 feet off the floor for optimal air distribution and comfort.
What is the typical installation time for a mini split?
The installation time for a mini split system usually ranges from 4 to 8 hours, depending on the complexity of the setup and the number of indoor units being installed.
Is it necessary to have a drain line for the indoor unit?
Yes, a drain line is necessary for the indoor unit of a mini split system to remove condensate that forms during the cooling process, preventing moisture buildup and potential damage.
