Learn how to install mini split systems effectively with our comprehensive guide on space assessment, necessary tools, installation steps, and troubleshooting tips.Installing a mini split system can seem daunting, especially for those unfamiliar with HVAC technology. However, with the right preparation and guidance, it can become a manageable DIY project. This blog post will take you through the essential steps to successfully install a mini split system, starting with an overview of how these systems work. We’ll help you assess your installation space to ensure optimal placement, gather the necessary tools, and stress the importance of following the installation manual. Finally, we’ll touch on the crucial aspects of testing the system and troubleshooting common issues. By the end of this guide, you’ll have the knowledge and confidence to tackle your mini split installation head-on, making your home more comfortable and energy-efficient.
Understanding Mini Split Systems
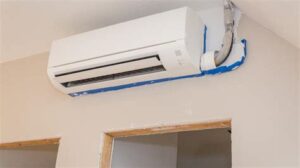
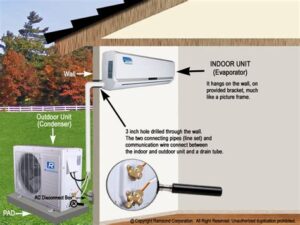
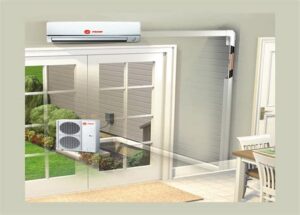
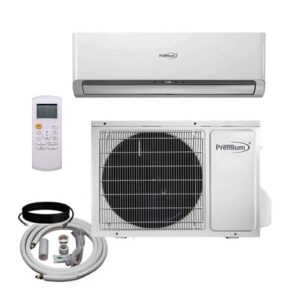
Mini split systems are an increasingly popular choice for heating and cooling residential and commercial spaces. Unlike traditional HVAC systems, mini splits do not require ductwork, which makes them highly flexible and efficient. These systems consist of an outdoor compressor unit and one or more indoor air handler units that can be mounted on walls, ceilings, or floors.
One of the main advantages of mini split systems is their ability to provide zoned heating and cooling. Each indoor unit can be controlled independently, allowing different areas of a building to be maintained at different temperatures. This not only contributes to improved energy efficiency but also enhances comfort levels within each space.
Installation is a crucial aspect of mini split systems. Although many homeowners may consider a DIY approach, it’s important to understand the complexities involved, including the proper sizing of units, electrical connections, and refrigerant line installation. Often, professional installation ensures optimal performance and longevity of the system.
Assessing Installation Space
When considering whether it is hard to install a mini split, one of the most critical factors is assessing the installation space. Before diving into the installation process, it is essential to identify the suitable location for both the indoor and outdoor units. Each of these units has specific requirements regarding distance, clearance, and accessibility, which can greatly affect the efficiency of your mini split system.
Begin by checking the manufacturer’s guidelines for minimum distance requirements from walls, ceilings, and other obstructions. A good rule of thumb is to maintain at least 5 inches of clearance from the ceiling and walls, allowing for proper airflow. Additionally, ensure the area is free from any potential blockages, such as furniture or drapes, which could impede the system’s performance.
If you plan to install the outdoor unit on a balcony or ground level, consider the weight and vibration factors. It should be installed on a sturdy surface that can support its weight and dampen vibration. Also, remember to maintain adequate access for future maintenance and repairs. Creating a designated space for your mini split system contributes significantly to its efficiency and longevity, making the assessment of installation space a vital initial step.
Gathering Necessary Tools
When it comes to installing a mini split system, having the right tools is essential. Proper preparation can make the task not only easier but also more efficient. Below is a list of the necessary tools you will need to gather before starting your installation:
- Drill: A power drill is crucial for making the necessary holes into walls and supporting structures.
- Refrigerant gauges: These are important for measuring pressure and ensuring the refrigerant levels are adequate.
- Pipe cutter: A pipe cutter will allow you to make clean cuts on the refrigerant lines.
- Wrenches: Both open-end and adjustable wrenches are required for tightening connections.
- Level: A leveling tool ensures that the indoor and outdoor units are installed correctly.
- Safety gear: Gloves and goggles should not be overlooked; safety first!
Gathering these tools beforehand will save you time and prevent any interruptions during the installation process. It can often be frustrating to realize you are missing a tool mid-way through the job, so prepare in advance.
Make sure to check the manufacturer’s guidelines for any additional tools or equipment that may be specific to your mini split unit. Some units may require specialized tools that are not commonly found in every toolkit.
By equipping yourself with the necessary tools, you can approach your mini split installation with confidence, ens
Following Installation Manual
When it comes to installing a mini split system, one of the most crucial steps is following the installation manual. This document serves as a comprehensive guide tailored specifically for your particular model, ensuring that you adhere to the manufacturer’s specifications. Every mini split system comes with its own unique requirements and recommendations that must be met for effective and safe installation.
The installation manual typically includes detailed instructions on various components such as mounting techniques, wiring arrangements, and refrigerant handling. One must pay attention to the safety precautions highlighted in the manual. For instance, whether you need to wear protective gear or use certain instruments to avoid accidents is essential information found in these documents.
Moreover, the manual often provides troubleshooting tips and maintenance guidelines for your mini split system. This information is invaluable for ensuring the longevity and efficiency of your unit. A well-followed installation manual guarantees that you set up your system correctly, ultimately leading to superior performance and reduced energy costs.
Testing and Troubleshooting
After successfully installing your mini split system, it is essential to conduct thorough testing and troubleshooting to ensure the unit operates efficiently and effectively. This step is crucial for verifying that everything is set up correctly and functioning as intended.
To begin the testing phase, turn on the mini split system and observe its operation. Check the remote control for responsiveness, adjust the temperature settings, and listen for any unusual noises. Additionally, you should confirm that the airflow is strong and consistent. If you notice any irregularities, it may indicate a need for troubleshooting.
If issues arise during testing, refer to the installation manual for troubleshooting guidelines. Common problems include inadequate cooling, inconsistent operation, or error codes displayed on the remote. Conduct the following steps to troubleshoot:
- Check the power supply: Ensure that the unit is properly connected to power and that the circuit breaker is not tripped.
- Inspect refrigerant levels: Low refrigerant can hinder performance; consult a professional if needed.
- Clean filters and coils: Dust and debris can obstruct airflow, leading to inefficiency.
By thoroughly conducting tests and following troubleshooting procedures, you can ensure that your mini split system works seamlessly, providing comfort in your space.
Frequently Asked Questions
What is a mini split system?
A mini split system is a type of heating and cooling system that consists of an outdoor unit and one or more indoor units, allowing for individual climate control in different areas of a home.
Do I need any special tools to install a mini split system?
Yes, installing a mini split system typically requires specific tools such as a drill, wrenches, a level, and possibly vacuum pumps and refrigerant gauges.
Is it necessary to hire a professional for mini split installation?
While some experienced DIYers can install mini splits themselves, it is generally recommended to hire a professional to ensure proper installation and to comply with local regulations and warranty requirements.
What are the main steps involved in installing a mini split system?
The main steps include selecting the installation location, mounting the indoor and outdoor units, connecting refrigerant lines, securing electrical connections, and testing the system for proper operation.
How long does it usually take to install a mini split system?
The installation time can vary, but it generally takes between 4 to 8 hours for a professional to install a mini split system, depending on the complexity of the setup.
Are there any common challenges faced during mini split installation?
Common challenges include proper placement of indoor units, ensuring a good seal on refrigerant lines, electrical connection issues, and navigating building codes.
What should I do if I run into issues during installation?
If you experience issues during installation, it’s best to consult the manufacturer’s installation guide, reach out to a professional technician, or contact customer support for assistance.
