Learn how to install and troubleshoot multi-zone mini splits with our comprehensive guide covering location choice, indoor and outdoor unit connections.Are you considering upgrading your home’s heating and cooling system? Installing a multi-zone mini split could be the solution you’re looking for. These versatile systems allow you to control the temperature in different areas of your home independently, enhancing comfort and energy efficiency. In this blog post, we’ll guide you through the essential steps of installing a multi-zone mini split system—starting with a clear understanding of how it works, moving on to the critical task of selecting the right location for your units, and detailing the installation process for both indoor and outdoor components. Additionally, we’ll cover essential testing and troubleshooting tips to ensure your system runs smoothly. Let’s dive in and transform your space into a personalized climate-controlled haven!
Understanding Multi Zone Mini Splits
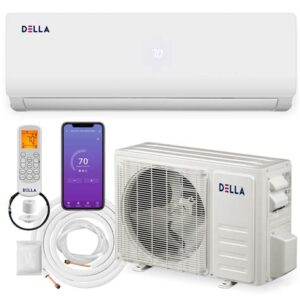
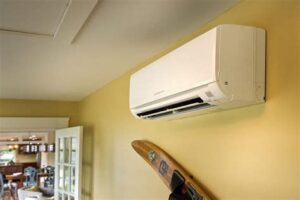
Multi-zone mini splits are an innovative heating and cooling solution designed for homes and businesses. They consist of an outdoor unit and multiple indoor units that can control the temperature in separate zones. This system provides remarkable flexibility and efficiency, making it a popular choice for many environments.
One of the primary advantages of multi-zone mini splits is their ability to allow individual temperature control in each room or area. This means you can adjust the settings based on the specific needs of different spaces, leading to significant energy savings. Moreover, mini splits are known for their quiet operation compared to traditional HVAC systems, making them an excellent choice for residential settings.
When considering a multi-zone mini split, it’s essential to evaluate the size and layout of your space. Matching the capacity of the indoor units to the particular requirements of each zone ensures optimized performance and comfort. It’s worth noting that professional installation is recommen
Choosing the Right Location
When it comes to installing multi zone mini splits, choosing the right location for both the indoor and outdoor units is crucial for optimal performance. The effectiveness of your mini split system largely depends on the strategic placement of these units. Here are some considerations to keep in mind when selecting locations:
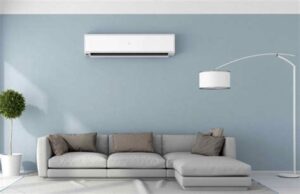
- Indoor Units: Ensure that the indoor units are placed in areas where air can circulate freely. Avoid locations that are obstructed by furniture or walls to maintain efficient airflow.
- Outdoor Units: The outdoor unit should be placed in a well-ventilated area and away from direct sunlight to prevent overheating. Make sure the unit has adequate space around it for air intake and exhaust.
- Accessibility: Both units should be easily accessible for maintenance and repair. Consider placing the outdoor unit on a stable platform or bracket if necessary.
Another important aspect is to consider the distance between the indoor and outdoor units. A shorter line set distance can improve efficiency and reduce the risk of refrigerant leaks.
Lastly, take into account the aesthetic appeal of your home. Choose locations that not only optimize performance but also blend well with your interior and exterior design.
Installing the Indoor Units
When it comes to installing a multi-zone mini-split system, the indoor units play a crucial role in ensuring your home is comfortable and energy-efficient. Proper installation can significantly influence the system’s performance and longevity.
Before starting the installation process, consider the following key factors:
- Placement: Choose locations that provide optimal airflow and comfort. Avoid areas that obstruct airflow, such as behind furniture or in corners.
- Accessibility: Ensure that the units are accessible for future maintenance and cleaning.
- Drainage: Position the units such that the condensate can easily drain out, preventing any water accumulation.
Once you have determined the ideal locations, follow these steps for a successful installation:
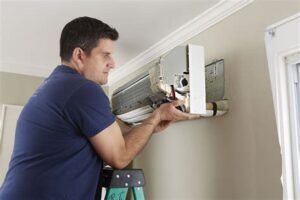
- Mounting the Indoor Units: Use the provided mounting brackets to secure the indoor units on the wall. Ensure they are level, as this helps with proper drainage.
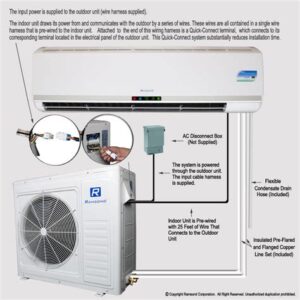
- Connecting the Refrigerant Lines: Carefully connect the refrigerant lines to the indoor units. Make sure that all connections are tight to prevent any leaks.
- Electrical Connections: Follow the manufacturer’s guidelines for connecting the electrical wires. Always ensure that the power is turned off before handling electrical components.
Following these guidelines will help you install your multi-zone mini-split system indoor units effectively and efficiently.
Connecting the Outdoor Unit
Once the indoor units of your multi-zone mini split system are installed, it’s time to focus on the outdoor unit. This is a crucial step in ensuring your heating and cooling system operates efficiently. The outdoor unit serves as the heart of your system, providing the necessary efficiency and power to keep your indoor spaces comfortable. Here, we will outline the steps and considerations for connecting the outdoor unit safely and effectively.
Before you begin, it’s essential to select a suitable location for the outdoor unit. It should be placed in a spot that allows for maximum airflow and is easily accessible for maintenance. Ideally, the unit should be elevated, such as on a platform or bracket, to avoid potential water damage and improve airflow. Once the location is determined, ensure that a solid and level foundation is created. This foundation should be able to bear weight, as the outdoor unit can be quite heavy.
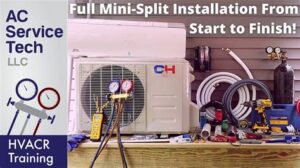
Next, begin the process of connecting the outdoor unit to the indoor units. This involves running refrigerant lines and electrical connections, which are essential for the system’s operation. Ensure you use insulated refrigerant lines and correct gauge wire for electrical connections to avoid any mishaps later. Pay careful attention to routing the lines with minimal bends to enhance efficiency. It’s advisable to refer to the manufacturer’s installation manual for specific guidelines, as different multi-zone systems may have unique requirements.
Once connections are made, check for any leaks by applying a soap solution to the joints where refrigerant lines meet. If bubbles appear, it indicates a leak that must be addressed. After verifying connections, proceed to connect the unit to the power supply, ensuring that all electrical connections are secure and comply with local codes. Finally, follow any manufacturer-specific startup procedures to get your system operational.
By carefully following these steps to connect the outdoor unit, you will ensure that your multi-zone mini split system operates efficiently and effec
Testing and Troubleshooting
After successfully installing your multi-zone mini split, it’s essential to ensure that everything is functioning properly. Testing and troubleshooting are vital steps that can help identify any issues before they escalate. This phase involves checking the unit’s performance, reviewing the installation for any omissions, and making sure the system is operating efficiently.
Begin your testing by turning on the indoor units and setting the desired temperature. Monitor the air temperature coming from the vents after a few minutes. It should be significantly different from the ambient temperature. If the airflow seems inadequate, examine the air filters for dirt and blockage, as this can severely impact performance.
If you encounter any problems, it’s crucial to troubleshoot methodically. Refer to the unit’s manual for guidance on common issues, which might include refrigerant leaks, electrical problems, or malfunctioning thermostats. Here are some common troubleshooting steps:
- Check for error codes displayed on the remote or unit.
- Inspect all connections to ensure they are secure.
- Assess the outdoor unit for any blocked airflow or debris.
- Evaluate the installation location of indoor units to optimize efficiency.
Keep in mind that a simple issue can often lead to complex problems if not resolved promptly. Regular maintenance checks can also help prevent issues, ensuring your multi-zone mini split system operates smoothly for years to come.
Frequently Asked Questions
What is a multi-zone mini split system?
A multi-zone mini split system is an air conditioning and heating solution that offers the ability to control the temperature in multiple areas or zones of a building using one outdoor unit paired with several indoor units.
What are the benefits of installing a multi-zone mini split?
The benefits include energy efficiency, individualized temperature control for different rooms, flexible installation options, and reduced utility costs compared to traditional HVAC systems.
How do I choose the right size mini split for my rooms?
To choose the right size, calculate the BTU (British Thermal Unit) requirements for each room based on factors like room size, insulation, and climate, using a BTU calculator or consulting with an HVAC professional.
Can I install a multi-zone mini split system myself?
While some homeowners with DIY experience may attempt installation, it is recommended to hire a licensed HVAC professional for safety and to ensure proper installation and functionality.
What tools do I need for the installation?
The tools typically required for installation include a drill, screwdrivers, wrenches, level, tape measure, and various HVAC-specific tools for refrigerant line connection.
How much does it cost to install a multi-zone mini split?
Installation costs can vary widely based on factors such as the number of zones, the type of units, and local labor rates, but generally range from $3,000 to $10,000.
What maintenance is required for a mini split system?
Regular maintenance includes cleaning or replacing filters, checking refrigerant levels, inspecting and cleaning the outdoor and indoor units, and scheduling professional tune-ups at least once a year.
