Learn how to install your indoor AC unit effectively with tips on location selection, tool gathering, mounting, refrigerant connection, and system testing.Installing a Mitsubishi mini-split system can be a game-changer for your home, providing efficient heating and cooling while maintaining a sleek and unobtrusive presence. Whether you’re a seasoned DIY enthusiast or a first-time installer, understanding the essential steps involved in this installation process is crucial for achieving optimal performance. In this blog post, we will guide you through each phase, starting from choosing the right location for your indoor unit and gathering the necessary tools, to the intricate tasks of mounting the unit and connecting the refrigerant lines. Finally, we’ll cover the important steps of testing and commissioning your system to ensure it runs smoothly. With these helpful insights, you’ll be well on your way to creating a comfortable living environment with your new Mitsubishi mini-split system. Let’s get started!
Choosing the Right Location
Choosing the right location for your Mitsubishi mini split system is crucial for maximizing its efficiency and effectiveness. The placement of the indoor unit directly influences air circulation and comfort levels in your home. Here are several important factors to consider:
- Accessibility: Ensure that the location is easily accessible for future maintenance and cleaning.
- Airflow: Avoid locations that obstruct airflow. The unit should be placed where the air can circulate freely without any blockages, such as furniture or walls.
- Height: Ideally, mount the indoor unit 7 to 8 feet above the floor to ensure proper heat distribution.
- Proximity to an Electrical Source: The selected location should be near an electrical supply, making installation easier and more efficient.
- Noise Considerations: If possible, avoid placing the unit near bedrooms and quiet areas to minimize noise disruption.
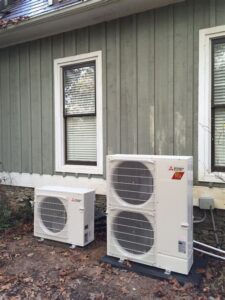
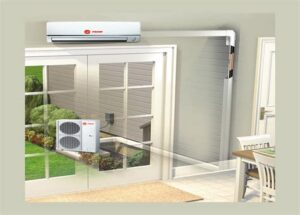
Another aspect to consider is the external unit’s placement, which interacts with the indoor unit. Ensure that both units are aligned to minimize the length of refrigerant lines, as this can improve efficiency.
In summary, taking the time to choose the right location for your mini split system can lead to greater comfort and energy savings in your home. Evaluate all the mentioned factors carefully before proceeding with the installation.
With the points above in mind, you’re now ready to look at other essential installation steps for your Mitsubishi mini split system.
Gathering Necessary Tools
When it comes to installing a Mitsubishi mini split, having the right tools is essential for a smooth and efficient installation process. Here’s a list of the necessary tools you’ll need to gather before you begin:
- Refrigerant Gauge Set: This tool is crucial for measuring pressures and ensuring the system is properly charged.
- Pipe Wrenches: Useful for working with refrigerant lines, these wrenches will help you secure fittings tightly.
- Drill with Bits: A powerful drill is needed to create holes for mounting brackets and running lines.
- Level: Ensuring your indoor and outdoor units are level is vital for optimal performance.
- Vacuum Pump: This tool is necessary to remove moisture and air from the refrigerant lines.
- Electrical Tools: Wire strippers, screwdrivers, and multimeters are essential for connecting the electrical components of the system.
- Safety Equipment: Don’t forget to wear safety goggles and gloves to protect yourself while working.
Before starting your installation, double-check that you have all these tools on hand. This preparation can save you time and frustration during the installation process.
Investing in quality tools can also lead to a better installation experience. Each tool serves a specific purpose, contributing to the overall efficiency and effectiveness of the mini split installation.
With your toolkit ready, you can move on to the next steps of your Mitsubishi mini split installation. Being equipped will ensure that you can tackle mounting, connecting, and testing with confidence.
Mounting the Indoor Unit
Mounting the indoor unit of your Mitsubishi mini split system is a critical step that requires careful planning and consideration. The position of the indoor unit affects not only the unit’s efficiency but also the comfort level in the space it is intended to cool or heat. Follow the guidelines below to ensure a successful installation.
First, it’s essential to select a wall that provides enough space for the indoor unit while taking into account both aesthetics and functionality. The ideal location should be high enough to allow for optimal air distribution but should also be conveniently reachable for maintenance. Always avoid placing the unit under electrical wiring or ducts that could obstruct airflow.
Before securing the unit, make sure to use a level to ensure the bracket is straight. If it’s slanted, this can lead to inefficient operation and could potentially cause the unit to malfunction. Once the bracket is secured, gently lift the indoor unit and hook it onto the wall mount, ensuring it clicks securely into place.
After mounting, double-check the stability of the installation, as well as the alignment of the unit. It’s a good idea to refer to the manufacturer’s instructions for specific mounting guidelines and dimensions to ensure compatibility.
| Key Considerations | Details |
|---|---|
| Height: | Mount high enough for optimal airflow. |
| Accessibility: | Ensure it’s easy to reach for maintenance. |
| Airflow: | Avoid obstructions such as wiring or ducts. |
| Leveling: | Always check with a level to prevent malfunctions. |
Connecting the Refrigerant Lines
Connecting the refrigerant lines is a crucial step when installing a Mitsubishi mini split system. Proper connections ensure optimal performance and efficiency of your heating and cooling system. Here’s a detailed guide to help you through this process.
Prior to connecting the refrigerant lines, make sure that you have the necessary tools on hand. Some of the essential tools include:
- Pipe cutter for cutting the copper lines.
- Wrench set to tighten the fittings securely.
- Refrigerant gauge set to check for leaks and system pressure.
After ensuring you have everything ready, follow these steps to connect your refrigerant lines:
- First, carefully cut your copper refrigerant lines to the required lengths.
- Next, using the flaring tool, flare the ends of the pipes that will connect to the indoor and outdoor units.
- Then, attach the lines to the corresponding ports on both units, making sure to tighten the fittings securely while avoiding over-tightening.
- Finally, once everything is connected, use the refrigerant gauge set to check for any leaks and ensure the system is functioning correctly.
Take your time with this process, as ensuring the integrity of your connections is key to the longevity and efficiency of your Mitsubishi mini split system.
Testing and Commissioning the System
After successfully installing your Mitsubishi mini split system, the next crucial step is testing and commissioning the system. This process ensures that the entire system is functioning properly, providing optimal performance and efficiency. Below are the essential steps to follow during this phase:
- Check Electrical Connections: Verify all electrical connections are secure and properly insulated to prevent any hazards.
- Refrigerant Level Check: Confirm the refrigerant levels match the manufacturer’s specifications. An improper level can affect the system’s efficiency and longevity.
- Run the System: Power on the system and run it through all operational modes (heating, cooling, fan) to ensure it transitions smoothly.
Once you have completed these checks, it is critical to monitor the system’s performance. Pay attention to the following metrics:
| Parameter | Target Value | Actual Value |
|---|---|---|
| Indoor Temperature | Set to desired level | Check readings |
| Outdoor Temperature | Within specified range | Check readings |
| Noise Levels | Below 50 dB | Check readings |
Finally, once all components are functioning appropriately and the system is set to optimal operational levels, document your findings and provide the homeowner with an overview of how to operate and maintain their Mitsubishi mini split system. This step ensures that they understand the importance of regular checks and maintenance.
Frequently Asked Questions
What tools do I need for installing a Mitsubishi mini split?
For installing a Mitsubishi mini split, you will need a drill, level, wrenches, screwdrivers, a saw for cutting the mounting bracket, and a vacuum pump for the refrigerant lines.
What is the first step in the installation process?
The first step in installing a Mitsubishi mini split is to select an appropriate location for the indoor and outdoor units, ensuring there’s enough clearance and support.
How do I mount the indoor unit?
To mount the indoor unit, secure the mounting bracket to the wall at the chosen location, ensuring it is level. Then, attach the indoor unit to the bracket.
What should I consider when installing the outdoor unit?
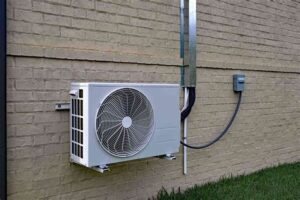
When installing the outdoor unit, consider ventilation, sun exposure, and noise levels. It should be placed on a stable and level surface, away from obstructions.
How do I connect the refrigerant lines?
To connect the refrigerant lines, ensure the flare fittings are clean and free from debris. Use a wrench to secure them tightly after applying refrigerant line sealant.
Is it necessary to hire a professional for installation?
While DIY installation is possible, hiring a professional is recommended to ensure proper installation and warranty compliance, particularly for refrigerant handling.
What should I do after installation?
After installation, check for any refrigerant leaks, test the system to ensure it’s operating correctly, and set the thermostat to your desired temperature.


