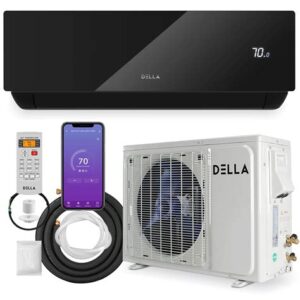
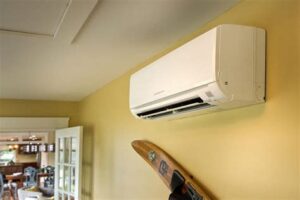
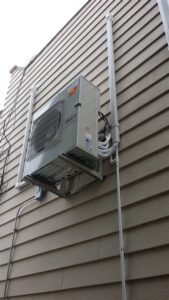
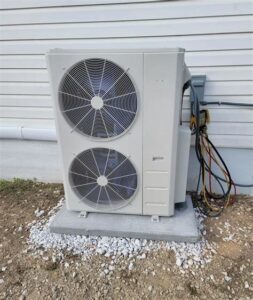
Learn how to install a mini-split unit by selecting the right location, preparing walls, gathering tools, and connecting the unit efficiently.Installing a mini split on an interior wall can significantly enhance your home’s comfort by providing efficient heating and cooling. This versatile air conditioning system is ideal for spaces where traditional ductwork is impractical. However, the process requires careful planning and execution to ensure optimal performance and aesthetics. In this post, we will guide you through the essential steps to successfully install a mini split unit on an interior wall. From selecting the perfect location to preparing the wall and gathering the necessary tools, each subheading will equip you with the knowledge and confidence to tackle this project. By the end of this guide, you’ll be ready to connect your mini split unit and experience the benefits of personalized climate control. Let’s get started!
Selecting a suitable location
When it comes to installing a mini split system, selecting a suitable location is crucial for optimal performance. The location directly affects the system’s efficiency and your overall comfort. Here are some considerations to keep in mind:
- Height: Install the indoor unit at least 7 to 8 feet above the floor to ensure airflow that can circulate effectively throughout the room.
- Clear Space: Choose a spot with sufficient clearance around the unit. This allows for better airflow and ease of maintenance.
- Proximity to the Outdoor Unit: The indoor and outdoor units should be as close as possible to minimize refrigerant line length, which enhances energy efficiency.
- Avoid Sunlight: Avoid locations that receive direct sunlight, as excessive heat can impede the unit’s performance.
Before finalizing your mini split installation site, inspect the wall for any pipes or electrical wiring that could obstruct the installation. Having a clear path will not only ease installation but also ensure safety.
Additionally, consider the layout of your room. Positions near the center of the wall are often ideal, as they distribute cold air evenly throughout the space. Think about furnishings and obstructions that might block airflow from the unit.
In summary, taking the time to carefully choose the location will lead to more effective cooling and heating. A few extra moments spent in this planning phase can dramatically improve your system’s overall performance and longevity.
Preparing the interior wall
Preparing the interior wall is a crucial step in the process of installing a mini split air conditioning unit. Before you proceed, you need to ensure that the wall is suitable for the installation. This involves checking for any obstructions, ensuring the wall material can support the unit’s weight, and creating a clean and level surface.
Here are the essential steps to follow while preparing your interior wall:
- Locate the studs: Use a stud finder to locate the wooden or metal studs in the wall. This will provide you with a solid anchor point for your mini split unit.
- Check for obstructions: Ensure there are no electrical wires, plumbing pipes, or insulation that may interfere with the installation. Avoid these areas before proceeding.
- Clean the surface: Remove any dust, debris, or old wall coverings to create a clean area for mounting the unit. A clean surface ensures better adhesion of the mounting bracket.
Once you have prepared the interior wall, double-check your measurements and ensure you have accounted for any necessary clearances as outlined in the mini split installation manual. Proper preparation will make the rest of the installation process smoother and more efficient.
Gathering necessary tools and equipment
Before you embark on the journey of installing a mini split unit on an interior wall, it’s essential to gather all the necessary tools and equipment. Having the right tools readily available will not only streamline the installation process but also ensure safety and efficiency. Below is a comprehensive list of essential tools and equipment you’ll need:
- Drill: A powerful drill is necessary for making holes in the wall to install the mounting bracket.
- Socket Wrench Set: This is essential for tightening bolts securely.
- Level: To ensure that your unit is perfectly horizontal, preventing any potential drainage issues.
- Stud Finder: This tool helps locate wall studs where you will mount the bracket, providing stability.
- PVC Pipe Cutter: If your mini split system uses PVC piping, this cutter will make clean cuts.
In addition to these tools, you will also need some supplies to facilitate the installation process:
| Supply | Purpose |
|---|---|
| Mounting Bracket | Secures the indoor unit to the wall. |
| Insulation Tape | Wraps around the refrigerant lines for better efficiency. |
| Screws and Anchors | Used to secure the mounting bracket and unit to the wall. |
Lastly, don’t forget about gloves, safety goggles, and a measuring tape. These items are crucial for maintaining safety and accuracy during the entire installation process. By ensuring you have all these tools and supplies r
Installing the mounting bracket
When it comes to installing a mini split system, one of the most critical steps is installing the mounting bracket. This step ensures that your mini split unit is securely attached to the wall, providing stability and efficiency. Here’s a step-by-step guide to help you through this process.
First, locate the perfect position for the mounting bracket. The height should be around 5 to 7 feet from the floor, centered in the area you want to cool. Use a level to ensure the bracket is perfectly horizontal before marking the mounting holes. You can do this by taking measurements from the ceiling or the floor and marking with a pencil.
Next, with your drill, create holes based on the markings you made. Make sure to choose the right size drill bit according to the mounting hardware you will be using. After you’ve drilled the holes, insert wall anchors if necessary, then align the mounting bracket with the holes. Using a screwdriver or a ratchet, secure the bracket tightly to the wall. Double-check with a level to guarantee that it’s straight before proceeding to the next steps of your installation.
Remember: A well-secured mounting bracket is essential for the overall performance and longevity of your mini split system!
Connecting the mini split unit
Once you have successfully installed your mini split system and the mounting bracket is securely in place, the next crucial step is connecting the mini split unit. Proper connection ensures that the system operates efficiently and provides the desired cooling or heating performance.
Here’s a detailed breakdown of the connection process:
- Electrical Connections: First, you will need to connect the electrical wiring from the indoor unit to your main power supply. Make sure to follow the manufacturer’s guidelines for this step.
- Refrigerant Lines: Next, carefully connect the refrigerant lines that will transport the coolant between the indoor and outdoor units. Be sure to tighten them adequately to prevent leaks.
- Drain Line: Do not forget about the condensate drain line. Properly attaching it will ensure that any excess water is effectively drained away from the unit. This prevents water damage and maintains efficiency.
After completing these connections, it’s imperative to perform a thorough check of all fittings and connections to ensure everything is secure. Once verified, you can proceed to test the system to confirm it’s operating correctly.
Connecting your mini split unit might seem complex, but with careful attention to detail, you can ensure that your system is set up for optimal performance. As always, if you are uncertain at any stage, don’t hesitate to consult a professional.
Frequently Asked Questions
What is a mini-split system?
A mini-split system is a type of air conditioning and heating system that consists of an outdoor compressor and one or more indoor air-handling units, providing efficient climate control without the need for ductwork.
Why would I install a mini-split on an interior wall?
Installing a mini-split on an interior wall allows for efficient heating or cooling in specific rooms, especially in spaces where traditional HVAC systems may not reach effectively, such as converted attics or garages.
What are the benefits of using a mini-split system?
Mini-split systems offer several benefits, including energy efficiency, flexibility in temperature control for individual rooms, and relatively easy installation as they do not require ductwork.
What tools do I need to install a mini-split on an interior wall?
You will typically need tools such as a drill, stud finder, level, wrenches, and possibly a vacuum pump if you need to evacuate the line set.
Can I install a mini-split myself, or should I hire a professional?
While it is possible to install a mini-split yourself if you are skilled in HVAC work, it is recommended to hire a professional to ensure proper installation and efficiency, especially for the refrigerant lines.
Are there any space considerations when installing a mini-split on an interior wall?
Yes, ensure that there is adequate space around the indoor unit for airflow, maintenance, and that it is installed at a suitable height on the wall to maximize heating or cooling efficiency.
What kind of maintenance does a mini-split system require?
Maintenance for a mini-split system typically includes cleaning or replacing filters regularly, checking for refrigerant leaks, and ensuring that the outdoor unit is free from obstructions like debris or vegetation.


