Learn how to install your air conditioning unit effectively with expert tips on location, size, tools, connection, and troubleshooting.Are you considering a mini split heat pump for your home? This energy-efficient heating and cooling solution offers unparalleled comfort and flexibility, making it a popular choice among homeowners. However, the installation process can seem daunting if you’re not familiar with it. In this blog post, we’ll guide you through the essential steps for a successful installation, starting from choosing the right location to connecting the indoor unit. We’ll discuss how to select the proper size for your space, assemble the necessary tools, and test your system to ensure everything runs smoothly. Whether you’re a DIY enthusiast or just looking to save on installation costs, our comprehensive guide will help you confidently navigate the installation process and enjoy the benefits of your new mini split heat pump.
Choosing the Right Location
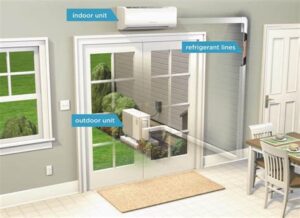
When it comes to installing a mini split heat pump, one of the most crucial factors to consider is the location. Choosing the right spot for both the indoor and outdoor units can significantly affect the efficiency and effectiveness of your system.
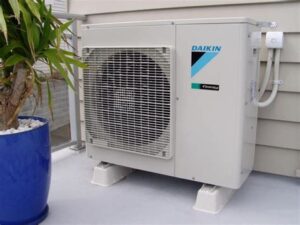
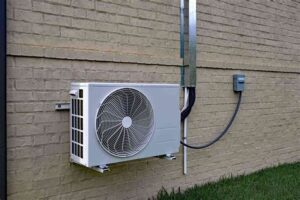
First and foremost, consider the outdoor unit. It should be placed in a location that allows for adequate air circulation. Look for an area that is free from obstructions, such as trees, walls, or fences. It’s generally recommended to maintain a clearance of at least 12 inches on all sides of the unit, as this ensures optimal airflow.
Next, focus on the indoor unit. Ideally, it should be installed in a central location to maximize efficiency and comfort. Make sure it is not obstructed by furniture or other items. Additionally, keep in mind that heat rises; therefore, positioning the unit high on the wall can enhance performance and even distribution of conditioned air.
Lastly, consider the proximity to power sources and drainage options, which can impact the installation process. Selecting the ideal location not only contributes to the immediate comfort of your space but also influences the long-term functionality of your mini split heat pump.
Selecting the Proper Size
When it comes to installing a mini split heat pump, selecting the proper size is crucial for achieving optimal performance and energy efficiency. A unit that is too small may struggle to adequately cool or heat your space, while one that is too large can lead to short cycling, resulting in increased energy costs and uneven temperature control.
To determine the right size for your mini split heat pump, it is essential to calculate the heating and cooling load of the area you wish to condition. This calculation takes into account factors such as:
- Room Size: Measure the square footage of the space.
- Insulation: Consider the quality of insulation in your walls and ceilings.
- Sunlight Exposure: Note how much direct sunlight the room receives.
- Occupancy: Factor in the number of people regularly using the space.
Once you’ve gathered this information, you can use a BTU (British Thermal Unit) calculator to find the proper size of your mini split system. Typically, a mini split requires about 20 BTUs per square foot of living space, but this varies based on the above factors. Don’t hesitate to consult wit
Assembling the Necessary Tools
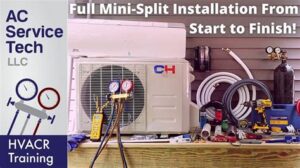
When it comes to installing a mini split heat pump, having the right tools is essential to ensure a smooth and efficient installation process. Before you begin, take a moment to gather the necessary equipment. Below is a list of the basic tools you’ll need:
- Refrigerant Gauges: For measuring the pressure of the refrigerant.
- Torque Wrench: To ensure that all fittings are tightened to the manufacturer’s specifications.
- Drill and Bits: Essential for making holes in the wall for piping and mounting brackets.
- Level: To ensure the indoor and outdoor units are installed perfectly straight.
- Pipe Wrenches: For securing and adjusting the refrigerant lines.
- Wire Strippers: To prepare electrical connections.
In addition to these tools, it’s crucial to wear suitable safety gear throughout the installation. This includes gloves, goggles, and possibly a hard hat, especially when working on roofs or tall ladders. Using the right tools not only speeds up the installation process but also enhances your overall safety.
Before you proceed with the installation, double-check that you have all the necessary tools on hand. Organizing your workspace will make the tasks ahead easier and more efficient. Each task may require different tools, so having them nearby will help maintain a smooth workflow.
Finally, consider consulting the manufacturer’s manual or instructions for any additional tools specific to your model. Every mini split heat pump may have unique requirements, and being well-prepared will ensure a successful installation.
Connecting the Indoor Unit
Connecting the indoor unit of a mini split heat pump is a critical step in the installation process. This unit is responsible for blowing conditioned air into your space, so making sure it’s connected properly is essential for optimal performance.
Before you start, ensure that you have the necessary tools handy, including a refrigerant line, electrical wiring, and a drain line. You will also need to consult the installation manual for specific instructions tailored to your unit. Usually, the process involves the following steps:
- Mounting the indoor unit: Secure the mounting bracket on the wall at the desired height, making sure it’s level.
- Connecting refrigerant lines: Use the provided lines to connect the indoor unit to the outdoor unit. Make sure to tighten the fittings properly to prevent leaks.
- Connecting electrical wiring: Follow the wiring diagram provided with your unit to connect the electrical wires securely.
- Drain line installation: Attach a PVC or flexible drain line to ensure proper water drainage from the indoor unit.
After completing these steps, it’s crucial to check all connections for any signs of leaks or loose fittings. A proper installation will ensure the longevity and efficiency of your mini split heat pump system.
Testing and Troubleshooting
After successfully installing a mini split heat pump, the next crucial step is testing its functionality and performing necessary troubleshooting. This ensures that the system operates as intended and provides optimal heating or cooling for your space.
Initially, check the power supply to ensure that the unit is receiving electricity. It’s important to verify that the circuit breaker is functional and the electrical connections are secure. Once everything is confirmed, turn on the heat pump to test its operations.
If the unit fails to start or doesn’t cool/heats properly, further troubleshooting steps may be required. Below is a simple checklist to guide you:
| Issue | Possible Solution |
|---|---|
| Unit not turning on | Check power connections and circuit breaker. |
| Not cooling/heating effectively | Inspect the air filters and ensure they’re clean. |
| Water leakage | Examine the drainage line for clogs or kinks. |
| Unusual noises | Ensure all components are secure and not vibrating. |
Document any issues and their solutions, as it may help in future maintenance. In case the problems persist, consulting a professional is advisable to ensure your mini split heat pump operates efficiently and effectively throughout the seasons.
Frequently Asked Questions
What is a mini split heat pump?
A mini split heat pump is a type of heating and cooling system that includes an outdoor compressor and one or more indoor air handlers. It efficiently transfers heat between the indoors and outdoors, providing both heating in winter and cooling in summer.
Why should I install a mini split heat pump?
Mini split heat pumps are energy efficient, offer zoning capabilities, are relatively easy to install, and provide constant temperature control. They can significantly reduce energy bills compared to traditional HVAC systems.
What tools do I need to install a mini split heat pump?
You’ll typically need a drill, screwdrivers, wrenches, a meter for electrical testing, a pipe cutter for refrigerant lines, and possibly a refrigerant gauge set, along with safety gear.
Do I need a professional to install my mini split heat pump?
While some homeowners may choose to install a mini split themselves, it’s recommended to hire a professional for proper installation to ensure safety, compliance with local codes, and optimal system performance.
How long does it take to install a mini split heat pump?
The installation process can vary but usually takes between 4 to 8 hours, depending on the complexity of the installation and the number of indoor units being installed.
What maintenance does a mini split heat pump require?
Regular maintenance includes cleaning or replacing filters every 1-3 months, checking refrigerant levels, ensuring outdoor units are clear of debris, and scheduling an annual professional inspection.
How do I determine the right size mini split heat pump for my home?
To determine the right size, you need to perform a heat load calculation, which considers factors like home size, insulation quality, and local climate. Consulting with a professional can ensure you choose the right capacity for efficient heating and cooling.
