Discover the benefits, components, and tools for DIY mini split installation. Follow our step-by-step guide and tips for a successful setup!Are you considering a mini split system for your home but hesitant about the installation process? Installing a mini split DIY can be a rewarding project that not only saves you money but also gives you a sense of accomplishment. In this blog post, we’ll explore the many benefits of tackling the installation yourself, from cost savings to personal satisfaction. We’ll break down the essential components of a mini split system so you can understand what you’re working with. Additionally, we’ll guide you through the necessary tools and materials you’ll need for a successful installation. With our step-by-step DIY guide and expert tips, you’ll be well-prepared to ensure your mini split system operates efficiently and effectively. Embrace the challenge and enhance your home’s comfort with this convenient heating and cooling solution!
Benefits of DIY Mini Split Installation
Opting for DIY mini split installation can be a rewarding experience for homeowners looking to manage their climate control more efficiently. One of the primary benefits is the potential for significant cost savings. By bypassing the need for professional installation services, you can save on labor costs, making the project more budget-friendly.
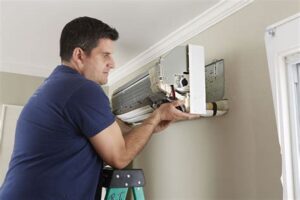
Another advantage of a DIY installation is the flexibility it provides. Homeowners can choose the location and orientation of the indoor and outdoor units according to their specific needs and preferences. This allows for a more personalized approach to heating and cooling your home, enhancing overall comfort.
Moreover, installing mini splits yourself gives you a greater understanding of the system and its components. This knowledge can be invaluable for future maintenance and troubleshooting, enabling you to effectively manage any issues that may arise. You beco
Understanding Mini Split Components
Installing a mini split system is a fantastic way to enhance your home’s heating and cooling efficiency. To successfully carry out a DIY installation, it is essential to understand the core components that make up a mini split system. This understanding will not only aid in the installation process but will also ensure that your system operates efficiently and lasts longer.
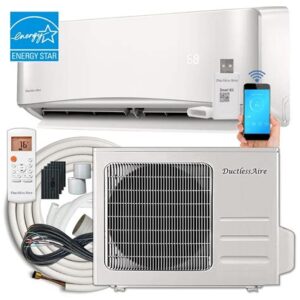
The primary components of a mini split system include:
| Component | Description |
|---|---|
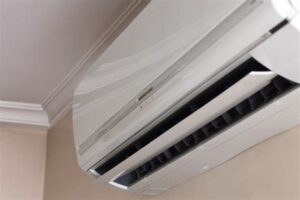
| Indoor Unit | The part that is installed inside your home. It distributes the heated or cooled air throughout the room. |
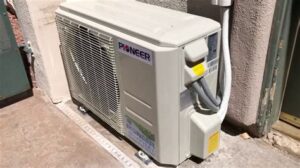
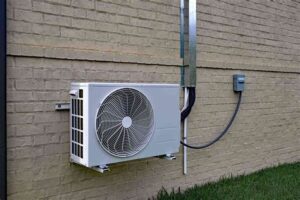
| Outdoor Unit | This unit is installed outside the home. It contains the compressor and the condenser, which are vital for heat exchange. |
| Refrigerant Lines | These copper lines connect the indoor and outdoor units, allowing refrigerant to flow between them. |
| Drain Line | This line removes condensation from the indoor unit to prevent water damage. |
| Thermostat | A device that allows you to set and control the temperature for comfort. |
Understanding these components will equip you with the knowledge needed for your DIY mini split installation. You’ll know exactly where each part goes and its function, ultimately leading to a smoother installation process. As you prepare for your project, make sure to familiarize yourself with each part and how they work together for optimal performance.
By having a solid grasp of the mini split components, you can troubleshoot potential issues and perform maintenance tasks with confidence. This preparation ensures that your mini split system serves you well for years to come.
DIY Installation Tools and Materials
When it comes to DIY installation of a mini-split system, having the right tools and materials is crucial for a successful project. Below is a list of essential items you need to gather before starting your installation.
| Tool/Material | Description |
|---|---|
| Refrigerant Gauges | For measuring the pressure in the refrigerant lines during the installation process. |
| Vacuum Pump | Essential for removing air and moisture from the refrigerant lines to ensure optimal performance. |
| Pipe Wrench | Used for tightening and loosening various components within the refrigerant system. |
| Drill and Bits | Required for making holes in walls or ceilings for piping. |
| Level | To ensure that both the indoor and outdoor units are installed correctly and evenly. |
| Screwdrivers | For securing panels and connections on the mini-split units. |
| Insulation Tape | To wrap pipes and ensure that no heat is lost in the refrigerant lines. |
| Safety Equipment | This includes gloves and goggles to protect yourself during the installation process. |
In addition to these tools, you’ll also need the following materials:
- Refrigerant Lines: Ensure you purchase correctly sized lines for your system.
- Mounting Brackets: Necessary for securely attaching the indoor and outdoor units to walls.
- Drain Pipe: To ensure proper drainage of condensate from the indoor unit.
- Electrical Wiring: Make sure you have the right gauge and length for your setup.
Having all these tools and materials ready beforehand will save you time and effort, making your DIY installation process smoother and more efficient. With the right preparation, you can successfully install your mini-split system and enjoy the benefits of efficient heating and cooling in your space.
Step-by-Step DIY Installation Guide
Installing a mini split system can seem daunting, but with the right preparation and understanding of its components, it can be a rewarding DIY project. In this guide, we’ll walk you through the step-by-step process for successfully installing your own mini split system.
1. Gather Your Tools and Materials:
- Mini split system components (indoor and outdoor units)
- Refrigeration lines
- Electrical wire
- Drill with bits
- Level
- Stud finder
- Wrench set
- Vacuum pump
- Refrigerant gauges
- Screwdriver
- Safety gear (gloves, goggles)
2. Choose the Right Location:
Decide on the location for both the indoor and outdoor units. Ensure that they are placed on sturdy surfaces and have good clearance for airflow. The indoor unit should be installed on an exterior wall to allow for easier connection to the outdoor unit.
3. Mount the Indoor Unit:
Using a level, mark and drill holes for the mounting bracket on the wall. Secure the bracket with screws, and then hang the indoor unit. Don’t forget to drill a small hole for the refrigerant lines and drain line to pass through the wall.
4. Install the Outdoor Unit:
Place the outdoor unit on a concrete pad or mounting brackets. Make sure the unit is level and has adequate clearance from walls and other obstructions.
5. Connect the Refrigerant Lines:
Carefully connect the refrigerant lines from the indoor unit to the outdoor unit, ensuring all connections are tight and leak-free. Use a wrench to secure the fittings. Make sure not to bend the lines excessively.
6. Electrical Connections:
Run the electrical wiring from the indoor unit to the outdoor unit. Consult your mini split’s manual for specific wiring instructions. Always ensure that the power is turned off before making any electrical connections.
7. Vacuum the System:
Using a vacuum pump, evacuate the air from the refrigerant lines to prepare the system for operation. This step is crucial for ensuring that your mini split operates efficiently and effectively.
8. Charge the System:
After vacuuming, charge the system with refrigerant according to the manufacturer’s specifications. Check for any leaks during this process.
9. Test Your Installation:
Turn on the system and check if both the indoor and outdoor units are working properly. Listen for any unusual noises and ensure that air is circulating correctly.
This step-by-step guide will help you through the efficient installation of your mini split system while saving on labor costs. Remember to always prioritize safety and consult the manufacturer’s instructions whenever necessary.
Tips for Ensuring Proper DIY Installation
When embarking on the journey of DIY mini split installation, ensuring that you follow the right practices is crucial for achieving optimal performance. The following tips will help facilitate a successful installation process.
1. Read the Manual: Before you begin the installation process, it’s essential to thoroughly read the manufacturer’s manual that comes with your mini split system. This document contains specific guidelines and recommendations that are crucial for your particular unit, including electrical requirements and installation techniques.
2. Check Your Local Codes and Regulations: Before starting any installation, make sure to check your local building codes and regulations regarding HVAC systems. Certain areas may have specific requirements for electrical wiring or refrigerant handling, and being informed will help you avoid fines or issues in the future.
3. Prepare the Site Properly: Ensure that the installation site is clean and free of obstructions. Examine the wall where you will mount the indoor unit; it should be capable of supporting the unit’s weight and allow for proper airflow.
4. Gather the Right Tools: The right tools can make a significant difference in the installation quality. Common tools you will need include a screwdriver, drill, level, vacuum pump, and leak detector. Don’t forget to wear protective gear throughout the process.
5. Verify the Placement of the Outdoor Unit: The outdoor unit should be placed in a location that allows for adequate airflow and proper drainage. Ensure there’s sufficient space around the unit for maintenance access and to minimize noise disturbances.
By following these tips, you’ll significantly improve your chances of a successful DIY installation. A well-planned approach allows you to enjoy the benefits of your mini split system while ensuring safety and compliance.
Frequently Asked Questions
What tools do I need for a DIY mini split installation?
You’ll need basic tools like a refrigerant gauge set, wrenches, screwdrivers, a drill, and PVC or copper piping depending on your setup.
How do I select the right mini split system for my space?
Calculate the square footage of the area you want to cool or heat, and consult the manufacturer’s specs to find a system with the appropriate BTU rating.
Do I need a permit to install a mini split system?
It depends on your local regulations. Check with your city or county to see if a permit is required for HVAC installations.
How long does a mini split installation typically take?
A DIY installation can take anywhere from 4 to 8 hours, depending on your experience and the complexity of the setup.
What are the key steps in the installation process?
Key steps include choosing a location for the indoor and outdoor units, mounting the units, running refrigerant lines, electrical connections, and testing the system.
Can I install a mini split system myself or should I hire a professional?
While DIY installation is possible, hiring a professional can ensure the system is installed correctly and safely, especially if you’re not experienced in HVAC work.
How do I maintain a mini split system after installation?
Regular maintenance includes cleaning the filters, checking refrigerant levels, and scheduling professional servicing annually to ensure optimal performance.
