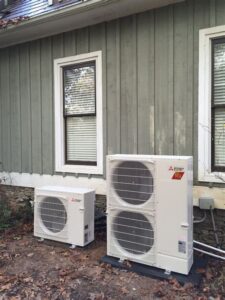
Learn how to install your refrigeration system by choosing the right location, evaluating electrical needs, selecting tools, and preparing your mounting area.Installing a mini split ceiling cassette can transform the comfort of your space by providing effective, energy-efficient heating and cooling solutions. However, the process requires careful planning and execution to ensure optimal performance and longevity of the unit. In this blog post, we will guide you through essential steps to consider before installation, starting with choosing the right location for your unit, followed by evaluating electrical requirements. We will also discuss selecting the proper tools and preparing the mounting area to facilitate a seamless installation experience. Finally, we’ll cover the crucial aspect of connecting the refrigerant lines, ensuring that your mini split system operates efficiently. Whether you’re a seasoned DIY enthusiast or taking on this project for the first time, our comprehensive guide will help you navigate the installation process with confidence.
Choosing the Right Location
When it comes to installing a mini split ceiling cassette, selecting the right location for installation is crucial to ensure optimal performance and efficiency. The ideal spot for a ceiling-mounted unit should facilitate effective air distribution throughout the room.
Here are some factors to consider when choosing the right location:
- Room Size: Make sure the area is adequately sized for the capacity of the unit. A unit that is too small won’t cool effectively, while one that is too large will cycle on and off too frequently.
- Airflow: Avoid placing the unit in corners, behind furniture, or in areas with obstructions. Free airflow is essential for efficient operation.
- Accessibility: Ensure that the unit is easily accessible for maintenance and repairs. This includes considering the proximity to access points for electrical connections and refrigerant lines.
Additionally, it is beneficial to consult the manufacturer’s guidelines for specific installation requirements, as they often provide insights into the best locations based on their unit’s design.
Ultimately, choosing the right location not only enhances the efficiency of your mini split ceiling cassette system but also prolongs its lifespan, making it a worthwhile investment.
Evaluating Electrical Requirements
When it comes to installing a mini split ceiling cassette, one of the crucial steps you must take is evaluating the electrical requirements. Ensuring that you have the proper electrical specifications in place will help guarantee efficient operation and safety of the system.
First, it’s essential to determine the voltage requirements of your mini split system. Most mini split units operate on either 120V or 240V circuits. Check the manufacturer’s specifications to find out which voltage your specific model requires. It’s important to have a dedicated circuit that meets these needs to prevent overloading other appliances.
Next, consider the amperage rating of your unit. This rating will inform you about the size of the circuit breaker needed. For most mini split systems, you’ll likely need a circuit breaker rated between 15A and 30A. Always adhere to the guidelines provided by the manufacturer to ensure safety and compliance with local building codes.
Lastly, ensure that the wiring is adequate for the unit’s power requirements. The wire gauge should correspond to the amperage of the system. For example, if your mini split requires 20A, you may need at least a 12-gauge wire to accommodate the load without overheating.
In summary, carefully evaluating electrical requirements is vital when installing a mini split ceiling cassette. By following the proper safety protocols and guidelines, you can ensure a smooth installation and years of reliable operation.
Selecting Proper Tools
When it comes to installing a mini split ceiling cassette, having the right tools is crucial for a successful installation. From cutting and securing the mounting brackets to connecting refrigerant lines, each step requires specific equipment to ensure efficiency and effectiveness.
The following is a list of essential tools you will need:
- Drill: Used for creating holes in walls or ceilings for mounting.
- Level: Ensures that the cassette is installed straight and does not cause unnecessary strain.
- Pipe Wrench: Essential for tightening and loosening refrigerant lines.
- Manifold Gauge Set: Used to measure the pressure of the refrigerant system.
- Vacuum Pump: Necessary for removing moisture and air from the refrigerant lines before charging the system.
In addition to these primary tools, make sure to have personal protective equipment such as gloves and goggles on hand for safety. The right tools not only facilitate a smoother installation process but also contribute to the longevity and performance of your mini split system.
Preparing the Mounting Area
Preparing the mounting area is a crucial step in the process of installing a mini split ceiling cassette. Taking the time to adequately prepare this area will not only ensure a successful installation but also optimize the efficiency and effectiveness of the system.
Start by ensuring that the ceiling is structurally sound. Check for any signs of water damage, mold, or weakness in the materials. It is also essential to verify that the ceiling can support the weight of the mini split ceiling cassette unit. If necessary, reinforce the ceiling with additional support beams or brackets.
Next, clear the area of any debris, furniture, or obstacles that might inhibit the installation process. A clean workspace not only makes for a smoother project but also helps in maintaining safety. Measure the dimensions of the mounting area to ensure the selected unit will fit appropriately. Finally, mark the location of any necessary electrical outlets and refrigerant lines to streamline your installation process.
Connecting the Refrigerant Lines
Connecting the refrigerant lines is a crucial step in the process of installing a mini-split ceiling cassette. Properly executing this step ensures that the system operates efficiently and provides optimal cooling or heating to your space. Below are the key considerations and steps involved in this process.
Before you begin, it’s essential to gather the right materials. You will need copper refrigerant lines, insulation, flare fittings, and sealant tape. Here’s a basic list of items you will require:
- Copper refrigerant lines (both liquid and gas lines)
- Insulation material for the refrigerant lines
- Flare fittings appropriate for the system
- Sealant tape to secure connections
When connecting the refrigerant lines, ensure that they are cut to the proper length and flared correctly—this is vital to prevent leaks. Start by connecting the liquid line and the suction line to the outdoor unit. Next, use the flare fittings to attach the lines to the indoor ceiling cassette unit. Always check the connections for tightness and consider using a leak detector to ensure there are no gas escapes.
Remember, maintaining a proper slope of about 1% in the lines is essential for draining any condensation that may accumulate. This practice also aids in the efficient functioning of your mini-split system.
Frequently Asked Questions
What is a mini split ceiling cassette?
A mini split ceiling cassette is a type of ductless air conditioning system that is installed in the ceiling, providing efficient cooling and heating while being discreet and unobtrusive in design.
What are the benefits of using a mini split ceiling cassette?
Benefits include energy efficiency, ease of installation, reduced noise levels, individual zone control, and space-saving design, making them ideal for both residential and commercial spaces.
How do you install a mini split ceiling cassette?
Installation involves selecting the appropriate location, mounting the unit securely to the ceiling, connecting refrigerant lines, and electrical wiring, as well as ensuring proper drainage for condensate water.
What tools are needed for the installation of a mini split ceiling cassette?
Common tools include a drill, level, keyhole saw, wrenches, screwdrivers, refrigerant gauges, and electrical tools to handle wiring connections.
Is professional help recommended for installing a mini split ceiling cassette?
While experienced DIY enthusiasts can install them, it is recommended to hire a professional to ensure proper installation, adhere to local codes, and identify any potential issues.
How do you maintain a mini split ceiling cassette unit?
Regular maintenance involves cleaning the filters, checking for any air blockages around the unit, verifying refrigerant levels, and scheduling professional servicing at least once a year.
What is the average cost of installing a mini split ceiling cassette?
The average cost varies by location and complexity of installation, but typically ranges from $2,000 to $5,000, including equipment and labor.
