Learn how to install Pioneer mini splits with our guide on location selection, area preparation, unit connection, and system testing for optimal performance.Installing a Pioneer mini-split system can be a game-changer for enhancing your home’s heating and cooling efficiency. Whether you’re looking to create a comfortable climate in a single room or throughout your entire home, mini-splits offer a versatile solution that’s both energy-efficient and stylish. This blog post will guide you through the essential steps for a successful installation, ensuring you maximize the benefits of your new system. From understanding the components and features of Pioneer mini-splits to selecting the optimal location for both indoor and outdoor units, we’ll cover everything you need to know. Additionally, we’ll provide tips on preparing the installation area, connecting the units, and fine-tuning the system for peak performance. Let’s dive into the world of mini-splits and transform your living space into an oasis of comfort!
Understanding Pioneer Mini Splits
Pioneer Mini Splits are an innovative and efficient solution for heating and cooling your home or office. These systems consist of two main components: an indoor unit and an outdoor unit. The design of mini splits allows for flexible installation and optimal climate control in specific areas of a building.
One of the key benefits of Pioneer Mini Splits is their energy efficiency. Unlike traditional HVAC systems that rely on ducts to distribute air, mini split systems use a direct approach. This method not only saves energy but also minimizes heat loss. In fact, many models are equipped with advanced inverter technology, which adjusts the compressor speed based on the temperature needs, further enhancing their efficiency.
Moreover, Pioneer Mini Splits offer improved indoor air quality. Because these systems do not rely on ducts, they reduce the amount of dust, allergens, and pollutants that circulate in your home. Additionally, many units come with built-in filters that can be easily replaced or cleaned, ensuring a healthier living environment.
Whether you’re looking to install a new cooling system or replace an outdated one, understanding how Pioneer Mini Splits function and their advantages is crucial in making an informed decision. This knowledge will not only help you choose the right system but also ensure that your installation process goes smoothly.
Selecting the Right Location for Installation
When it comes to installing a Pioneer mini split, selecting the right location for both the indoor and outdoor units is crucial for optimal performance and efficiency. Proper placement can greatly impact the cooling and heating capabilities of your system.
Here are some essential factors to consider:
- Indoor Unit Placement: Choose a location that allows for even air distribution. Avoid placing the unit near heat sources, such as lamps or televisions, as these can affect the performance.
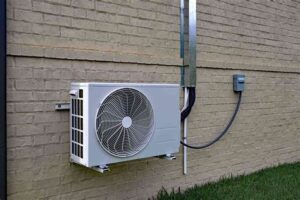
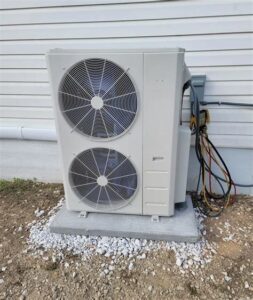
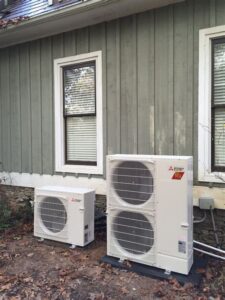
- Outdoor Unit Position: The outdoor unit should be installed in a well-ventilated area, away from obstructions like fences or walls that can block airflow.
- Noise Considerations: Think about the noise produced by the outdoor unit. Installing it farther away from bedrooms or common living spaces can enhance comfort.
- Accessibility: Ensure both units are accessible for maintenance and repairs. Space around these units can facilitate easy servicing.
Taking the time to evaluate these aspects during the planning stage wi
Preparing the Area for Installation
Before you start the installation of your Pioneer Mini Split system, it’s crucial to properly prepare the area. This will ensure optimal performance and longevity of your new heating and cooling system.
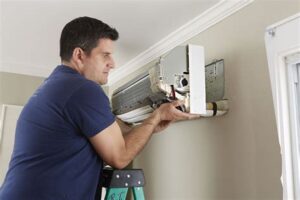
First, consider the location for your indoor unit. It should be installed in a central area of the room to provide even cooling and heating. Typically, it’s not advisable to place the unit directly in front of furniture or other obstacles. Instead, aim for an open wall surface that facilitates airflow. An appropriate height for the unit is usually around 7-8 feet above the floor.
Next, prepare the outdoor area as well. The outdoor unit requires ample space for air circulation. Ensure there’s a good clearance of at least 12 inches on either side and above, and 24 inches behind for maintenance access. Avoid any obstructions such as bushes or walls that could impede airflow around the unit. Lastly, double-check that there are no overhead obstacles such as power lines or tree branches that might interfere with the installation.
Once you’ve confirmed both locations are suitable, it’s essential to ensure that the surfaces are sturdy and can support the weight of the units. This preparation will not only facilitate a smoother installation but will als
Connecting the Indoor and Outdoor Units
Connecting the indoor and outdoor units of your Pioneer mini split system is a crucial step in ensuring its efficiency and effectiveness. The connection involves several key components, including refrigerant lines, a drainage pipe, and electrical wiring. This process requires careful attention to detail, as improper connections can lead to system failures or reduced performance.
Before starting the connection, it’s essential to have the right tools and materials on hand. You’ll typically need the following:
- Refrigerant lines
- Drainage pipe
- Electrical wiring (typically 14 or 16 gauge depending on the model)
- Insulation for the refrigerant lines
- Pipe wrenches and fittings
- Drill and drill bits for wall penetration
Once you have everything prepared, follow these steps to connect the indoor and outdoor units:
- Run the refrigerant lines and electrical wires through the wall or ceiling from the indoor unit to the outdoor unit.
- Connect the refrigerant lines to the respective ports on both units, ensuring they are tightened securely to prevent any leaks.
- Attach the drainage pipe from the indoor unit to ensure that any condensation is properly drained away.
- Connect the electrical wiring according to the manufacturer’s wiring diagram, ensuring correct polarity and secure connections.
- Finally, check all connections for any potential leaks or loose wires before testing the system.
After making all the connections, it’s essential to perform a pressure test to ensure that there are no leaks, followed by a vacuum to remove any moisture from the lines. This will help maintain
Testing and Fine-Tuning the System
Once you have successfully installed your Pioneer Mini Split system, the next critical step is testing and fine-tuning the system to ensure optimal performance and comfort. This stage is vital for verifying that everything is functioning correctly and has been properly set up.
Begin by turning on the system and selecting the desired temperature settings. Observe the indoor unit to ensure that it is running smoothly without any strange noises. It’s important to note if the air is blowing out at the correct temperature and speed. Monitor the outdoor unit as well and check for any unusual sounds or vibrations.
While the system is running, take the time to check all thermostat functions. Ensure that the remote control is communicating properly with the unit and that all modes (cooling, heating, and fan) are responsive. Adjust the settings and see if the temperature readings are accurate. If you notice any discrepancies, you may need to recalibrate the thermostat. Make any adjustments necessary to achieve the desired comfort levels in your space.
Finally, once you’ve verified everything is working as expected, consider conducting a maintenance check. This includes cleaning the filters, ensuring that the drain line is clear, and checking the refrigerant levels. Regular maintenance plays an essential role in the longevity and efficiency of your Pioneer Mini Split system.
Frequently Asked Questions
What are the key steps in installing a Pioneer mini split system?
The key steps include choosing the installation location, mounting the indoor and outdoor units, connecting the refrigerant lines, securing the electrical connections, and ensuring proper drainage.
Do I need a professional to install a Pioneer mini split?
While installation can be done by DIY enthusiasts, it’s recommended to hire a professional for safety, compliance with local codes, and to ensure the system operates efficiently.
What tools are required for installing a Pioneer mini split?
Essential tools include a drill, level, wrench set, screwdrivers, pipe bender, and any required electrical tools. A vacuum pump and manifold gauge set are also necessary for refrigerant line connections.
How long does it typically take to install a Pioneer mini split?
The installation process can take anywhere from 4 to 8 hours depending on the complexity of the setup and the experience level of the installer.
What precautions should I take when installing a mini split?
Ensure to wear safety gear, follow the manufacturer’s instructions closely, turn off electricity before starting, and check for any local building codes that may affect your installation.
Will I need to install a separate electrical circuit for my mini split?
Yes, most mini split systems require a dedicated electrical circuit to avoid overload and ensure safe operation, so consulting an electrician is advisable.
How do I maintain my Pioneer mini split after installation?
Regular maintenance includes cleaning the filters monthly, checking the refrigerant levels, ensuring the outdoor unit is free from debris, and scheduling professional maintenance at least once a year.
