Learn how to choose the right location, calculate BTU requirements, select the correct size, and set up your indoor and outdoor units effectively.Installing a MrCool mini split system can be a game-changer for your home’s heating and cooling efficiency. This flexible and energy-efficient option allows you to enjoy customized comfort all year round. However, to ensure optimal performance, it’s crucial to pay attention to specific installation details. From choosing the right location for both the indoor and outdoor units to accurately calculating the BTU requirement, every step counts. Selecting the correct size will help maximize efficiency and comfort, while proper setup is essential for function and longevity. In this guide, we’ll walk you through the essential steps for a successful installation, ensuring that your MrCool mini split system operates at peak performance while keeping your space cozy and welcoming. Let’s get started!
Choosing the Right Location
When it comes to installing a MrCool mini split system, one of the most critical steps is choosing the right location for the indoor and outdoor units. The placement can significantly affect the efficiency and effectiveness of your heating and cooling system.
Here are a few key considerations for selecting the optimal location:
- Indoor Unit: The indoor unit should be placed in a location where air can circulate freely throughout the room. Avoid placing it behind furniture or in corners that can obstruct airflow.
- Outdoor Unit: Ensure the outdoor unit is positioned in a well-ventilated area, away from obstructions like walls or large plants that could hinder air intake and exhaust. Make sure there’s enough space for maintenance.
- Distance Between Units: The distance between the indoor and outdoor units should not exceed the manufacturer’s guidelines. This distance is crucial for the system’s overall efficiency and performance.
In addition to these factors, it’s best to avoid locations where the units will be exposed to direct sunlight, extreme weather conditions, or excessive debris. Taking the time to carefully select the location can lead to a more efficient and effective mini split system.
Calculating the BTU Requirement
When installing a MRCOOL mini split system, one of the most critical factors to consider is calculating the BTU requirement. This measurement is essential for ensuring your system will efficiently cool or heat a space. The BTU, or British Thermal Unit, quantifies the amount of energy needed to raise the temperature of one pound of water by one degree Fahrenheit.
To accurately determine the BTU requirement for your space, you need to evaluate several factors, including:
- Room Size: Measure the length and width of the room to calculate the square footage.
- Ceiling Height: Consider the height of the ceilings, as higher ceilings require more BTUs.
- Insulation Quality: Well-insulated rooms retain temperature better and may require fewer BTUs.
Once you have this information, you can use a simple formula or an online BTU calculator to find the exact requirement. For example, a common formula is:
BTU = Area in Square Feet x BTU per Square Foot
Typically, you can estimate that you’ll need about 20 BTUs per square foot for cooling in a standard home. Adjust this number based on the factors mentioned earlier, as each room can vary significantly. By carefully calculating the BTU requirement, you can ensure your MRCOOL mini split system operates efficiently and maintains a comfortable climate in your space.
Selecting the Correct Size
When installing a MrCool mini split system, one of the most critical steps is selecting the correct size. If the system is too small, it will struggle to cool or heat your space effectively, leading to discomfort and increased energy bills. Conversely, if it’s too large, the system will cycle on and off frequently, which can also lead to inefficiencies and higher operational costs.
To determine the right size for your mini split, you need to consider several factors:
- Room Size: Measure the square footage of the space you wish to heat or cool. A general guideline is to have around 20 BTUs per square foot.
- Insulation Quality: The amount of insulation in your walls and roof will affect the heating and cooling needs. Better insulation helps retain temperature.
- Climate Zone: Your geographic location plays a significant role in determining the necessary BTUs. Warmer areas require more cooling power, while colder areas may need more heating capacity.
Use the following table as a rough estimate to choose the appropriate BTU based on room size:
| Room Size (sq ft) | BTU Requirement |
|---|---|
| 100-300 | 6000 – 12000 BTU |
| 300-600 | 12000 – 18000 BTU |
| 600-1000 | 18000 – 24000 BTU |
By carefully assessing room size, insulation quality, and climate, you can ensure that you select the correct size for your MrCool mini split system, leading to greater efficiency and comfort in your home.
Setting Up the Outdoor Unit
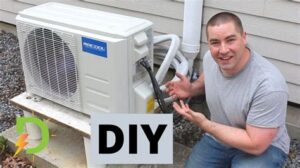
Installing a Mrcool mini split system involves several critical steps, and one of the most important is setting up the outdoor unit. Proper installation ensures optimal performance and longevity of your HVAC system. Here’s a guide to help you through the process:
| Step | Description |
|---|---|
| 1 | Choosing the Right Spot: Locate an area that is away from direct sunlight, rain, and debris. Ensure it’s on a solid, level surface to prevent any unnecessary vibrations. |
| 2 | Clearing the Area: Remove any obstacles that could block airflow. A clearance of at least 12 inches on all sides is essential for effective operation. |
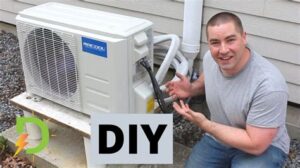
| 3 | Mounting the Unit: Secure the outdoor unit using mounting brackets that come with your Mrcool mini split system. Make sure it’s level to avoid potential issues with drainage. |
| 4 | Connecting the Lines: Properly connect the refrigerant lines and electrical wiring to the outdoor unit according to the manufacturer’s instructions. It’s important to double-check all connections. |
| 5 | Testing the Installation: Once everything is connected, turn on the system to ensure it’s working correctly. Check for any leaks or unusual noises that could indicate a problem. |
Following these steps will help ensure that your Mrcool mini split outdoor unit is set up properly, providing efficient heating and cooling for your spaces. Always refer to the specific installation manual for your model to ensure compliance with all safety standards and recommendations.
Additionally, consider local regulations and zoning laws before placing your outdoor unit. In some areas, there may be restrictions on the distance from property lines or other structures.
If you are not comfortable with any part of the installation process, it is always wise to consult with a professional HVAC technician to prevent any mishaps during installation.
Connecting the Indoor Unit
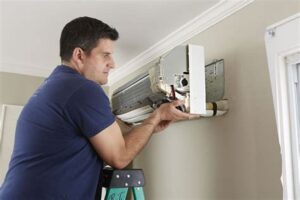
Connecting the indoor unit of your MRCOOL mini split system is a crucial step in ensuring optimal performance and energy efficiency. It’s essential to follow the manufacturer’s guidelines closely to avoid any issues. Before starting, make sure you have all the necessary tools and materials on hand.
Here are the general steps for connecting the indoor unit:
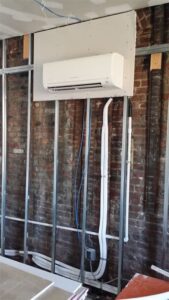
- Position the Indoor Unit: Choose a suitable location indoors, ideally on an interior wall. Ensure that there is adequate airflow around the unit.
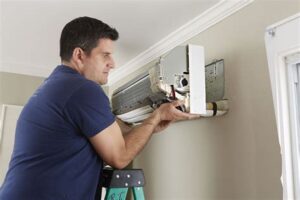
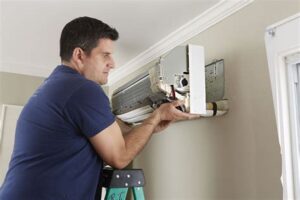
- Install the Mounting Bracket: Secure the mounting bracket to the wall using appropriate anchors and screws. Make sure it is level to avoid any operational issues.
- Connect the Refrigerant Lines: Carefully run the refrigerant lines through the wall and connect them to the indoor unit. Ensure there are no kinks or sharp bends.
- Electrical Connections: Connect the electrical wiring according to the wiring diagram provided in the installation manual. Ensure all connections are tight and secure.
- Install the Drain Line: It is crucial to install a condensate drain line, allowing any excess moisture to be effectively removed from the unit.
Once these steps are completed, double-check all connections for leaks and tighten any loose fittings. Power on the unit to test its functionality, ensuring cool air circulates properly. Taking the time to connect the indoor unit correctly will greatly enhance the performance and longevity of your MRCOOL mini split system.
In summary, connecting the indoor unit involves careful positioning, secure mounting, and precise connections. Proper installation can make a significant differen
Frequently Asked Questions
What tools are needed to install a MrCool mini split system?
You will typically need tools such as a drill, level, measuring tape, wrenches, screwdrivers, and a vacuum pump for the installation process.
Is it necessary to hire a professional to install a MrCool mini split?
While MrCool mini splits are designed for DIY installation, having prior experience with HVAC systems or seeking professional help can ensure proper installation and efficiency.
What is the first step in installing a MrCool mini split?
The first step is selecting the right location for both the indoor and outdoor units to ensure optimal airflow and efficiency.
How do you connect the indoor and outdoor units of a MrCool mini split?
You connect the indoor and outdoor units using the provided refrigerant lines, communication wires, and drainage lines, making sure to follow the installation manual’s specifications.
Are there any electrical requirements for installing a MrCool mini split?
Yes, you must ensure that the electrical system can handle the mini split’s load, using the correct circuit breaker and wiring, as specified in the installation manual.
How long does it typically take to install a MrCool mini split?
Installation time can vary based on experience, but it usually takes between 4 to 8 hours for a standard installation.
What are some maintenance tips for a MrCool mini split system after installation?
Regularly clean or replace air filters, ensure the outdoor unit is free of debris, and schedule professional maintenance every year to keep the system running efficiently.
