Learn how to install your HVAC system effectively with our comprehensive guide covering location, tools, preparation, connection, and testing for optimal performance.Installing a Mitsubishi mini split system can transform your home’s comfort levels, providing efficient heating and cooling tailored to your needs. Whether you’re looking to enhance a single room or an entire space, understanding the installation process is essential for achieving optimal performance. In this guide, we’ll walk you through each critical step, from choosing the best location for your units to gathering the necessary tools and preparing the installation area. You’ll learn how to connect the indoor and outdoor units seamlessly, ensuring a smooth operation, and how to program and test the system effectively. With careful planning and the right techniques, you can successfully install your Mitsubishi mini split and enjoy a refreshing indoor climate year-round. Let’s get started on your journey to a more comfortable home!
Choosing the Right Location
When it comes to installing a Mitsubishi mini split, choosing the right location for both the indoor and outdoor units is crucial for optimal performance and efficiency. The selected location can have a significant impact on the effectiveness of your heating and cooling system.
Here are some key factors to consider when determining the best locations for your mini split units:
- Indoor Unit Placement: Make sure to install the indoor unit in a central location, where it can distribute air evenly throughout the space. Avoid placing it behind furniture or in areas that block airflow.
- Outdoor Unit Accessibility: Ensure the outdoor unit is easily accessible for maintenance and repair. It shouldn’t be placed in areas where debris can accumulate, such as under trees or near garden beds.
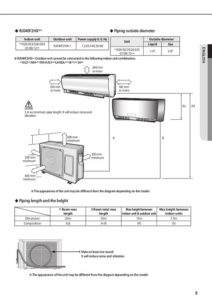
- Clearances: Both units require proper clearances for efficient airflow. The outdoor unit should have at least 12 inches of clearance on all sides, while the indoor unit should be at least a few inches from the ceiling to maximize performance.
By carefully selecting the locations of your indoor and outdoor units, you can enhance the overall efficiency and longevity of your Mitsubishi mini split system. Pay attention to these details, and your installation will set a solid foundation for comfort in your home.
Gathering the Necessary Tools
When it comes to installing a Mitsubishi mini split system, having the right tools at your disposal is essential for a smooth and efficient installation process. Below is a list of the necessary tools you’ll need to complete the installation:
| Tool | Description |
|---|---|
| Drill | Used for making holes in the wall for mounting the indoor and outdoor units. |
| Level | Ensures that the indoor and outdoor units are properly aligned. |
| Vacuum Pump | Required for removing air and moisture from the refrigerant lines. |
| Manifold Gauge Set | Used to measure the pressure in the refrigerant lines during installation. |
| Pipe Wrench | Essential for tightening and loosening the fittings on the refrigerant lines. |
| Electrical Tools | A combination of screwdrivers, wire strippers, and pliers for electrical connections. |
| Refrigerant Tubes | To connect the indoor and outdoor units, you’ll need the appropriate refrigerant tubes. |
In addition to the tools mentioned, it’s also wise to have safety equipment on hand. This includes gloves, goggles, and a hard hat to ensure you are protected during the installation process.
Carefully choosing and gathering these tools will not only make the installation more efficient but will also minimize the risk of damage to the mini split system or your home. Always ensure that you check your toolkit before starting the project to avoid any interruptions.
Remember, a well-prepared installer is likely to achieve better results. So take the time to gather all the necessary tools and safety equipment before you begin your Mitsubishi mini split installation.
Preparing the Installation Area
Before you begin the process of installing a Mitsubishi mini split system, it’s crucial to ensure that the installation area is properly prepared. This step not only makes the installation process smoother but also helps in the longevity and efficiency of the system.
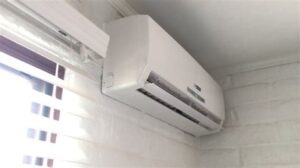
The first aspect to consider is the location where you plan to install the indoor unit. The unit should be placed away from direct sunlight and heat sources, and ideally, it should be close to an exterior wall for easier connection to the outdoor unit. It’s also essential to have a clear space of at least 6 inches around the indoor unit to facilitate airflow.
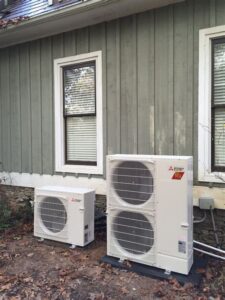
Next, you need to assess the outdoor installation area. Ensure it is free from obstructions like trees, vines, or any other potential blockages. The outdoor unit should be placed on a stable surface and should be leveled properly. Additionally, consider the following items:
- Accessibility: Ensure there is enough space around the unit for maintenance and repairs.
- Drainage: Check that the area allows for proper drainage to avoid water accumulation.
- Safety: Ensure that the area is safe and complies with local codes and regulations.
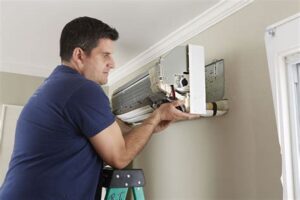
Finally, prep the wall for mounting the indoor unit. Make sure to locate and mark the studs in the wall, and check for any electrical wires or plumbing lines that could interfere with drilling. By taking these preliminary steps, you can set yourself up for a successful Mitsubishi mini split installation.
Connecting the Indoor and Outdoor Units
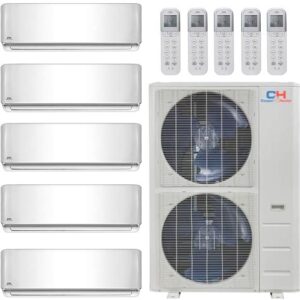
Connecting the indoor and outdoor units of a Mitsubishi mini split system is a crucial step in the installation process. This connection is vital for the system to operate efficiently and effectively. Before you start, ensure you have gathered all the necessary tools and materials, including refrigerant lines, electrical wiring, and a vacuum pump.
To begin with, you will need to attach the refrigerant lines to both the indoor and outdoor units. The larger line is the suction line, while the smaller one is the liquid line. It is essential to ensure proper connections to prevent any refrigerant leaks. Use a pipe wrench to tighten these connections as needed.
Next, connect the drain line from the indoor unit to the appropriate drainage location. This ensures that any condensate from the system flows away from your home. Following that, you will need to run the electrical wiring between the two units. Be sure to consult the manufacturer’s guidelines for the correct wiring scheme and voltage requirements.
| Connection Type | Description |
|---|---|
| Refrigerant Lines | Connect the suction and liquid lines carefully, ensuring they’re tight. |
| Drain Line | Install the drain line to facilitate condensate drainage. |
| Electrical Wiring | Follow the manufacturer’s electrical guidelines for safe operation. |
Once all connections are secure, double-check each line for any signs of wear or improper fittings. This will help ensure that your Mitsubishi mini split operates without issues. Finally, prepare to fill the system with refrigerant and conduct tests to confirm everything is working as expected.
Programming and Testing the System
Once you have successfully installed your Mitsubishi mini split system, the next critical step is programming and testing the system. This process ensures that your system operates efficiently and provides the desired temperature control in your space.
Before you begin programming the system, ensure that all connections are secure and that there are no leaks. Familiarize yourself with the user manual, which provides detailed instructions on programming features such as temperature settings, timer functions, and switch settings. Here’s a list of the programming steps you should follow:
- Turn on the system: Power on the indoor unit and remote controller.
- Select the mode: Choose the appropriate operation mode (cooling, heating, etc.) depending on your needs.
- Set the temperature: Adjust the desired temperature using the remote control.
- Program timers: Utilize the timer feature to schedule start and stop times for your system.
- Test the remote: Ensure the remote control is functioning properly by testing all buttons.
After programming, it is important to test the system thoroughly. Start by observing the airflow from the indoor unit and checking if the temperature matches your setting. Additionally, listen for any unusual noises that might indicate a problem. It’s advisable to run the system for a few hours in both heating and cooling modes to evaluate its performance and ensure it meets your expectations.
Frequently Asked Questions
What is a Mitsubishi mini split system?
A Mitsubishi mini split system is a type of heating and cooling system that consists of an outdoor condenser unit and one or more indoor air-handling units, allowing for efficient temperature control in a specific area.
What tools are needed for installing a Mitsubishi mini split?
You will need tools such as a drill, wrenches, screwdrivers, a level, a vacuum pump, refrigerant gauge set, and possibly a soldering torch for the installation of the line set.
How do I choose the right size Mitsubishi mini split for my space?
To choose the right size, calculate the square footage of the area you want to heat or cool and use the BTU (British Thermal Unit) sizing guidelines recommended by the manufacturer.
What is the importance of proper placement for the indoor unit?
Proper placement of the indoor unit is crucial for efficient airflow, avoiding obstructions, and ensuring balanced temperature distribution throughout the room.
Can I install a Mitsubishi mini split myself?
While it’s possible to install a Mitsubishi mini split yourself if you have the necessary skills, it’s often recommended to hire a professional to ensure proper installation and compliance with local codes.
What maintenance is required for a Mitsubishi mini split system?
Regular maintenance includes cleaning or replacing filters, checking power connections, inspecting the outdoor unit for debris, and having a professional check the refrigerant level annually.
How energy-efficient are Mitsubishi mini split systems?
Mitsubishi mini split systems are known for their energy efficiency, with many models featuring SEER (Seasonal Energy Efficiency Ratio) ratings above 20, leading to lower energy bills compared to traditional HVAC systems.
