Learn how to install mini split systems with our step-by-step guide, covering location, tools, and troubleshooting tips for optimal performance.Are you considering the cost-effective and efficient option of installing a mini split system in your home? With their ability to provide both heating and cooling in a compact unit, mini splits are becoming increasingly popular among homeowners. While hiring a professional might seem like the easiest route, many are finding that installing a mini split themselves is entirely feasible with some preparation and guidance. In this blog post, we’ll walk you through the essentials of understanding mini split systems, selecting the right installation location, gathering the necessary tools and materials, and following a step-by-step installation process. Plus, we’ll cover important tips for testing and troubleshooting your new system to ensure optimal performance. Let’s dive into the world of DIY mini split installation!
Understanding Mini Split Systems
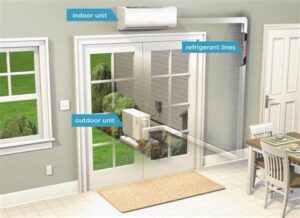
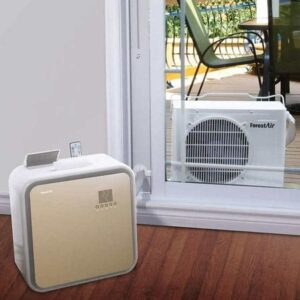
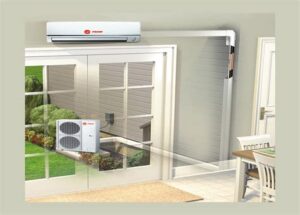
When it comes to heating and cooling options for your home, mini split systems have gained significant popularity due to their versatility and energy efficiency. A mini split system consists of two main components: an indoor unit and an outdoor unit. The indoor unit is responsible for conditioning the air in your living space, while the outdoor unit houses the compressor and condenser.
One of the key advantages of mini splits is their zoning capability. This means you can control the temperature in different rooms individually, providing both comfort and savings on energy costs. Typically, you will find units that can handle multiple indoor units from a single outdoor unit, making it an excellent solution for larger spaces or multi-room setups.
Another important aspect of mini split systems is their energy efficiency. They utilize inverter technology that adjusts the speed of the compressor based on the heating or cooling demand, which not only enhances comfort but also reduces energy consumption. In fact, many mini split systems have high SEER (Seasonal Energy Ef
Choosing the Right Location
When it comes to installing a mini split system, selecting the right location for both the indoor and outdoor units is crucial for optimal performance. This choice can significantly impact the system’s efficiency, comfort level, and longevity.
Here are some key factors to consider when choosing the location for your mini split system:
- Indoor Unit Placement: Ideally, the indoor unit should be placed in a central location, away from walls and obstructions. This allows for even air distribution across the room.
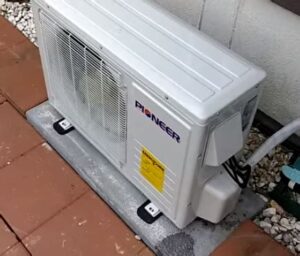
- Outdoor Unit Positioning: The outdoor unit should be situated away from obstructions such as fences or bushes, ensuring sufficient airflow. It’s also advisable to place it on a solid foundation to reduce vibrations.
- Access for Maintenance: Ensure that there’s enough space around both units for easy maintenance and servicing. This will extend the lifespan of your system and minimize hassle during repairs.
Considering these factors will not only improve the effectiveness of your mini split system but also enhance your comfort and satisfaction in the long run. Make sure to account for local climate conditions as they may also influence your placement decision.
Ultimately, choosing the right location will set the tone for your mini split installation experience, ensuring you reap th
Gathering Necessary Tools and Materials
Before you embark on the journey of installing a mini split system, it’s essential to gather all the necessary tools and materials. Having everything on hand will ensure a smoother installation process, preventing unnecessary delays. Below is a list of essential tools you will need:
| Tool/Material | Purpose |
|---|---|
| Drill | For making holes in walls and securing the indoor unit. |
| Level | To ensure that the outdoor and indoor units are installed correctly. |
| Line Set | Required to connect the indoor and outdoor units. |
| Vacuum Pump | Used to remove moisture and air from the refrigerant lines. |
| Refrigerant | The working fluid that circulates in the system. |
| Pipe Insulation | To insulate the refrigerant lines for better energy efficiency. |
| Hangers and Mounting Brackets | To securely attach the outdoor unit to a wall or stand. |
| Electrical Tools | Wires, connectors, and possibly a multimeter for electrical connections. |
Once you have the above tools and materials, double-check everything to ensure nothing is left out. Additionally, consider wearing proper safety gear such as gloves and goggles to protect yourself during the installation.
Having a well-organized workspace will make your mini split installation more efficient. Take the time to lay out your tools and materials in an orderly fashion to facilitate easy access during the installation process.
With your tools and materials ready, you are well on your way to successfully installing your new mini split system!
Step-by-Step Installation Process
Installing a mini split system can seem daunting, but breaking it down into manageable steps makes the process much easier. Here’s a clear, step-by-step guide to help you through the installation process.
Step 1: Choosing the Right Location
Before you start, select an ideal location for both the indoor and outdoor units. Ideally, the indoor unit should be mounted high on the wall to allow for optimal airflow, while the outdoor unit should be placed on a stable base and away from obstructions.
Step 2: Gathering Necessary Tools and Materials
You will need several tools and materials to complete your installation:
- Drill with bits
- Measuring tape
- Pipe wrenches
- Level
- Electrical tools (screwdrivers, wire strippers)
- Refrigerant lines
- Mounting bracket and screws
Ensure you have everything on hand before getting started.
Step 3: Installing the Wall Bracket
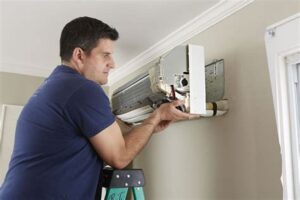
Use the mounting bracket to install the indoor unit on the wall. Make sure it is leveled correctly to prevent any issues later. Secure it firmly with screws, taking care to anchor it in the wall studs.
Step 4: Drilling a Hole for Refrigerant Lines
Drill a hole through the wall to allow the refrigerant and condensation drain lines to pass through. The hole should slope slightly downward to enable proper drainage from the indoor unit.
Step 5: Connecting the Refrigerant Lines
Carefully connect the refrigerant lines from the outdoor unit to the indoor unit. Make sure to follow the manufacturer’s instructions regarding tightening the fittings to avoid leaks.
Step 6: Wiring the Units
Now, it’s time to connect the electrical wiring. This involves connecting the power cord to the circuit breaker and ensuring that all connections are secure according to the electrical specifications provided.
Step 7: Finalizing the Installation
Double-check all connections, and then attach the cover panels. Once everything is securely in place, return to the outdoor unit and connect the power supply. Make sure it is grounded properly.
Step 8: Testing the System
Finally, turn on the mini split system to test it. Check for proper operation and ensure that there are no refrigerant leaks or unusual noises. Adjust settings as needed to ensure optimal performance.
By following these steps, you can successfully install your own mini split system. Remember to follow all safety guidelines throughout the process, and consult the manufacturer’s manual for specific installation instructions.
Testing and Troubleshooting the System
After successfully installing your mini split system, the next step is to perform thorough testing and troubleshooting to ensure everything operates smoothly. Testing your system not only confirms that it is functioning correctly but also allows you to identify any potential issues that may arise later on.
Here are some essential steps to effectively test and troubleshoot your mini split system:
- Check the Thermostat: Verify that the thermostat is set to the desired temperature and operating mode.
- Observe Airflow: Ensure that both the indoor and outdoor units are delivering proper airflow without obstructions.
- Inspect Drain Lines: Examine the condensate drain line for any clogs that may hinder proper drainage.
- Listen for Unusual Noises: Be attentive to any strange sounds coming from the unit that may indicate mechanical issues.
- Monitor Temperature Changes: Use a thermometer to check if the system is adequately cooling or heating the room as expected.
If you encounter any problems, here are some common troubleshooting tips:
If your system is not cooling properly, ensure that the filters are clean, the refrigerant levels are appropriate, and the outdoor unit is not obstructed.
By following these guidelines, you can ensure that your mini split system operates efficiently and provides optimal comfort. Regular checks and maintenance will prolong the lifespan of your system and keep it running smoothly.
Frequently Asked Questions
What is a mini split system?
A mini split system is a type of heating and cooling system that is designed to provide energy-efficient climate control in individual rooms or zones without the need for ductwork.
What tools do I need for installing a mini split system?
You will typically need a drill, level, wrenches, screwdrivers, a vacuum pump, refrigerant gauges, and a multimeter to install a mini split system.
Are there any prerequisites before installing a mini split myself?
Yes, it’s important to familiarize yourself with local building codes, obtain necessary permits, and understand the electrical and plumbing requirements for your specific installation.
Is it difficult to install a mini split system on my own?
While it is possible to install a mini split system yourself, it requires technical skills, careful planning, and attention to detail. If you are not confident in your DIY abilities, hiring a professional might be a better option.
What are some common mistakes to avoid during installation?
Common mistakes include improperly sizing the system, poor placement of the indoor and outdoor units, neglecting insulation, and incorrect electrical connections.
How long does the installation process take?
The installation process for a mini split system can take anywhere from a few hours to a full day, depending on the complexity of the setup and your experience level.
What maintenance does a mini split system require after installation?
Regular maintenance for a mini split system includes cleaning or replacing air filters, checking for refrigerant leaks, ensuring the drainage system is clear, and scheduling professional inspections annually.
