Learn how to successfully mount an indoor unit by choosing the right location, assessing wall structure, gathering tools, preparing your area, and executing the installation.Installing a mini split on an interior wall can be a game-changer for enhancing the comfort of your home. With the ability to provide efficient heating and cooling, mini splits offer versatility and energy savings. However, the installation process requires careful consideration and attention to detail to ensure optimal performance and reliability. In this blog post, we’ll guide you through essential steps: from choosing the right location for your indoor unit to assessing the wall structure and preparing your work area. We’ll also cover the tools you’ll need and walk you through the mounting process. Whether you’re a seasoned DIY enthusiast or a first-time installer, this comprehensive guide will empower you to tackle your mini split installation with confidence and ease. Let’s get started!
Choosing the right location
When it comes to installing a mini split on an interior wall, one of the most critical steps is choosing the right location. This decision can greatly affect the efficiency and performance of your system. Here are some factors to consider:
- Room size and layout: Ensure the mini split is installed in a location that allows for optimal air circulation throughout the room.
- Distance from the ceiling: Ideally, the unit should be mounted at least 6-8 inches below the ceiling to allow for proper airflow.
- Interior obstacles: Avoid areas with furniture, decor, or other objects that might obstruct airflow.
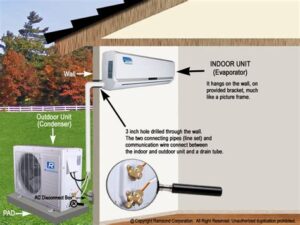
Additionally, consider the proximity to a power source and the outdoor unit, which is vital for the unit’s operation.
It’s also important to evaluate the wall’s structural integrity. Ensure that the wall can support the weight of the mini split system without compromising stability.
Finally, think about the aesthetic aspect. The location should not only be practical but also blend well with your interior design.
Assessing the wall structure
When installing a mini split on an interior wall, the first crucial step is assessing the wall structure. This process ensures that the wall can support the weight and functionality of the unit. Different types of walls, such as drywall, brick, or plaster, require different considerations.
To begin, check whether the wall is made of studs that are parallel and properly spaced. This is essential, as the mounting bracket for the indoor unit should be securely attached to these studs. A stud finder can make this task easier by locating the hidden beams behind the wall.
Next, evaluate the wall’s surface for any damages or irregularities. Cracks, moisture issues, or any signs of deterioration may compromise the installation’s integrity. It’s best to ensure a clean, stable surface to guarantee safe mounting for the mini split system.
Finally, consider the overall layout of the room. The wall should provide an adequate location for the split unit in terms of air circulation and accessibility for maintenance. By thoroughly assessing the wall structure, you can set a solid foundation for a successful mini split installation.
Gathering the necessary tools
Before beginning the process of installing a mini-split system on an interior wall, it is crucial to ensure you have all the necessary tools at your disposal. Gathering the right tools not only simplifies the installation process but also ensures safety and efficiency. Below is a list of essential tools and materials you will need:
- Drill: A power drill is vital for making holes in the wall for mounting brackets and piping.
- Stud Finder: This tool helps locate wall studs, ensuring that you mount the unit securely.
- Level: A level will ensure that your indoor unit is properly aligned for optimal performance.
- Measuring Tape: Measuring the area accurately will help in positioning the unit correctly.
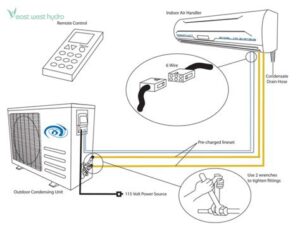
- Wrench Set: Required for tightening and securing fittings and connections.
- Screwdriver Set: For attaching brackets and mounting the indoor unit.
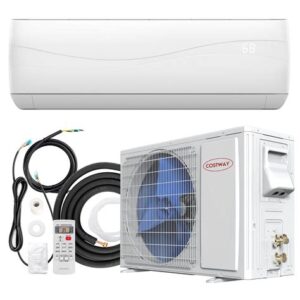
- Piping and insulation kits: Essential for connecting the indoor and outdoor units.
- Safety Gear: Protective eyewear and gloves to ensure safety during installation.
It’s a good practice to check your inventory before starting the installation. Having everything you need within arm’s reach will save you time and frustration. In some cases, you may also want to have a power saw and additional sealant on hand, depending on the specifics of your installation scenario.
In addition to physical tools, it’s advised to have a good set of installation instructions handy. Whether you’re following a manual or a tutorial, understanding the steps is equally important as having the right tools to execute them. Local codes and requirements may also call for specif
Preparing the work area
Before installing a mini split system on an interior wall, it’s crucial to thoroughly prepare the work area. This preparation will ensure a smooth installation process and help avoid any potential issues that could arise later.
Start by clearing the area of any furniture, decorations, or obstacles. This will not only give you ample space to work but also protect your items from dust and debris that may occur during installation. Make sure the floor is clean and level to avoid any mishaps as you maneuver your tools.
Additionally, you should identify any electrical outlets or connections that may be required for the indoor unit. Ensure that these are accessible and verify that the circuit can handle the load of the mini split system. It’s also wise to have a power extension cord handy if needed. This initial preparation is essential for a hassle-free installation experience.
Mounting the indoor unit
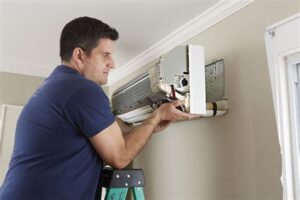
After you’ve completed the necessary preparations and gathered all the required tools, the next crucial step in installing a mini split on an interior wall is mounting the indoor unit. Proper installation is essential for optimal performance and ensuring longevity of your mini split system. Here’s a detailed guide to help you through this process.
Before proceeding, ensure that you have all the tools you need, including a drill, level, screws, and a bracket specifically designed for your mini split model. Once you are ready, follow these steps to mount the indoor unit:
- Select the mounting location: Choose a spot that allows for adequate airflow and accessibility for maintenance.
- Attach the mounting bracket: Using a level, secure the bracket to the wall with appropriate screws. Ensure that it can support the weight of the indoor unit.
- Secure the indoor unit: Align the indoor unit with the mounted bracket and push it into place, ensuring that it is firmly secured.
- Check the unit’s position: Make sure the indoor unit is level and stable. Adjust as necessary to avoid any operational issues.
Once the indoor unit is securely mounted, it’s important to connect the refrigerant lines and electrical wiring as per the manufacturer’s instructions before proceeding to the next phase of installation. Taking the time to mount the unit properly will ensure your system func
Frequently Asked Questions
What tools do I need to install a mini split on an interior wall?
You will need a drill, level, stud finder, measuring tape, wrench set, and a screwdriver.
How do I choose the right location for my mini split indoor unit?
The indoor unit should be installed on an interior wall that allows for optimal airflow and is away from direct sunlight and drafts.
What are the steps for mounting the mini split indoor unit?
Begin by marking the location, drilling holes for the mounting bracket, securing the bracket, and then attaching the indoor unit to the bracket.
Do I need professional help for electrical work during installation?
It is recommended to hire a licensed electrician for electrical connections to ensure safety and compliance with local codes.
How do I connect the refrigerant lines in a mini split?
Carefully run the refrigerant pipes from the indoor unit to the outdoor unit, ensuring they are insulated and securely connected to prevent leaks.
What should I do after the installation to ensure it works properly?
After installing, check for leaks, ensure the remote controls function, and test the system by running it in heating and cooling modes.
Are there any maintenance tips for my mini split after installation?
Regularly clean the air filters, check for blockages in the drainage, and schedule annual professional maintenance to keep the system in optimal condition.


