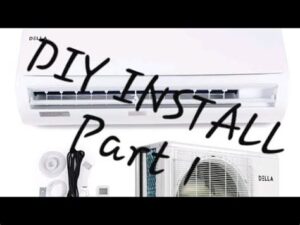
Learn how to choose the right heat pump location, model, and ensure proper installation and electrical connections for optimal functionality.When it comes to creating a comfortable indoor climate year-round, a mini split heat pump stands out as an efficient and versatile solution. Whether you’re looking to cool down during the sweltering summer months or keep warm in the chilly winter, these systems offer customized temperature control without the complications of extensive ductwork. However, successful installation hinges on several crucial factors. From choosing the right location and selecting the appropriate model to understanding the installation process and ensuring the electrical connections are secure, each step plays a vital role in the system’s overall performance. In this blog post, we’ll guide you through the essential aspects of installing a mini split heat pump, ensuring that you can effortlessly enjoy its benefits in your home.
Choosing the right location
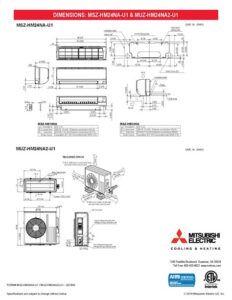
When it comes to installing a mini split heat pump, one of the most crucial steps is choosing the right location for both the indoor and outdoor units. Proper placement ensures optimal efficiency and performance, while also enhancing the unit’s longevity. Consider the following factors when selecting a location:
- Indoor Unit Placement: Install the indoor unit in a central location to evenly distribute heated or cooled air. Avoid corners and hidden areas.
- Outdoor Unit Clearance: Ensure that the outdoor unit has sufficient clearance for airflow. Ideally, there should be at least 12 inches of space around the unit.
- Sunlight Exposure: Minimize direct sunlight on the outdoor unit to prevent overheating. Shade from trees or awnings can be beneficial.
Another important consideration is the proximity of the indoor unit to the outdoor unit. Keeping the two units close together can reduce refrigerant line length, which in turn can improve efficiency and reduce installation costs.
Lastly, always check local building codes and regulations regarding the installation of mini split heat pumps, as these may impose restrictions or guidelines on placement. Taking the time to carefully evaluate the installation locations will lead to enhanced performance and comfort for your home.
Selecting the appropriate model
When it comes to installing a mini split heat pump, selecting the appropriate model is crucial for ensuring optimal performance and comfort in your space. A wide variety of models are available on the market, and making the right choice can significantly impact your energy efficiency and heating or cooling needs.
Firstly, consider the size of the space you want to heat or cool. Mini split systems are available in various capacities measured in BTUs (British Thermal Units). It’s essential to calculate the required BTU output based on the area of your room, the ceiling height, insulation quality, and climate zone. An undersized unit will struggle to maintain the desired temperature, while an oversized unit may cycle on and off too often, leading to humidity issues.
Next, evaluate the features that different models offer. Some mini split heat pumps come with advanced features like variable-speed compressors, multi-zone capabilities, and smart home integration. Investing in a model with energy-efficient features can lead to significant savings on your energy bills, whereas models equipped with advanced filtration can improve indoor air quality. Review the specifications and consider what best fits your heating and cooling requirements.
Finally, always check the manufacturer’s warranty and support options. A reliable brand will usually provide a comprehensive warranty and accessible customer support, giving you peace of mind in your investment. Take your time to research and compare different models, as this decision will lay the groundwork for effective mini split heat pump performance.
Understanding the installation process
Installing a mini split heat pump involves several critical steps to ensure optimal performance and longevity. Understanding the installation process can help you avoid common pitfalls and ensure your system operates efficiently. Below, we outline the key components involved in the installation of a mini split heat pump.
1. Preparing the Installation Site: Before you begin, it’s essential to select an appropriate location for both the indoor and outdoor units. Make sure the area is clear of debris and has sufficient space for maintenance and air circulation.
2. Mounting the Indoor Unit: The indoor unit needs to be mounted securely on a wall. Use a level to ensure the unit is straight, and then follow the manufacturer’s guidelines for proper installation at the recommended height. Drilling holes may be necessary for the mounting bracket.
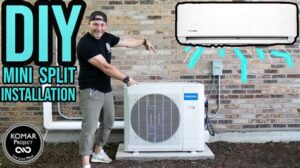
3. Installing the Outdoor Unit: The outdoor unit should be placed on a flat surface, elevated above ground level to avoid any potential water damage. Ensure there’s at least two feet of clearance around the unit for airflow.
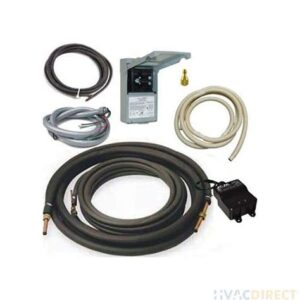
4. Connecting the Refrigerant Lines: One of the key steps involves installing the refrigerant lines between the indoor and outdoor units. Make sure to follow the manufacturer’s instructions closely to prevent leaks.
5. Wiring the Electrical Connections: Proper wiring is vital for safety and functionality. Use the appropriate wiring size and ensure all connections are tight and secure. Never forget to turn off the power before working with electrical components.
6. Testing the System: After everything is installed, it’s crucial to test the system. Start the heat pump and check for any unusual noises, leaks, or airflow issues. A thorough test ensures that your installation is successful and that the system will operate efficiently.
By understanding each step involved in the installation process of a mini split heat pump, you can be more prepared and confident in achieving a successful setup. Always refer to the manufacturer’s manual for specific installation instructions and recommendations.
Ensuring proper electrical connections
When it comes to installing a mini split heat pump, ensuring proper electrical connections is critical for the efficiency and safety of the system. Faulty or improper connections can lead to a host of problems, including performance issues and potential hazards. In this section, we will cover the essential steps to take for safe and effective electrical wiring.
Before beginning any electrical work, always make sure to switch off the power to the designated circuit. This prevents any accidental shocks and ensures that you’re working in a safe environment. Here’s a quick checklist of items you may need:
- Wire Strippers
- Screwdriver Set
- Voltage Tester
- Electrical Tape
- Conduit and Connectors
Next, it’s important to follow the manufacturer’s instructions regarding the wiring diagram. This will vary from model to model, so ensure that you are using the specific diagram for your chosen mini split heat pump. Typically, you will connect the indoor and outdoor units’ wires to ensure proper communication and power supply.
Finally, once all connections are made, double-check for any loose connections and verify that everything is properly insulated. Using a voltage tester can help you confirm that the connections are secure and functioning correctly before turning on the power.
By prioritizing proper electrical connections, you ensure the longevity and efficiency of your mini split heat pump, thereby enjoy
Testing the functionality of the heat pump
After successfully installing your mini-split heat pump, the next crucial step is to ensure it is functioning properly. Testing the functionality of the heat pump allows you to verify that it operates as expected, providing the necessary heating or cooling for your space. Below are several steps and checks you should follow to systematically test your newly installed system.
1. Check the Thermostat Settings: Start by examining the thermostat settings. Ensure that it is set to the desired temperature and operational mode (heating or cooling). If the settings are incorrect, adjust them to see if the system responds accordingly.
2. Listen for Unusual Noises: When you turn on the heat pump, listen closely for any unusual noises. A properly functioning unit should operate quietly. If you hear strange sounds such as banging or grinding, it may indicate a problem that requires immediate attention.
3. Confirm Proper Airflow: Check that air is flowing freely from the indoor and outdoor units. You can place your hand near the vents to feel the airflow. If you notice weak airflow, there may be an issue with the fan or filters, which could hinder the performance of the heat pump.
4. Measure Temperature Differential: Using a thermometer, compare the temperature of the air being expelled from the indoor unit with the ambient temperature in the room. There should be a noticeable difference, indicating that the unit is effectively heating or cooling.
5. Monitor for Any Error Codes: Many mini-split units come equipped with a display that may show error codes if a problem arises. Be sure to check the manual for information on what these codes mean and how to address any issues you encounter.
By following these testing steps, you can be confident that your mini-split heat pump is fu
Frequently Asked Questions
What is a mini split heat pump?
A mini split heat pump is a versatile heating and cooling system that consists of an indoor unit and an outdoor unit. It provides efficient climate control without requiring ductwork.
What are the benefits of installing a mini split heat pump?
Benefits of a mini split heat pump include energy efficiency, flexibility in installation, zoning capabilities for improved comfort, and reduced utility bills due to its high SEER ratings.
How do I choose the right size mini split heat pump for my space?
To choose the right size mini split heat pump, you need to calculate the square footage of the area you want to condition and consult a sizing guide or HVAC professional to determine the appropriate BTU capacity.
What tools do I need to install a mini split heat pump?
Essential tools for installing a mini split heat pump include a drill, wrenches, screwdrivers, refrigerant gauge set, level, and possibly a vacuum pump if you need to evacuate the system.
Can I install a mini split heat pump myself?
While a DIY installation is possible for those with technical expertise, it is recommended to hire a licensed HVAC professional to ensure safe and proper installation, especially regarding refrigerant handling.
What maintenance does a mini split heat pump require?
Maintenance for a mini split heat pump includes regularly cleaning or replacing air filters, checking the outdoor unit for debris, and scheduling periodic professional servicing to inspect refrigerant levels and overall system performance.
Are there any zoning benefits with a mini split heat pump?
Yes, a mini split heat pump allows for zoning benefits, meaning different rooms can be set to different temperatures, which enhances comfort and energy efficiency across various living spaces.
