Learn to install Pioneer Mini Split Systems with our comprehensive guide, covering location choices, essential tools, installation steps, and troubleshooting tips.Installing a Pioneer mini split system can significantly enhance your home’s comfort by providing efficient heating and cooling options. As energy costs continue to rise, more homeowners are turning to mini splits for their reliability, flexibility, and ease of installation. In this blog post, we will guide you through the essential steps to successfully install a Pioneer mini split system. From understanding the unique features of these systems to selecting the optimal location for installation, we’ll ensure you’re well-prepared for the task ahead. We’ll also cover the tools and equipment you’ll need and provide a clear, step-by-step installation process. Finally, we’ll discuss how to test your newly installed system and troubleshoot any issues that may arise. Whether you’re a seasoned DIYer or a novice, this guide will empower you to take on your mini split installation with confidence!
Understanding Pioneer Mini Split Systems
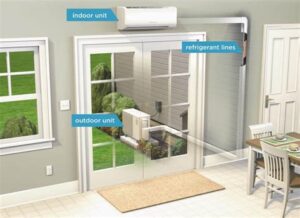
Pioneer mini split systems are a popular choice for homeowners and businesses seeking an efficient and flexible heating and cooling solution. These systems consist of an outdoor unit and one or more indoor units, providing targeted comfort without the need for extensive ductwork. Understanding how these systems work is crucial for anyone considering installation.
One of the key features of *Pioneer mini split systems* is their inverter technology, which allows the system to adjust its compressor speed based on the temperature needs of the space. This leads to *energy efficiency* and reduced energy bills. Additionally, mini splits offer both heating and cooling capabilities, making them versatile for different climates.
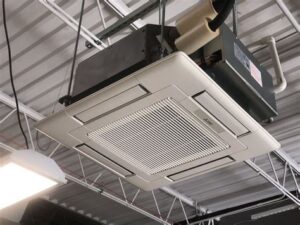
Installation flexibility is another advantage of *Pioneer mini splits*. The indoor units can be mounted on walls, ceilings, or floors, depending on your space requirements. This adaptability is ideal for a wide range of settings, from small apartments to larger commercial spaces. With various models available, it’s important to choose one that suits your specific needs.
“Pioneer mini split systems are an efficient and adaptable solution that can enhance comfort in any environment.”
| Feature | Description |
|---|---|
| Energy Efficiency | Utilizes inverter technology for reduced bills |
| Heating & Cooling | Provides dual functionality for year-round comfort |
| Installation Flexibility | Can be mounted in various locations for convenience |
In summary, understanding *Pioneer mini split systems* is essential for making informed decisions on heating and cooling options. Their energy efficiency, dual functionalities, and installation flexibility make them an increasingly popular choice for both residential and commercial spaces.
Choosing the Right Location for Installation
When it comes to installing a Pioneer mini split, choosing the right location is crucial for optimal performance and efficiency. The placement of both the indoor and outdoor units will directly affect the system’s ability to heat or cool your space effectively.
Here are some factors to consider when selecting an installation location:
- Indoor Unit: Install the indoor unit on an exterior wall that allows for easy access to the outdoor unit. This reduces the length of the refrigerant lines, improving efficiency.
- Avoid Obstructions: Ensure the unit has sufficient clearance around it. Avoid placing the unit behind furniture, curtains, or other objects that could obstruct airflow.
- Height Matters: Mount the indoor unit approximately 7-9 feet above the floor for optimal air distribution and to minimize noise.
The outdoor unit should also be placed thoughtfully. Consider the following criteria:
- Protection from Elements: Choose a spot that shelters the outdoor unit from direct sunlight, heavy rain, and snow to prolong its lifespan.
- Accessibility: Ensure that the outdoor unit can be easily accessed for maintenance and repairs. It should be placed on a stable, flat surface.
- Clearance: Maintain a minimum clearance of 12 inches on all sides of the outdoor unit for proper airflow and service access.
By carefully selecting the right locations for both the indoor and outdoor units, you can enhance the performance of your Pioneer mini split system, ensuring reliable heating and cooling throughout the year.
Gathering the Necessary Tools and Equipment
Before you embark on the journey of installing your Pioneer Mini Split system, it’s essential to gather all the necessary tools and equipment. This not only ensures a smooth installation process but also helps you avoid interruptions along the way. Below is a comprehensive list of tools and equipment you will need:
- Drill – For creating holes in walls for the lines and electrical connections.
- Level – To ensure that your indoor and outdoor units are properly aligned.
- Wrench Set – For tightening and loosening nuts and bolts.
- Pipe Cutter – To cut the refrigerant lines to the desired length.
- Multi-Meter – To check electrical connections and ensure they are functioning correctly.
- Measure Tape – For accurate measurements of your installation area.
- Screwdrivers – A variety for different screws and fasteners.
- Safety Equipment – Gloves, goggles, and masks to protect yourself during the installation process.
In addition to the tools, you will also need certain materials like refrigerant lines, drain hoses, electrical wires, and mounting brackets specifically designed for your Pioneer Mini Split system. Make sure you have these materials on hand before you begin installing.
Lastly, consider referring to the manufacturer’s manual for any specific requirements or additional tools recommended for your particular model. Having everything organized and ready will make your installation experience much easier and more efficient, allowing you to enjoy
Step-by-Step Installation Process
Installing Pioneer Mini Split systems can be a rewarding and efficient way to cool or heat your home. This guide will take you through the step-by-step installation process to ensure that your system works effectively and efficiently. Before you begin, make sure you gather all the necessary tools and equipment.
Here are the steps you should follow for a successful installation:
- Prepare the Installation Location: Choose a suitable location for both the indoor and outdoor units. Ensure it’s easily accessible and away from obstructions.
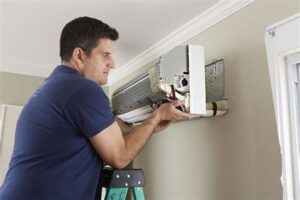
- Mount the Indoor Unit: Use the provided wall bracket and secure it to the wall, making sure it’s level.
- Drill a Hole for the Line Set: This hole should connect the indoor unit to the outdoor unit. Ensure it is slightly sloped for proper drainage.
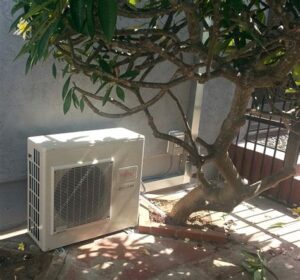
- Install the Outdoor Unit: Place the outdoor unit on a stable surface, such as a concrete pad. Make sure it has enough clearance around it for airflow.
- Connect the Line Set: Carefully connect the refrigerant lines, ensuring there are no leaks. Insulate the connections to prevent energy loss.
- Wiring Connections: Follow the wiring diagram provided in the manual to connect the power lines between the indoor and outdoor units.
- Vacuum the Line Set: Use a vacuum pump to remove air and moisture from the line set before charging the system.
- Test the System: Once everything is connected, turn on the system and check for proper operation.
Throughout the installation process, it’s crucial to follow the manufacturer’s instructions carefully. Always prioritize safety by turning off power when making electrical connections. This will help ensure your Pioneer Mini Split system operates safely and efficiently for years to come.
Testing and Troubleshooting the Mini Split
Once you have successfully installed your Pioneer Mini Split system, the next vital step is to conduct thorough testing and troubleshooting to ensure that everything operates efficiently. This part of the installation process is crucial for confirming the system’s effectiveness and longevity.
Start by checking the remote control functionality. Make sure the batteries are installed correctly and try turning the unit on. If the unit does not respond, inspect the power supply and the circuit breaker to ensure there are no issues. In some cases, resetting the unit might be necessary to clear any software glitches.
Next, observe the cooling and heating functions during operation. Set the unit to both heating and cooling modes and monitor its response to ensure it reaches the desired temperature quickly. Additionally, listen for any unusual noises which could indicate plumbing issues or loose components. If the unit runs continuously without providing adequate temperature, evaluate the refrigerant levels and connections as they may require adjustments.
| Common Issues | Possible Solutions |
|---|---|
| No Power | Check circuit breaker and ensure unit is plugged in |
| Inadequate Cooling/Heating | Inspect refrigerant levels, filter cleanliness, and duct obstructions |
| Unusual Noises | Check for loose parts or foreign objects in the unit |
Lastly, always consult your Pioneer Mini Split user manual for specific troubleshooting advice and maintenance tips. This guide provides invaluable steps to ensure your system remains in perfect working condition. Remember, regular test
Frequently Asked Questions
What tools do I need to install a Pioneer mini split system?
Common tools required include a drill, level, screwdrivers, wrenches, a vacuum pump, and refrigerant gauge.
How do I determine the correct location for the indoor unit?
Choose a location that allows for even air distribution, away from obstructions, and close to an exterior wall for easy access to the outdoor unit.
What are the steps to install the outdoor unit of the mini split?
First, level the outdoor unit on a concrete slab or mounting brackets, then connect the refrigerant lines and electrical wiring.
Is it necessary to have a professional install the Pioneer mini split?
While installation can be a DIY project for experienced individuals, hiring a professional is recommended to ensure safety and proper operation.
How do I connect the refrigerant lines?
Carefully flare the ends of the refrigerant lines, wrap them with insulation, and connect them to both the indoor and outdoor units, ensuring there are no leaks.
What should I do after installation is complete?
Check for leaks, test the system to ensure it operates correctly, and if necessary, adjust the settings on the thermostat.
How often should I service my Pioneer mini split system?
It’s recommended to service the unit at least once a year, including cleaning the filters, checking refrigerant levels, and inspecting for any wear or damage.
