Learn about mini split systems, choose the right one for your RV, and follow our step-by-step guide for installation and maintenance.Embarking on a road trip in your RV is a thrilling adventure, but uncomfortable temperature extremes can dampen the experience. Installing a mini split system can be a game-changer, providing efficient heating and cooling tailored to your mobile living space. In this blog post, we’ll explore the ins and outs of mini split systems, helping you choose the right one specifically for your RV. We’ll discuss essential preparations for installation, followed by a detailed, step-by-step guide to ensure the process goes smoothly. Finally, we’ll cover how to test and maintain your mini split system to keep your home on wheels cozy throughout your travels. Let’s dive in and transform your RV into a comfortable haven, no matter the climate!
Understanding Mini Split Systems
Mini split systems are an innovative HVAC technology that offers efficient heating and cooling solutions for various living spaces, including recreational vehicles (RVs). These systems function without ductwork, making them easier to install and more flexible in terms of placement within your RV.
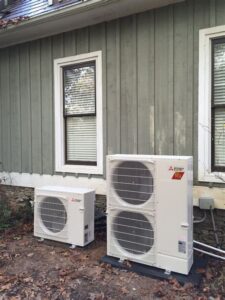
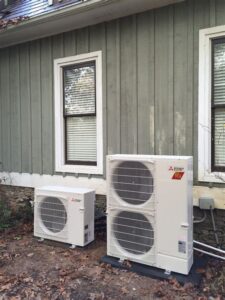
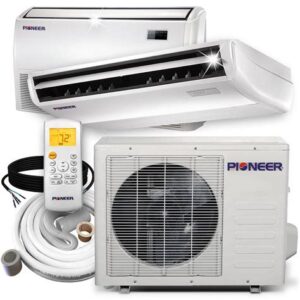
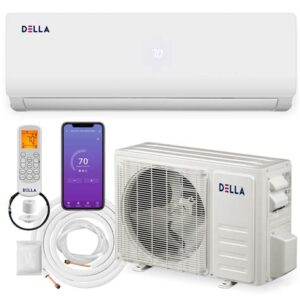
The primary components of a mini split system include an outdoor unit, which houses the compressor, and one or more indoor units that distribute conditioned air. This ductless system allows for individual control of temperature in different zones of your RV, providing personalized comfort for you and your passengers.
One of the main advantages of using a mini split system in an RV is energy efficiency. Mini splits consume less energy compared to traditional HVAC systems. This efficiency ultimately leads to lower energy bills, allowing for a more sust
Choosing the Right Mini Split for RV
When it comes to maintaining comfort in your RV, selecting the right mini split system is crucial. These systems provide an efficient and effective way to heat and cool your living space, but not every unit will fit your needs. Below are a few factors to consider when choosing the perfect mini split for your recreational vehicle.
1. Size of the Mini Split: The first thing to consider is the size of the mini split. The cooling capacity is measured in BTUs (British Thermal Units). A unit that is too small won’t effectively cool your RV, while one that is too large may cycle on and off too frequently, causing inefficiency. Typically, a 12,000 BTU unit is sufficient for most RV sizes, but it’s important to assess your specific space.
2. Energy Efficiency Rating: The energy efficiency of the mini split system is another critical consideration. Look for units with a high SEER (Seasonal Energy Efficiency Ratio) rating. This indicates that the system uses less energy to cool or heat your RV efficiently, which is particularly important when you’re relying on battery power or seeking to lower your operational costs.
3. Installation Requirements: Lastly, consider the installation requirements of the mini split system. Some models may require more complex setup, including additional tools or skills. Ensure you choose a system that matches your comfort level with DIY installations. Many manufacturers provide guides and support to help you through the installation process.
| Feature | Considerations |
|---|---|
| Size | Choose the right BTUs for your RV’s space |
| Energy Efficiency | Opt for a system with a high SEER rating to save energy |
| Installation | Check the installation complexity and requirements |
By keeping these factors in mind, you’ll be better equipped to select a mini split system that ensures your RV remains a comfortable oasis no matter where your adventures take you. Remember to take your time in assessing your options and consult with professionals if needed!
Preparing RV for Mini Split Installation
Before you install a mini split system in your RV, it is essential to prepare your vehicle adequately. Proper preparation will ensure that the installation process goes smoothly and that the system functions optimally. Here are some steps to consider:
- Assess Electrical Capacity: Verify that your RV’s electrical system can handle the additional load from the mini split unit. You may need an upgrade to your power supply or solar system.
- Choose the Right Location: Select an appropriate spot for the indoor and outdoor units. The indoor unit should be centrally located for maximum efficiency, while the outdoor unit should be placed where it has adequate airflow and access to the exterior.
- Check for Space Requirements: Ensure there is enough space around both units for maintenance and airflow, following the specific installation requirements outlined by the manufacturer.
Additionally, it’s vital to gather the necessary tools and materials before starting the installation. You’ll typically need various tools such as a drill, level, measuring tape, and a vacuum pump to remove air and moisture from the lines.
Lastly, if your RV has an existing air conditioning system, consider how you will integrate or replace it with the new mini split system. You might n
Step-by-Step Mini Split Installation Process
Installing a mini split system in your RV can enhance your comfort while traveling. With the right preparation and knowledge, you can tackle this important upgrade yourself. Here’s a detailed step-by-step guide to help you through the installation process of a mini split in your RV.
Step 1: Gather the Necessary Tools and Materials
- Mini split unit (indoor and outdoor components)
- Installation kit (included with the mini split system)
- Drill and drill bits
- Level
- Wrenches and screwdrivers
- Pipe insulation
- Electrical tools (wire cutter, voltage tester)
- Safety goggles and gloves
Step 2: Choose the Proper Location
Decide on the best location for your mini split unit. The indoor unit should be installed in a location that allows for optimal airflow and efficiency. Similarly, the outdoor unit requires adequate space for ventilation and must be mounted securely to withstand movement during travel. Remember to measure twice to ensure sufficient clearance for both units.
Step 3: Prepare the Installation Area
Next, prepare the installation area by clearing any obstacles. This includes moving furniture and ensuring that all surfaces are clean and free of debris. If necessary, cut a hole through the wall of your RV for the refrigerant lines and electrical wiring, ensuring it is sealed properly to avoid any leaks.
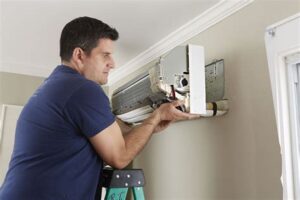
Step 4: Mount the Indoor Unit
Using a level, install the mounting bracket for the indoor unit. Make sure it’s at an appropriate height to allow air distribution throughout the RV. Secure the indoor unit tightly to the bracket, ensuring that it is stable. This is crucial, as vibrations from travel can dislodge an improperly mounted unit.
Step 5: Install the Outdoor Unit
The outdoor unit needs to be mounted on a solid base that can support its weight. Use brackets or a pad to secure it, ensuring it is level and won’t shift during travel. Connect the refrigerant lines and the electrical wiring, following the manufacturer’s instructions carefully. Check for any leaks in the connections.
Step 6: Connect the Wiring
Once both units are mounted, connect the electrical wiring. Make sure to turn off all electrical power and use proper safety precautions. Following your unit’s manual, connect the wires based on the color coding and secure them to avoid any short circuits. After verification, turn the power back on.
Step 7: Test the System
After everything is connected, it’s important to test your new mini split system. Turn on the indoor unit and check if air is being distributed properly. Listen for any unusual sounds that might indicate an installation problem. If everything seems to be working well, enjoy your newly installed efficient cooling and heating system!
Step 8: Insulate the Lines
Finally, make sure to insulate the refrigerant lines to prevent energy loss. Use pipe insulation in areas exposed to temperature fluctuations. This will not only improve efficiency but also extend the life of your mini split system.
Incorporating a mini split system into your RV can significantly improve your travel experiences. By following these steps carefully, you can successfully install one yourself, ensuring comfort in your mobile living space.
Testing and Maintaining Mini Split in RV
Once you have successfully installed a mini split system in your RV, it’s crucial to ensure its proper functionality. Regular testing and maintenance not only prolong the lifespan of your system but also guarantees optimal performance. Below are some essential steps and tips for keeping your mini split in top shape.
1. Check Filters: The filters in your mini split system play a pivotal role in ensuring clean air circulation. It’s advisable to check and clean these filters every month to prevent dirt and debris from accumulating. If the filters are washable, rinse them with water; otherwise, replace them according to the manufacturer’s guidelines.
2. Inspect the Outdoor Unit: If your RV has an outdoor unit, regularly inspect it for any signs of damage, such as dents or rust. Ensure that the coils are free from leaves and debris, which can hinder airflow. Schedule a thorough cleaning at least once a season to maintain its efficiency.
3. Monitor Refrigerant Levels: The refrigerant is essential for your mini split’s cooling and heating functions. Low refrigerant levels can indicate a leak in the system. If you suspect this issue, contacting a qualified technician is crucial for repairs and recharging the unit.
4. Test the System: Periodically run the heating and cooling modes to ensure everything is functioning correctly. Listen for unusual sounds, which could signal a malfunction, and check for any error codes on your unit’s display panel.
5. Schedule Professional Maintenance: While DIY maintenance is vital, having a professional technician service your mini split annually can address issues you might overlook. They can check electrical connections, test the thermostat, and ensure that all components are functioning as they should.
Maintaining your mini split is essential for both comfort and efficiency. By following these steps, you can ensure that your mini split system remains reliable, providing you with a cool retreat during those hot summer days in your RV.
Frequently Asked Questions
What is a mini-split system and why is it suitable for an RV?
A mini-split system is a type of air conditioning and heating unit that offers efficient climate control without the need for extensive ducting. It’s suitable for RVs due to its compact size, flexibility in installation, and ability to provide both heating and cooling.
What tools do I need to install a mini-split system in my RV?
You’ll need basic tools such as a drill, wrenches, screwdrivers, and level. Additionally, having a vacuum pump and refrigerant gauges will help ensure proper installation of the system.
Do I need a professional to install a mini-split system in my RV?
While a knowledgeable DIYer can install a mini-split system, hiring a professional is recommended for those unfamiliar with HVAC systems, as proper installation is crucial for efficiency and performance.
How do I choose the right mini-split system for my RV?
Consider the size of your RV and the required BTU (British Thermal Unit) rating needed to effectively cool or heat the space. It’s advisable to consult with an HVAC professional to help determine the appropriate size for your specific needs.
What are the advantages of using a mini-split system over a standard RV air conditioner?
Mini-split systems are quieter, more energy-efficient, and provide better temperature control. They also allow for zoning, meaning different areas of your RV can be set to different temperatures, enhancing comfort.
What is the typical installation cost for a mini-split system in an RV?
Installation costs can vary widely based on the system’s complexity and labor rates in your area, but generally, you can expect to pay between $1,500 and $4,000, which includes the unit and installation services.
How do I maintain my mini-split system once it’s installed in my RV?
Regular maintenance includes cleaning the air filters, checking for refrigerant leaks, and ensuring the outdoor unit is free of debris. Schedule periodic professional inspections to keep the system running efficiently.
