Learn how to install an air conditioning system with these essential steps: location selection, tool gathering, unit assembly, refrigerant line connection, and system testing.Installing a Senville mini split system can greatly enhance your home’s comfort while also improving energy efficiency. This compact and versatile heating and cooling solution allows you to create a tailored climate in any room. However, the successful installation of your mini split requires careful planning and execution. In this blog post, we will guide you through the key steps, starting with selecting the ideal location for your unit to ensure optimal performance. We’ll also cover the essential tools needed for the job, the assembly of the indoor unit, connecting the refrigerant lines, and finally, how to test and adjust the system for perfect operation. Whether you’re a DIY enthusiast or a homeowner looking to improve your living space, our comprehensive guide will set you up for success in installing your Senville mini split. Let’s get started!
Selecting the Right Location
When it comes to installing a Senville mini split, one of the first steps is selecting the right location for both the indoor and outdoor units. The effectiveness of your air conditioning system greatly depends on where it is placed, ensuring optimal air distribution and efficiency.
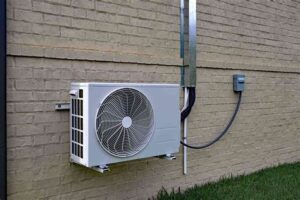
Start by choosing a location for the indoor unit that allows for unobstructed airflow. This means avoiding areas directly beneath windows, doors, or any furniture that could block the airflow. Ideally, place the unit in a central part of the room for even temperature distribution. For the outdoor unit, consider a spot with sufficient clearance around it, allowing for easy maintenance and airflow. It should be located on a level surface and away from any debris that could obstruct its operation.
Additionally, factor in proximity to a power source and the necessary refrigerant line connections between the indoor and outdoor units. A shorter distance between them minimizes the potential for energy loss and reduces installation complexity. By taking these considerations seriously, you’ll ensure that your Senville mini split performs efficiently a
Gathering the Necessary Tools
Installing a Senville mini split system can be a rewarding project, but to achieve a successful installation, it is essential to gather all the necessary tools beforehand. Having the right tools at your disposal will not only make the installation process smoother but will also help ensure that the system operates efficiently.
Before starting, make sure you have the following critical tools lined up:
- Refrigerant Gauge Set – This tool is essential for checking the pressure of the refrigerant in the system.
- Drill and Drill Bits – You will need this for making holes for piping and mounting the indoor and outdoor units.
- Wrench Set – A set of adjustable wrenches will be helpful for tightening refrigerant connections.
- Screwdrivers – Both flathead and Phillips screwdrivers are important for securing various components.
- Pipe Cutter – This is needed to cut the copper tubing to the appropriate length.
- Level – Ensuring that your units are level is critical for proper operation.
- Tape Measure – Accurate measurements will help in making the installation more precise.
- Vacuum Pump – This is necessary for removing air and moisture from the refrigerant lines.
With these tools in hand, you will be well-prepared to tackle the installation of your mini split system. Always make sure to consult the equipment’s installation manual for any specific tool requirements that may be necessary for your particular model.
Assembling the Indoor Unit
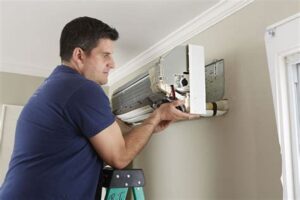
Assembling the indoor unit of your Senville mini split is a crucial step in ensuring optimal performance and efficiency. When done correctly, it lays the groundwork for effective climate control in your space. Here’s a breakdown of the assembly process.
Components You Will Need:
- Indoor unit
- Mounting bracket
- Plastic plug covers
- Insulation tape
- Level
To begin, ensure that you have all the necessary components ready. First, take the indoor unit and attach it to the mounting bracket according to the manufacturer’s instructions. It is critical to use a level to ensure that the unit is correctly aligned; a crooked installation can lead to improper drainage and reduced effectiveness.
Once the indoor unit is securely mounted, use the plastic plug covers to seal any openings. This step is essential to maintain energy efficiency and prevents air leaks that would compromise the system’s functionality. After you’ve sealed everything meticulously, apply insulation tape around the refrigerant lines to protect them from external elements.
With the assembly complete, double-check all connections and ensure everything is tightly secured. This careful assembly process not only enhances the lifespan of your Senville mini split b
Connecting the Refrigerant Lines
Connecting the refrigerant lines is a crucial step in the installation of your Senville mini split system. This process requires precision and care to ensure the system operates efficiently and effectively. Below are the steps to properly connect the refrigerant lines:
- Preparation: Begin by gathering your tools and materials. You will need a pipe cutter, wrenches, Teflon tape, and several refrigerant fittings.
- Measure and Cut: Measure the length of the refrigerant lines required between the indoor and outdoor units. Use the pipe cutter to cut the lines to the appropriate length.
- Flaring the Pipes: Once cut, you must flare the ends of the refrigerant pipes. This involves using a flaring tool to create a uniform flare that fits securely into the fittings.
- Connecting the Lines: With the flared ends ready, wrap Teflon tape around the threads of the fittings. Then, carefully connect the refrigerant lines to both the indoor and outdoor units. Ensure that they are tightly secured, but avoid over-tightening.
- Leak Testing: After connecting, it’s important to test for leaks. Use a leak detection solution around the joints and fittings. If bubbles form, you’ll need to re-tighten or adjust the connections.
Once you’ve confirmed that all connections are secure and leak-free, you can proceed with the next steps in your mini split installation. Remember that proper connection of refrigerant lines is essential for the efficient functioning of your unit, so take your time and ensure everything is done right.
If you’re unsure about any part of the process, don’t hesitate to consult a professional. Mistakes in connecting refrigerant lines can lead to poor performance or even damage to your Senville mini split system.
Properly connecting the refrigerant lines not only ensures the longevity of your system but also contributes to its overall efficiency. Enjoy the comfort that your new mini split brings to your home!
Testing and Adjusting the System
After successfully installing your Senville mini split system, the next crucial step is testing and adjusting the system to ensure optimal performance. This process not only guarantees that the unit operates efficiently but also helps identify any potential issues before they become significant problems.
Begin the testing process by activating the system and setting it to the desired temperature. Observe the following key features:
- Airflow: Ensure that the airflow is steady and directed correctly. Adjust the louvres to achieve the best air distribution in the room.
- Temperature Regulation: Check if the unit reaches the desired temperature. This can be done by comparing the room temperature with the unit’s temperature reading.
- Noise Levels: Listen for any irregular sounds which could indicate an issue within the system.
In addition to these checks, it is essential to monitor the refrigerant lines and ensure that there are no leaks. If you notice any refrigerant loss, you will need to consult a professional technician to recharge or fix the system. Finally, utilize the remote control or wall-mounted controller to adjust settings according to your preferences, ensuring ultimate comfort for your space.
Frequently Asked Questions
What is a Senville mini split?
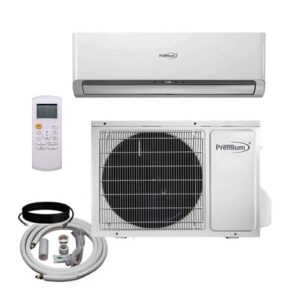
A Senville mini split is a type of ductless heating and cooling system that consists of an indoor unit and one or more outdoor units.
What tools do I need to install a Senville mini split?
You will need tools such as a drill, level, wrenches, screwdrivers, a vacuum pump, and refrigerant gauges.
Do I need professional help to install a Senville mini split?
While some homeowners can install mini splits themselves, it is recommended to hire a professional to ensure proper installation and system efficiency.
What are the steps to install the indoor unit of a Senville mini split?
The steps include choosing an appropriate location, mounting the bracket, drilling a hole for the pipes, and connecting the refrigerant and electrical lines.
How do I mount the outdoor unit for the Senville mini split?
The outdoor unit should be placed on a stable base at least a few inches off the ground, and secured to prevent movement due to wind or vibrations.
What refrigerant is used in Senville mini split systems?
Senville mini split systems typically use R410A refrigerant, which is more environmentally friendly than older refrigerants.
How can I ensure my Senville mini split operates efficiently after installation?
Regular maintenance, including cleaning filters, checking refrigerant levels, and ensuring unobstructed airflow, will help maintain efficient operation.
