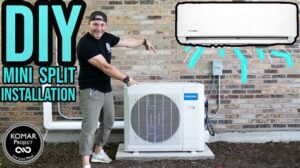
Discover how to install and troubleshoot Pioneer Mini Splits with our comprehensive guide covering location selection, preparation, and a step-by-step installation process.Installing a Pioneer mini split system can enhance your home’s comfort and energy efficiency, making it a worthwhile investment for any homeowner. These versatile heating and cooling units are ideal for spaces lacking ductwork or where traditional HVAC systems may not be cost-effective. In this blog post, we will guide you through everything you need to know, starting with an understanding of Pioneer mini splits, and how to choose the right location for your unit. We’ll then move on to preparation and provide you with a detailed, step-by-step installation process. Finally, we’ll cover testing and troubleshooting tips to ensure your new system operates efficiently. Whether you’re a seasoned DIYer or trying this for the first time, our comprehensive guide will help you navigate your installation journey with confidence.
Understanding Pioneer Mini Splits
Pioneer mini splits are a popular choice for both residential and commercial heating and cooling needs. These systems offer flexibility, efficiency, and ease of installation, making them an attractive option for many homeowners. Unlike traditional HVAC systems, mini split systems do not require ductwork, which means they can be installed in any location without the complexity of larger systems.
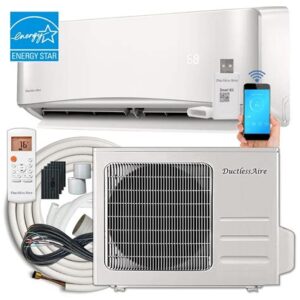
At the heart of a Pioneer mini split system is the indoor unit, which is responsible for distributing conditioned air into the living space. This unit can be mounted on the wall or ceiling and is connected to an outdoor unit via refrigerant lines. The outdoor unit houses the compressor and condenser, which are essential for the operation of the system. The separation of these components allows for greater flexibility in installation and design.
One of the significant advantages of Pioneer mini splits is their energy efficiency. Many models come with a SEER rating (Seasonal Energy Efficiency Ratio) of 16 or higher, making them one of the most efficient options on the market. This efficiency translates to lower energy bills and a reduced carbon footprint, appealing to environmentally conscious consumers.
Additionally, Pioneer mini splits provide individualized climate control. With multiple indoor units connected to a single outdoor unit, you can set different temperatures in different rooms, enhancing comfort levels throughout your home. This unique aspect makes them particularly suitable for areas with varying climate needs.
In summary, understanding the basics of Pioneer mini splits can help you make informed decisions about your heating and cooling options. With their efficient design and flexibility, they offer a modern solution for climate control in various settings.
Choosing the Right Location
Choosing the right location for your Pioneer mini split system is crucial for optimal performance and efficiency. The placement of your indoor and outdoor units can significantly impact the unit’s cooling and heating capabilities. Here are some factors to consider:
- Indoor Unit Placement: Ideally, the indoor unit should be mounted high on a wall to facilitate proper air circulation. Aim for a location central to the area you want to heat or cool.
- Avoid Obstructions: Ensure that the indoor unit is not obstructed by furniture, curtains, or other objects that could block airflow. Clear space around the unit will enhance its performance.
- Outdoor Unit Position: The outdoor unit should be placed in a well-ventilated area. Avoid locations where debris might block the unit or where it may be exposed to direct sunlight for long hours, which could compromise efficiency.
Once you have identified potential locations, consider the distance between the indoor and outdoor units. Longer distances may require additional materials such as refrigerant lines, which can increase the overall cost of installation. Keeping the distance under 25 feet is typically recommended for optimal performance.
Lastly, check for local building codes and regulations that might affect where you can install your mini-split system. Compliance will ensur
Preparing for Installation
Before diving into the installation of your Pioneer Mini Split, it’s crucial to properly prepare for this significant undertaking. This preparation will not only make the installation process smoother but also ensure that your unit functions efficiently once it’s set up. Here’s what you need to consider:
- Tools Required: Gather all necessary tools such as a drill, screwdriver, level, tubing cutter, and vacuum pump. Having these at your fingertips can significantly expedite the process.
- Understanding the Manual: Thoroughly read the instruction manual provided by Pioneer. This document contains essential information specific to your model and offers guidance on installation protocols.
- Choose the Right Location: Select an optimal location for mounting the indoor and outdoor units. Ensure that the indoor unit is placed high on the wall for effective airflow and the outdoor unit is in a shaded area for increased efficiency.
- Electrical Considerations: Ensure that the power supply is adequate for your mini split system. A dedicated circuit may be necessary, so consider consulting a licensed electrician if you are unsure.
After making these preparations, you will be ready for the next steps in the installation process. Remember, careful planning at this stage can save you a lot of time and potential headaches during installation.
Finally, consider environmental factors; if you live in a region with extreme temperatures, you may want to take additional precautions for efficient performance of your Pioneer Mini Split system.
Being well-prepared paves the way for a successful installation. Take your time to go through this checklist, and you’ll ensure
Step-by-Step Installation Process
Installing a Pioneer mini split system may seem daunting, but by following this step-by-step guide, you can ensure a successful installation. This process is straightforward and can often be completed with basic tools and skills. Here’s how you can install your Pioneer mini split system effectively.
Step 1: Gather Your Tools
Before beginning the installation, make sure you have all necessary tools on hand. You’ll typically need:
- Drill and bits
- Pipe cutter
- Level
- Wrench
- Measuring tape
- Screwdriver
Step 2: Choose the Right Location
Select the outdoor and indoor unit locations carefully. Ensure that the outdoor unit has adequate airflow and is placed near a power source. The indoor unit should be installed high on a wall for optimal air circulation.
Step 3: Install the Wall Bracket
Use a level to mark where the wall bracket will go, making sure it’s straight. Secure the bracket to the wall with appropriate anchors and screws based on your wall type.
Step 4: Prepare for Refrigerant Lines
Drill a hole through the wall for the refrigerant lines and ensure it is large enough to accommodate them. Use a grommet to protect the lines from any sharp edges.
Step 5: Mount the Indoor Unit
Lift the indoor unit onto the wall bracket. Make sure it is secure and level. This is crucial for proper drainage and operation.
Step 6: Install the Outdoor Unit
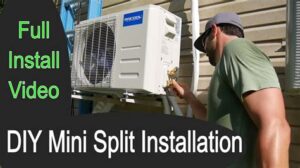
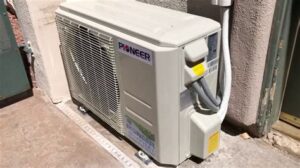
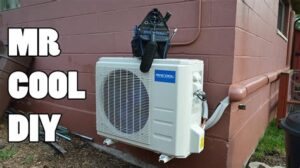
Place the outdoor unit on a stable surface, ideally on a platform or concrete blocks. Make sure it is level and secure. Connect the refrigerant lines and power supply as per the manufacturer’s instructions.
Step 7: Connect the Lines
Carefully connect the refrigerant lines between the indoor and outdoor units. Make sure all fittings are tightened and sealed properly to prevent leaks.
Step 8: Vacuum the Lines
Using a vacuum pump, evacuate the refrigerant lines to remove moisture. This step is critical as moisture can lead to system failure.
Step 9: Test the System
Turn on the power to the system and test its operation. Check for any leaks and ensure that both the indoor and outdoor units are functioning correctly.
By following these steps, you can successfully install your Pioneer mini split system. Each step ensures tha
Testing and Troubleshooting
Once you have successfully installed your Pioneer Mini Split, the real work begins: testing and troubleshooting. This crucial process ensures that your system is functioning optimally and efficiently. By following a systematic approach, you can check for any issues that may arise in the operation of your unit.
Start by turning on your Pioneer Mini Split and set the desired temperature. Monitor the system for a few minutes to see if it reaches the set temperature within an acceptable timeframe. If it doesn’t, check the following:
- Air Filters: Clogged or dirty filters can impede air flow.
- Refrigerant Levels: Low refrigerant can affect cooling efficiency.
- Electrical Connections: Loose connections may lead to a malfunction.
If everything appears normal but the unit is still not performing well, perform additional checks such as the remote control functionality and the positioning of the indoor and outdoor units. If you find any issues during your tests, consult the manufacturer’s guidelines or reach out to a professional technician for further assistance.
Regular maintenance and testing are key to ensuring that your Pioneer Mini Split continues to operate efficiently over time. Keeping an eye on performance will save you from unexpected breakdowns and costly repairs in the future.
Frequently Asked Questions
What tools do I need to install a Pioneer mini split system?
You will need basic tools such as a drill, level, wrenches, screwdrivers, and a pipe cutter. Additionally, having a vacuum pump and refrigerant gauges will be essential.
What precautions should I take before starting the installation?
Ensure you read the installation manual thoroughly, check for local building codes, and consider any necessary permits. It’s also important to turn off electrical supply before beginning the installation.
Where is the best location to install the indoor unit of the mini split?
The best location for the indoor unit is usually high on a wall, away from direct sunlight, and in an unobstructed area for optimal airflow. Ensure it is positioned to effectively distribute air throughout the room.
How do I mount the outdoor unit?
The outdoor unit should be mounted on a solid and stable surface, ideally elevated above ground to avoid water accumulation. Use brackets or pads to secure it in place.
What is the proper way to connect the refrigerant lines?
Ensure the lines are cut cleanly and fitted properly. Use flare fittings and tighten them with a wrench, but do not over-tighten which can damage the threads. It’s essential to maintain the correct slope of the lines.
How can I ensure there are no leaks after installation?
After connecting the refrigerant lines, you should perform a leak test using a refrigerant leak detector or a soap solution. Look for bubbles forming around the fittings as this indicates a leak.
What are the final steps after installation is complete?
Once everything is connected, you should evacuate the system using a vacuum pump, check the refrigerant level, and then turn on the power supply. Test the system to ensure it is operating correctly.
