Learn how to install a Mr Cool Mini Split with our comprehensive guide, covering location selection, tools, installation steps, and troubleshooting tips.Installing a Mr Cool mini split system can significantly enhance your home’s comfort, providing efficient heating and cooling tailored to your needs. Whether you’re looking to beat the summer heat or stay warm during winter months, a mini split offers a versatile solution without the need for ductwork. In this blog post, we’ll guide you through the process of installing your Mr Cool mini split from start to finish. We’ll begin with an overview of the system’s features to help you maximize its benefits, followed by tips on selecting the ideal installation location. Next, we’ll provide a comprehensive list of tools and equipment required for the job, including a detailed step-by-step installation process. Finally, we’ll discuss how to test your system and troubleshoot any issues that may arise. Let’s transform your space into a comfortable oasis with ease!
Understanding the Mr Cool Mini Split
The Mr Cool Mini Split is an excellent option for homeowners seeking a versatile and efficient cooling and heating solution. This system is particularly valued for its energy efficiency, ease of installation, and quiet operation. Unlike traditional HVAC systems, mini splits do not require ductwork, which can significantly reduce energy costs and improve indoor air quality.
One of the standout features of the Mr Cool Mini Split is its ability to provide both cooling and heating. The system utilizes inverter technology to adjust compressor speed, allowing for more consistent temperatures and lower energy consumption. Furthermore, the DIY installation option makes this system accessible for many homeowners who are tech-savvy or willing to learn the process.
When considering a Mr Cool Mini Split, it’s important to examine the various sizes and models available to match your specific room size and climate requirements. Proper sizing will ensure optimal performance and efficiency, making your investment worthwhile in the long run. Additionally, understanding the components—such as the interior air handler and the exterior condenser—will help you appreciate how this system operates to maintain your home’s comfort.
Selecting the Right Location for Installation
When installing a Mr Cool Mini Split unit, selecting the right location for both the indoor and outdoor components is crucial for optimal performance and efficiency. Here are some factors to consider:
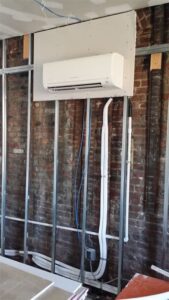
- Indoor Unit Placement: Choose a location that allows for even air distribution throughout the room. Avoid areas near objects that may obstruct airflow, such as furniture or curtains.
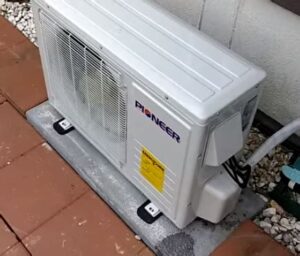
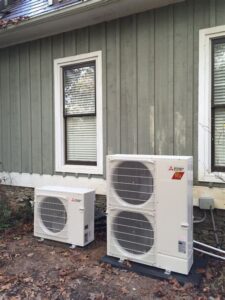
- Outdoor Unit Placement: Ensure that the outdoor unit is installed in a shaded area to avoid direct sunlight, which can affect its efficiency. Additionally, the unit should be placed on a level surface, away from debris and with sufficient clearance to allow for airflow.
- Proximity: The distance between the indoor and outdoor units is essential. Keeping them as close as possible reduces refrigerant line length, minimizing energy loss.
Furthermore, consider the aesthetic implications of your installation location. Ensure the units do not disrupt the visual harmony of your living space. If necessary, consult with a professional to maximize discreetness and functionality.
Finally, think about future maintenance. Choosing a location that provides easy access to both units will save time and effort when performing routine checks or repairs. Always ensure you’re adhering to local building codes and regulations during installation.
Gathering the Necessary Tools and Equipment
When it comes to installing your Mr. Cool Mini Split, having the right tools and equipment is essential for a successful installation process. Without the proper items at your disposal, what should be a smooth installation can quickly become a frustrating task. Below is a comprehensive list of the necessary tools and items you will need:
| Tool/Equipment | Purpose |
|---|---|
| Drill | For making holes in walls for mounting the indoor and outdoor units. |
| Level | Ensures the units are installed straight and level for effective operation. |
| Wrenches | Used for tightening fittings and connections in the copper lines. |
| Pipe Cutter | For cutting the copper tubing to the required lengths. |
| Vacuum Pump | Removes air and moisture from the refrigerant lines before charging the system. |
| Refrigerant Manifold Gauge Set | To measure pressures and charge the system properly. |
Additionally, make sure to have other supplies like electrical tape, screws, brackets, and refrigerant lines. It’s also advisable to use safety gear such as goggles and gloves while performing the installation to protect yourself from possible injuries.
With this list in hand, you will be well-prepared to start the installation of your Mr. Cool Mini Split system, ensuring that the process goes as smoothly and efficiently as possible.
Remember, investing in the right tools not only facilitates the installation process but also contributes to the longevity and effectiveness of your mini split system. So, take the time to gather everything you need!
Step-by-Step Installation Process
Installing a Mr Cool Mini Split system can significantly enhance the heating and cooling capabilities of your space. Below, you will find a detailed, step-by-step guide to help you through the installation process.
Before you begin, ensure you have chosen an appropriate location for both the indoor and outdoor units. The units should be positioned to allow for efficient airflow and accessibility for maintenance. Once you’ve determined the correct positioning, gather all necessary tools and equipment.
The installation process typically involves the following steps:
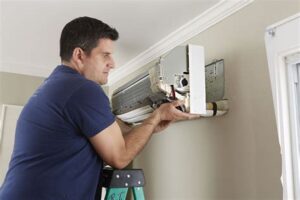
- Step 1: Install the mounting bracket for the indoor unit on the wall.
- Step 2: Drill a hole through the wall for refrigerant lines and condensate drain.
- Step 3: Connect the refrigerant lines and drain line to the indoor unit.
- Step 4: Hang the indoor unit on the mounting bracket.
- Step 5: Set up the outdoor unit on a stable and level surface.
- Step 6: Connect the outdoor unit with the refrigerant and power lines from the indoor unit.
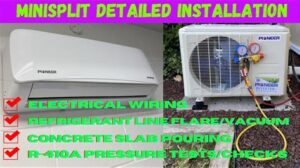
- Step 7: Vacuum the lines to remove any air and moisture.
- Step 8: Charge the system with refrigerant, following manufacturer instructions.
- Step 9: Test the system to ensure it operates smoothly.
After completing the installation, always refer to the owner’s manual to address any specific requirements or adjustments. It’s essential to follow the provided instructions carefully to ensure optimal performance and longevity of your Mr Cool Mini Split system.
Testing and Troubleshooting
Once you have completed the installation of your Mr Cool Mini Split, it is crucial to test the system to ensure everything is functioning properly. The first step in this process is to turn on the unit and check for any unusual sounds or vibrations. A well-installed unit should operate quietly and smoothly.
If the unit does not turn on, check the power supply and circuit breakers. Make sure that the power switch is turned on and that your electrical connections are secure. Sometimes, a blown fuse can cause the system to malfunction, so it’s a good practice to inspect the fuse as well.
In case your Mini Split turns on but does not cool or heat effectively, there are several factors to consider. Ensure the air filters are clean, as dirty filters can impede air flow. Additionally, check the thermostat settings to confirm it is set to your desired temperature. If you continue to experience issues, refer to the user manual for specific troubleshooting steps related to your model.
Finally, regular maintenance of your Mr Cool Mini Split will help prevent future problems. This includes cleaning the filters every month, checking the outdoor unit for obstructions, and scheduling professional inspections annually.
Frequently Asked Questions
What is a Mr. Cool mini split system?
Mr. Cool mini split systems are ductless heating and cooling units designed for energy efficiency and ease of installation.
What tools are needed to install a Mr. Cool mini split?
To install a Mr. Cool mini split, you will need a drill, screwdriver, level, measuring tape, and a refrigerant gauge.
Can I install a Mr. Cool mini split myself?
Yes, Mr. Cool systems are designed for DIY installation, provided you follow the instructions carefully.
What is the first step in installing a Mr. Cool mini split?
The first step is to select the appropriate location for both the indoor and outdoor units, ensuring they are easily accessible.
How do I connect the refrigerant lines in a Mr. Cool mini split system?
You need to flare the ends of the refrigerant lines and connect them to both the indoor and outdoor units, making sure they are securely fastened.
What are some common mistakes to avoid during installation?
Common mistakes include improper sizing of the unit, incorrect installation of the refrigerant lines, and neglecting to check for air leaks.
How do I maintain my Mr. Cool mini split after installation?
Regular maintenance includes cleaning the filters, checking the refrigerant levels, and scheduling professional inspections as needed.
