Learn how to install the Mr Cool DIY Mini Split with our step-by-step guide covering preparation, installation, connection, testing, and troubleshooting.If you’re looking for an efficient way to cool or heat your home without the hassle of professional installation, the Mr Cool DIY Mini Split system may be your perfect solution. This innovative system is designed for easy installation, making it an attractive option for homeowners eager to take on a DIY project. Whether you’re looking to enhance your home comfort or reduce energy costs, understanding how to properly install the Mr Cool DIY Mini Split is crucial. In this blog post, we will guide you through the entire process—from preparing the installation area and setting up the indoor unit to connecting the refrigerant lines and troubleshooting common issues. With a little preparation and the right tools, you’ll be well on your way to enjoying the climate control you desire. Let’s dive into the steps to ensure a successful installation!
Understanding the Mr Cool DIY Mini Split
The Mr Cool DIY Mini Split is an innovative air conditioning solution that allows homeowners to take control of their heating and cooling needs. Designed for ease of installation and efficiency, this system is perfect for those looking to upgrade their HVAC without the need for professional help. One of the standout features of the Mr Cool system is its straightforward DIY installation process, which sets it apart from traditional HVAC systems.
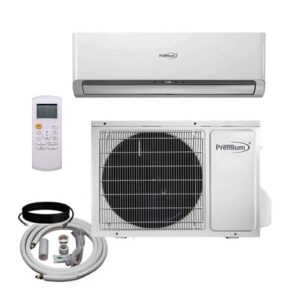
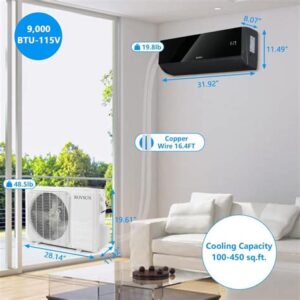
This mini split system consists of two main components: an indoor unit and an outdoor unit. The indoor unit is responsible for transferring cool or warm air into your living space, while the outdoor unit expels heat outside. The connection between the two units is made via refrigerant lines, making the entire installation process relatively simple for anyone with basic handyman skills.
Additionally, the energy efficiency of the Mr Cool DIY Mini Split is noteworthy. With a high SEER (Seasonal Energy Efficiency Ratio) rating, this system can significantly reduce energy bills compared to traditional heating and cooling methods. Understanding the Mr Cool DIY Mini Split is essential for anyone considering a DIY installation, as it provides the knowledge necessary to make informed decisions about home comfort.
Preparing the Installation Area
Preparing the installation area for your Mr Cool DIY Mini Split is a crucial step that sets the foundation for a successful setup. It’s important to ensure that the chosen location is optimal for both the indoor and outdoor units, maximizing efficiency and comfort. Here are the key considerations to keep in mind.
1. Select the Ideal Location: Choose a location for the indoor unit that provides adequate airflow and is unobstructed by furniture, curtains, or other obstacles. Ideally, the indoor unit should be placed high on a wall, away from direct sunlight and near an electrical outlet to facilitate easy installation.
2. Verify Electrical Requirements: Before installation, ensure that the electrical supply meets the requirements of the Mr Cool DIY Mini Split. You may need to install a dedicated circuit breaker for your unit. Check the manufacturer’s specifications for voltage and amperage to avoid any complications.
3. Clear the Area: Remove any items from the chosen installation area to give you ample space to work. This includes furniture, decorations, and any other items that might obstruct your movement or the installation process.
4. Ensure Structural Integrity: The wall that will hold the indoor unit must be structurally sound. Use a stud finder to locate wall studs and avoid installing the unit on drywall or other weak materials that might not support its weight.
5. Prepare for the Outdoor Unit: Identify a suitable spot for the outdoor unit that is level and provides enough clearance for airflow. Ensure it is not obstructed by debris, plants, or other items that could block its operation.
Once you have completed these preparation steps, you are well on your way to efficiently installing your Mr Cool DIY Mini Split. Proper preparation is key to ensuring the longevity and performance of your mini-split system.
Installing the Indoor Unit
When it comes to installing the Mr Cool DIY Mini Split system, the first step is to properly install the indoor unit. This process requires careful planning and execution to ensure optimal performance and longevity of the unit.
Start by selecting the best location for the indoor unit. Ideally, it should be installed high on a wall, away from direct sunlight and not obstructed by furniture or curtains. To make the installation process easier, make sure you have the following tools ready:
- Stud finder
- Drill
- Level
- Wrench
- Refrigerant line insulation
Next, hold the mounting bracket against the wall where you want to install it. Using a level, mark the position where the screws will go. Ensure the bracket is level to avoid uneven operation of the unit. Drill pilot holes into the wall studs based on the marked positions, and then secure the mounting bracket to the wall using appropriate screws. Double-check that the bracket is firmly attached and ensure it can handle the weight of the indoor unit.
Once the bracket is in place, you can move on to the actual installation of the indoor unit onto the bracket. Align the unit with the bracket and carefully slide it in place. Ensure that it is secure on the bracket and make any necessary adjustments to ensure proper alignment. With the indoor unit now installed, it’s time to move on to connecting the refrigerant lines, which will complete the setup for your Mr Cool DIY Mini Split system.
Connecting the Refrigerant Lines
Connecting the refrigerant lines is a crucial step in the installation of the Mr Cool DIY Mini Split system. This step ensures that the indoor and outdoor units can efficiently transfer heat, allowing for optimal cooling or heating based on your needs. Below are the steps you should follow to properly connect the refrigerant lines:
- Gather Your Tools: You’ll need a pair of adjustable wrenches, a tubing cutter, a vacuum pump, and the refrigerant lines included with your mini-split system.
- Prepare the Lines: Carefully uncoil the refrigerant lines from their packaging. Make sure to inspect the lines for any signs of damage or defects.
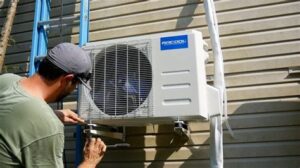
- Connect to the Outdoor Unit: Locate the connection points on the outdoor unit. Use the appropriate tool to tighten the fittings, ensuring a secure connection without over-tightening, which can damage the threads.
- Attach to the Indoor Unit: Repeat the connection process at the indoor unit, ensuring that the lines are not kinked or bent excessively.
- Insulate the Connections: Use insulation tape or dedicated insulation covers to wrap the connections. This prevents heat exchange with the environment and maintains efficiency.
- Purge the Lines: Before your final test, it’s important to purge the lines to remove any air or moisture. Use a vacuum pump connected to the service ports for this process.
Once the lines are securely connected and insulated, it’s time to test your connections. Make sure you don’t see any refrigerant leaks by checking the fittings with soap or a leak detection solution. If you find any leaks, tighten the connections as necessary and recheck.
Understanding the importance of proper refrigerant line connections can’t be overstated. Incorrect installations can lead to inefficiencies, system failures, and expensive repairs. It’s always recommended to follow the manufacturer’s guidelines closely during this step.
Now that you have connected the refrigerant lines, you are ready to proceed with the next steps in the installation process. Keep in mind that safety is paramount while working with refrigerants, so proper protective gear is essential throughout the installation.
Testing and Troubleshooting
Once you have installed your Mr Cool DIY Mini Split system, it is crucial to understand how to properly test and troubleshoot the unit. This ensures that the system is functioning efficiently and effectively, providing you with the comfort you expect. Here are some steps to follow during this phase.
First, check for any signs of leaks in the refrigerant lines. Inspect all connections and joints for any moisture or frost. If you find any leaks, you may need to use a leak detector or call a professional to assist with the repair.
Next, make sure that the indoor and outdoor units are operational. Turn on the air conditioning system and listen for any unusual noises. Check if the fan is working properly and ensure that the air is flowing as expected from the indoor unit. If there are any issues, referring to the user manual may provide insight into what could be wrong.
Lastly, monitor the temperature settings. Use a thermometer to ensure that the air temperature coming from the vents matches your thermostat settings. If it does not, you may need to recalibrate the thermostat or inspect the system for other potential issues.
By following these simple steps, you can effectively troubleshoot your Mr Cool DIY Mini Split system and ensure its optimal performance.
Frequently Asked Questions
What tools do I need to install the Mr. Cool DIY Mini Split?
You will need a drill, a level, a wrench set, a measuring tape, a screwdriver, and safety gear such as gloves and goggles.
Is special training required to install the Mr. Cool DIY Mini Split system?
No special training is required, as the Mr. Cool system is designed for DIY installation. However, basic electrical and plumbing knowledge can be helpful.
How long does the installation process take?
The installation process typically takes about 4 to 6 hours, depending on your skill level and the complexity of the installation.
What is the first step in installing the Mr. Cool DIY Mini Split?
The first step is to choose the right location for both the indoor and outdoor units, ensuring they are properly positioned for optimal air flow.
Do I need a permit to install the Mr. Cool Mini Split?
Permit requirements vary by location. It’s advisable to check with your local regulations to determine if a permit is needed.
Can I install the Mr. Cool Mini Split by myself?
Yes, the Mr. Cool DIY Mini Split is designed for easy installation by homeowners. Just follow the provided instructions carefully.
What maintenance is required after installing the Mr. Cool DIY Mini Split?
Regular maintenance includes cleaning or replacing air filters, checking refrigerant lines, and ensuring that both indoor and outdoor units are free from debris.


