Discover the benefits, installation, and maintenance tips for mini split systems. Choose the right unit and learn essential tools for a successful setup.Are you looking to enhance your home’s comfort and energy efficiency? Installing a mini split system could be the perfect solution! Designed to provide heating and cooling without the need for ductwork, mini splits have gained popularity for their versatility and cost-effectiveness. In this guide, we will walk you through the benefits of mini split systems, help you choose the right one for your space, and provide a list of essential tools you’ll need for installation. With our detailed step-by-step installation guide, even beginners can tackle the project confidently. Plus, we’ll share valuable tips for maintenance and troubleshooting to ensure your system operates efficiently for years to come. Let’s dive in and explore how you can install a mini split system yourself!
Benefits of Mini Split Systems
Mini split systems have gained immense popularity in recent years due to their versatile heating and cooling capabilities. One of the main benefits of these systems is their energy efficiency. Unlike traditional HVAC systems, mini splits allow for zoned heating and cooling, which means you can adjust the temperature in individual rooms according to your needs, reducing overall energy consumption.
Another significant advantage is the flexibility in installation. Mini split systems require only a small hole in the wall for the refrigerant line, making them suitable for a variety of building types, including homes without ductwork. This makes them an ideal choice for retrofitting older homes or for new constructions.
Additionally, mini splits often operate much more quietly than traditional systems, providing a comfortable and peaceful living environment. Their sleek design also allows them to blend seamlessly into the decor of any room, enhancing the aesthetic appeal of your space. With numerous models available, you can choose one that fits your specific needs and preferences.
Choosing the Right Mini Split System
When it comes to selecting the right mini split system, there are several factors to consider to ensure that you make the best choice for your space and needs. Understanding the different components, capacities, and features can significantly impact your comfort and energy efficiency.
First, consider the cooling and heating capacity measured in BTUs (British Thermal Units). The size of the system should match the square footage of the area you are looking to heat or cool. A common guideline is:
| Room Size (sq. ft.) | Recommended BTUs |
|---|---|
| 100 to 300 | 6,000 – 7,000 |
| 300 to 600 | 9,000 – 12,000 |
| 600 to 1,000 | 15,000 – 20,000 |
In addition to capacity, evaluate the energy efficiency of the mini split system. Look for models with a higher SEER (Seasonal Energy Efficiency Ratio) rating, as they will consume less energy while providing the same level of comfort. Systems with inverter technology can also help you save on energy costs by adjusting the compressor speed to maintain desirable temperatures.
Lastly, consider the features you might need. Some systems come with advanced functionalities such as built-in Wi-Fi for remote control, programmable timers for better scheduling, and multiple zone capabilities to control different rooms’ temperatures independently. Assessing your specific needs and priorities will help you select the perfect mini split system for your home or office.
Tools Needed for Installation
Installing a mini-split system can be a rewarding DIY project, but it requires the right tools to ensure a successful installation. Here’s a comprehensive list of the essential tools you’ll need:
| Tool | Purpose |
|---|---|
| Drill | To create holes for mounting brackets and wiring. |
| Level | To ensure the indoor and outdoor units are properly aligned. |
| Stud Finder | To locate studs in the wall for secure mounting. |
| Pipe Wrench | To tighten refrigerant lines and connections. |
| Vacuum Pump | To evacuate the refrigerant lines before charging the system. |
| Refrigerant Gauge Set | To check the system’s pressure and ensure proper operation. |
| Flaring Tool | To create flared fittings on copper lines. |
| Safety Gear | Including gloves and goggles, to protect yourself during installation. |
Having the right tools will make the installation process smoother and help you achieve better results. It’s also a good idea to have a helper on hand to assist with lifting and securing the units.
Before you begin the installation, ensure that you have read through the manufacturer’s instructions thoroughly. Understanding the required tools and steps can prevent common mistakes and ultimately lead to a successful installation.
By preparing with the right tools and knowledge, you’ll be equipped to tackle your mini-split system installation. Remember, taking your time and following each step carefully will lead to the best outcome and durability of your new mini split system.
Step-by-Step Installation Guide
Installing a mini split system can be a manageable task if you have the right tools and understanding of the process. This guide will walk you through the essential steps to successfully install your mini split system. Below, you’ll find a detailed overview broken down into clear steps.
Before beginning the installation, ensure that you have the following tools ready:
- Drill and drill bits
- Level
- Wrench set
- Pipe cutter
- Refrigerant gauges
- Measuring tape
- Vacuum pump
Follow these steps for a successful installation:
- Choose the Right Location: Select a wall-mounted unit location that allows for optimal air distribution and easy access to the outdoor compressor.
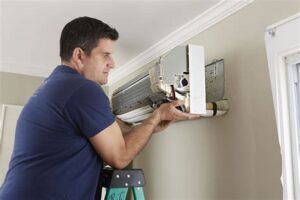
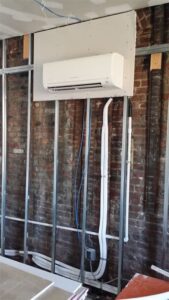
- Mount the Indoor Unit: Securely attach the mounting bracket to the wall and hang the unit on it, ensuring it is level.
- Drill the Hole: Drill a hole through the wall for the refrigerant lines and drain pipe. Ensure it is slightly sloped towards the outside.
- Connect the Refrigerant Lines: Properly connect the refrigerant lines, making sure there are no kinks.
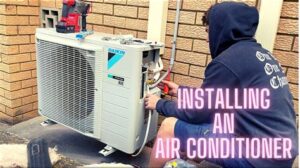
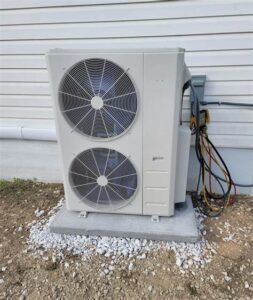
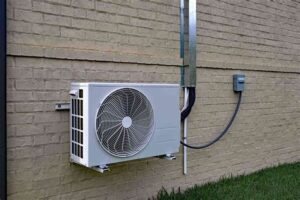
- Install the Outdoor Unit: Place the outdoor compressor on a stable surface, ideally elevated off the ground, and connect the refrigerant lines.
- Electrical Connections: Follow the electrical wiring instructions provided by the manufacturer for safe connections.
- Test the System: Finally, vacuum the system to remove air and moisture, then charge it with refrigerant. Make sure to run a test to ensure it’s working properly.
By following this guide, you can achieve a smooth installation of your mini split system on your own. Ensure that all steps are taken carefully and consult the manufacturer’s manual for specific instructions related to your model.
Tips for Maintenance and Troubleshooting
Maintaining your mini split system is crucial for ensuring its efficiency and longevity. Regular upkeep not only helps prevent costly repairs but also keeps your energy bills in check. Here are some essential tips for maintenance:
- Clean the filters: Check and clean the air filters every month. A clogged filter reduces airflow and can make your system work harder, resulting in higher energy consumption.
- Inspect condensate drains: Ensure that the condensate drain is clear of debris. If water is pooling around your unit, it may lead to damage and mold growth.
- Check outdoor unit: Keep the area around your outdoor unit free from vegetation and debris. Make sure the coils are clean for optimal airflow.
Troubleshooting common issues can also save you time and prevent the need for professional service. Here are some typical problems and their solutions:
| Problem | Possible Cause | Solution |
|---|---|---|
| Unit does not turn on | Power supply issue | Check the circuit breaker and ensure power is reaching the unit. |
| Poor cooling performance | Clogged filters or low refrigerant | Clean or replace filters and check refrigerant levels. |
| Unusual noises | Loose components or debris | Inspect for loose parts or clear any debris inside or around the unit. |
By following these maintenance and troubleshooting tips, you’ll ensure your mini split system operates smoothly, providing efficient comfort for years to come.
Frequently Asked Questions
What tools do I need to install a mini split system myself?
To install a mini split system, you will need basic tools such as a drill, level, wrench set, screwdriver, pipe cutter, vacuum pump, and refrigerant gauge set.
Can I install a mini split system without professional help?
Yes, you can install a mini split system yourself if you have some technical skills and follow the manufacturer’s instructions carefully. However, ensure compliance with local regulations.
What are the key steps in the installation process of a mini split system?
The key steps include selecting the installation location, mounting the indoor and outdoor units, connecting refrigerant lines, electrical wiring, securing the drain line, and testing the system.
How do I choose the right size mini split for my space?
To choose the right size mini split, calculate the BTUs (British Thermal Units) required for your space based on its square footage, insulation quality, and climate.
Is it necessary to insulate the refrigerant lines?
Yes, it is crucial to insulate the refrigerant lines to prevent energy loss and condensation, which can cause damage over time.
What precautions should I take when installing the outdoor unit?
Ensure the outdoor unit is placed in a location with adequate airflow, away from obstructions, and that it is level to avoid drainage issues.
How do I troubleshoot common issues after installation?
For troubleshooting post-installation issues, check connections, ensure the unit is level, inspect the air filters, and verify that the power supply is functioning correctly.
