Learn how to properly install an indoor unit by choosing the right location, checking wall strength, preparing space, and connecting refrigerant lines.Installing a mini-split system on an interior wall can be a practical solution for providing efficient heating and cooling in your home. Unlike traditional HVAC systems, mini-splits offer flexibility in placement and energy efficiency, making them an ideal choice for various living spaces. However, a successful installation requires careful planning and attention to detail. In this blog post, we’ll guide you through the essential steps to ensure a seamless installation, from choosing the right location for your unit to checking for wall strength and preparing the wall space. We’ll also cover the key processes of mounting the indoor unit and connecting the refrigerant lines. Whether you’re a DIY enthusiast or a homeowner looking to enhance your comfort, this comprehensive guide will equip you with everything you need to know to install a mini-split on an interior wall. Let’s dive in and start creating your perfect climate!
Choosing the Right Location
When it comes to installing a mini split system, one of the most critical steps is choosing the right location for the indoor unit. The location affects the system’s efficiency, airflow, and overall performance. Here are some essential tips to help you select the most suitable spot:
- Central Positioning: Ideally, the unit should be installed in a central location within the room to ensure even air distribution.
- Avoid Obstructions: Make sure there are no obstructions nearby, such as furniture or curtains, that can impede airflow.
- Height Matters: The indoor unit should be mounted high on the wall in order to take advantage of natural convection currents, which help in distributing air efficiently.
- Temperature Variations: Avoid locations near doors, windows, or exterior walls where temperature fluctuations can affect the unit’s performance.
- Accessibility: Ensure the unit is easily accessible for maintenance and cleaning.
Another key factor is to consider the size of the room. The mini split system’s capacity should match the room’s size to maintain optimal temperatures. Consulting a professional can help gauge the ideal BTU (British Thermal Unit) rating required for the space.
Additionally, keep in mind the aesthetic aspect of the installation. Select a location that won’t compromise the room’s decor. Many modern mini split systems come in sleek designs that can complement your interior.
By taking the time to carefully consider all of these factors when choosing the right location, you can ensure your mini split system operates efficiently and effectively, creating a comfortable living environment.
Checking for Wall Strength
When installing a mini split system, it is crucial to ensure the wall strength is adequate to support the indoor unit. A properly mounted unit not only enhances performance but also ensures safety and durability. Before you proceed with the installation, follow these guidelines to check your wall strength.
First, examine the type of wall you are working with. Walls can be made of various materials including drywall, plaster, or concrete. Each material has a different load-bearing capacity. For example, a stud wall can hold more weight than a thin layer of drywall. If you are unsure about your wall’s material composition, you may want to perform a thorough inspection or consult a professional.
Next, utilize a stud finder to locate the vertical studs within the wall. Mark their positions as these will be your primary anchor points for the indoor unit. It is recommended to mount the unit directly onto these studs to ensure it is securely attached. If your wall does not have studs positioned correctly for your unit, consider reinforcing the wall or selecting another location altogether.
Lastly, check for any signs of damage such as cracks, moisture, or decay. These issues may compromise the wall’s strength, making it unsuitable for installation. If you notice any problems, address them before proceeding. A strong wall is essential for the longevity and efficacy of your mini split system.
Preparing the Wall Space
Preparing the wall space is a crucial step in the mini-split installation process. Proper preparation ensures that the unit functions efficiently and is securely mounted, minimizing the risk of damage to the wall and the system itself.
First, you need to ensure that the wall surface is clean and free of any debris. Dust, dirt, or other particles can interfere with the mounting process and impact the overall performance of the unit. Use a damp cloth to wipe down the area where you will be installing the indoor unit.
Next, make sure that the wall is structurally sound. You can do this by checking for any signs of damage such as cracks, rot, or weakness. It’s essential to avoid walls that are compromised, as they may not support the weight of the mini-split system adequately.
After the wall has been deemed suitable, consider using a stud finder to locate the studs behind the drywall. This will help you determine the best spots for securely anchoring the mounting bracket, which is important for stability. Mark the stud locations with a pencil to guide your installation.
Finally, clear any obstacles around the area that might impede access during installation. Make sure that you have ample space to work and that nearby furniture or decorations won’t hinder the process. Preparing your wall space thoroughly not only paves the way for an efficient installation but also contributes to the longevity and performance of your mini-split system.
Mounting the Indoor Unit
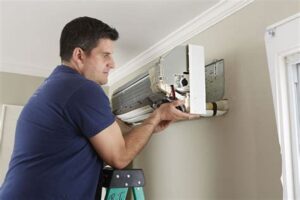
Mounting the indoor unit of a mini split system is a crucial step in ensuring optimal performance and efficiency. To achieve this, you must first ensure that you have selected the right location. The indoor unit should ideally be mounted high on the wall to promote adequate air circulation throughout the room.
Before you start the mounting process, make sure to gather all necessary tools, including a level, drill, and mounting bracket. The mounting bracket must be securely attached to the wall, providing a stable support system for the indoor unit.
Once everything is in place, hang the mini split indoor unit onto the bracket, making sure it is level and firmly secured. You can use screws to lock the unit in place. This ensures that the indoor unit will function effectively without vibrations or noise.
Finally, periodically check the unit post-installation to confirm that it is operating correctly and efficiently. Proper mounting is key to the longevity and performance of your mini split system.
Connecting the Refrigerant Lines
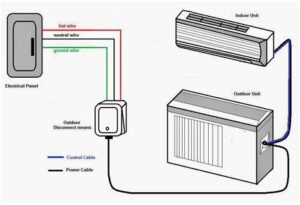
Connecting the refrigerant lines is a crucial step in the installation of your mini split air conditioner. This process involves carefully linking the indoor and outdoor units to allow for efficient heat exchange. Follow these steps for a successful installation.
Before starting, ensure you have the necessary tools: a tube cutter, wrenches, and proper safety gear. The refrigerant lines typically consist of two copper pipes: one for liquid refrigerant and the other for gas refrigerant. Pay close attention to the diameter of the pipes, as they must match the specifications provided by the manufacturer.
To connect the refrigerant lines:
- First, cut the lines to the appropriate length using your tube cutter.
- Next, flare the ends of the copper pipes. Use a flare tool and ensure that the flaring is precise to prevent leaks.
- Then, connect the lines to the indoor unit’s connection points. Secure them tightly with wrenches but avoid overtightening.
- Afterward, route the lines through a wall to connect with the outdoor unit.
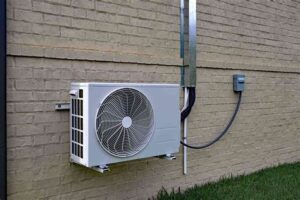
- Finally, connect the refrigerant lines to the outdoor unit, taking care to use the correct ports for liquid and gas.
Once everything is connected, it is essential to run a vacuum on the lines to remove any moisture and air. This step is vital as it helps maintain the system’s efficiency and prolongs the lifespan of your mini split system.
Frequently Asked Questions
What tools are needed to install a mini split on an interior wall?
To install a mini split on an interior wall, you will need screwdrivers, a drill, a level, a stud finder, pliers, and refrigerant line tools such as a pipe cutter and wrenches.
Where should I position the indoor unit of the mini split?
The indoor unit should be installed high on the wall, ideally around 7-8 feet from the floor. It should be positioned where airflow is unobstructed and can effectively distribute air throughout the room.
How do I determine the right size mini split for my space?
To determine the right size mini split, you can calculate the BTU (British Thermal Unit) requirements based on the room’s square footage, ceiling height, insulation levels, and heat sources. It’s often best to consult with a professional for accurate calculations.
What is the process for mounting the mini split indoor unit?
To mount the indoor unit, first mark the position on the wall, drill holes for the mounting bracket, secure the bracket to the wall, and then hang the unit on the bracket. Ensure it is level and stable.
Do I need to hire a professional, or can I install the mini split myself?
While some homeowners can install mini splits themselves, it is recommended to hire a professional HVAC technician to ensure proper installation, especially for handling refrigerants and electrical connections.
What should I consider when running the refrigerant lines?
When running refrigerant lines, ensure they are insulated to prevent energy loss, keep them as short and direct as possible to reduce pressure drop, and make sure they are protected from potential damage.
What maintenance is required after installing a mini split system?
After installation, regular maintenance includes cleaning or replacing the filters every month, inspecting the outdoor unit for debris, checking refrigerant levels, and scheduling annual professional inspections for optimal performance.


