Learn how to install a mini split system in your garage with our step-by-step guide covering selection, preparation, installation, and testing.Are you tired of extreme temperatures ruining your garage space? A mini split system could be your perfect solution for creating a comfortable environment all year round. This blog post will guide you step-by-step through the installation process of a mini split system in your garage, ensuring you have all the information you need for a successful project. From selecting the right system tailored to your needs to properly preparing the garage space, we’ll cover each crucial aspect of installation. You’ll learn how to install both the indoor unit and the outdoor condenser, followed by essential tips for testing and adjusting the system for optimal performance. By the end of this guide, you’ll have the confidence to transform your garage into a climate-controlled haven with ease. Let’s dive in!
Selecting the Right Mini Split System
When it comes to installing a mini split system in your garage, the first step is selecting the right unit for your needs. Mini split systems are an excellent choice for garages because they provide both heating and cooling while being efficient and easy to install. Here are some factors to consider when choosing the best mini split system for your garage:
- Size: The size of the mini split unit is crucial. Choose a model that fits your garage dimensions. A professional can help you calculate the necessary BTUs (British Thermal Units) based on the square footage of your space.
- Energy Efficiency: Look for units with a high SEER (Seasonal Energy Efficiency Ratio) rating. The higher the SEER, the more efficient the system, which can save you money on energy bills.
- Noise Level: Consider how noisy the system operates. Some units are specifically designed to run quieter, which is beneficial if you plan on spending a lot of time in your garage.
- Heating and Cooling Capacity: Depending on your climate, make sure the unit you choose can effectively heat and cool your garage throughout the year.
In addition to these factors, consider whether you want a single-zone or multi-zone system. A single-zone system works well for smaller garages, while a multi-zone system is ideal if you have a larger garage or want to heat/cool multiple areas.
Lastly, pay attention to the brand and warranty options. Choose a reputable brand that offers a good warranty,
Preparing the Garage Space
Before installing a mini split system in your garage, proper preparation of the space is essential to ensure optimal performance and efficiency. Here are the steps you should follow to get your garage ready:
- Clear Out Clutter: Remove any unnecessary items from the garage to create a spacious work area. This will also help you assess the installation area better.
- Assess Insulation: Check the insulation of the garage walls and ceiling. Proper insulation will help maintain the desired temperature and improve the efficiency of the mini split system.
- Determine Location: Choose an appropriate location for the indoor unit. Ideally, it should be installed on a wall where it can distribute air evenly throughout the garage.
- Check Electrical Supply: Ensure that there is a suitable electrical supply available for the mini split system. An electrician may be needed to install a dedicated circuit.
- Plan Drainage: Consider how condensation will be drained from the indoor unit. You may need to install a drainage line or a pump if gravity drainage is not possible.
With these preparations in place, you’ll have a functional and efficient garage environment for your mini split installation. Remember, the more organized and planned your space is, the smoother the installation process will be.
Finally, ensure that you have all the necessary tools and materials ready before proceeding with the installation. This includes brackets, screws, and any required accessories specific to your chosen mini split model.
By taking the time to prepare your garage space properly, you set the foundation for a successful mini split installation that can enhance the comfort of your garage for years to come.
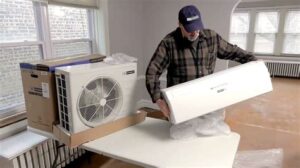
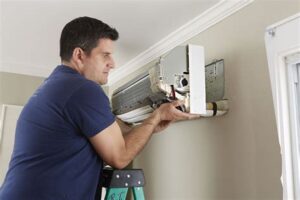
Installing the Indoor Unit
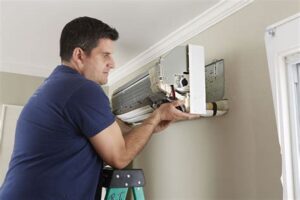
When it comes to installing a mini split system in your garage, the most crucial step is the installation of the indoor unit. This unit is responsible for distributing cool or heated air throughout the space, ensuring that your garage remains comfortable regardless of the season.
Follow these key steps to successfully install the indoor unit:
- Select the Right Location: Choose a spot that allows for even airflow and is away from any obstructions. Ideally, it should be on an interior wall.
- Mount the Bracket: Use a level to ensure that your mounting bracket is straight. Attach it to the wall with appropriate screws, which should be included with the mini split system.
- Drill the Hole: Drill a hole through the wall for the refrigerant lines and drainage. Make sure it slopes slightly downward for proper drainage.
- Connect the Lines: Carefully feed the refrigerant lines and electrical cable through the hole. Make sure the lines are not pinched or damaged.
- Attach the Indoor Unit: Secure the indoor unit onto the mounting bracket following the manufacturer’s instructions. Ensure it’s securely fastened.
Following these steps will help ensure a seamless installation of the mini split indoor unit, optimizing your cooling and heating needs for your garage. Always refer to the manufacturer’s guidelines for any specific installation requirements.
Mounting the Outdoor Condenser
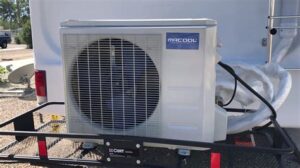
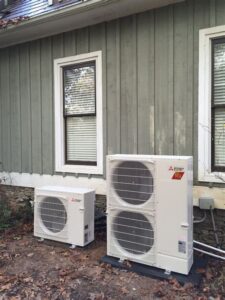
Mounting the outdoor condenser is a crucial step in the installation of your mini-split system. Proper placement and secure mounting not only ensure optimal performance but also extend the lifespan of your unit. Below are some key factors to consider during this process.
Firstly, choose a location that is on a stable surface, away from obstructions that could impede airflow. The unit should ideally be mounted at least 12 inches off the ground to prevent water damage and allow for easier maintenance. Additionally, make sure it is positioned on a side that is less exposed to the elements to protect it from severe weather.
For the actual mounting process, use brackets or a platform designed for the specific model of your condenser. Consulting the manufacturer’s instructions is critical, as it will provide you with guidelines for both height and leveling. After installing the unit securely, double-check connections and ensure there is a slight angle for drainage. This completes the mounting procedure and prepares your system for testing.
Testing and Adjusting the System
Once your mini split system is installed, it’s essential to carry out thorough testing and adjustments to ensure optimal performance. Begin by turning on the system and setting the desired temperature. It’s crucial to monitor both the indoor and outdoor units to confirm that they are operating correctly.
Check for any unusual sounds or vibrations, which could indicate an installation issue. Additionally, utilize a thermometer to measure the air temperature coming from the indoor unit. The output should ideally match the thermostat setting within a few degrees. If there is a significant discrepancy, you will need to troubleshoot further.
Don’t forget to verify the drainage line for proper functioning. It should allow condensation to flow out freely without any blockages. Regularly inspect the filters and ducts for airflow efficiency. Proper testing and adjusting not only ensure energy efficiency but also prolong the lifespan of the mini split system.
Frequently Asked Questions
What tools do I need to install a mini split in my garage?
You’ll need a drill, level, screwdriver, wrenches, a pipe cutter, and safety goggles. Additionally, you may need a vacuum pump for the refrigerant lines.
What type of mini split system is best suited for a garage?
A ductless mini split system is ideal for garages, especially those without existing ductwork. Look for a model with sufficient BTU capacity to effectively heat or cool your garage space.
How do I choose the right location for the indoor unit?
Select a spot that allows for even air distribution and is away from obstructions, such as furniture or equipment. Ideally, it should be mounted high on a wall.
What are the steps to install the outdoor unit?
Ensure the outdoor unit is placed on a stable surface, install the mounting bracket, level the unit, and connect it to your electrical supply according to the manufacturer’s instructions.
Do I need to hire a professional for electrical work?
If you’re not experienced with electrical systems, it’s advisable to hire a licensed electrician to connect the mini split to your home’s electrical supply for safety and compliance with local codes.
How do I connect the refrigerant lines between the indoor and outdoor units?
Carefully route the refrigerant lines using a pipe cutter, ensuring there are no kinks. Connect the lines according to the manufacturer’s guidelines, and ensure all connections are leak-free.
What maintenance tips should I follow after installation?
Regularly clean or replace filters, check for refrigerant leaks, and maintain the outdoor unit by clearing debris. Schedule professional maintenance once a year to ensure optimal performance.
