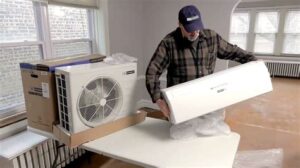
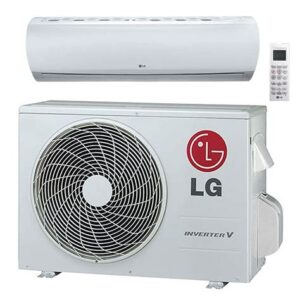
Learn how to select the perfect location and size for your unit, prepare the installation area, and install your indoor unit with ease.Installing a Pioneer mini split system can be a game-changer for your home’s heating and cooling needs, offering a seamless blend of comfort and efficiency. However, achieving optimal performance begins with careful planning and installation. In this blog post, we’ll guide you through the essential steps to successfully install your mini split unit, starting from choosing the best location for maximum airflow and efficiency to properly sizing the system for your space. We’ll also cover how to prepare the installation area, ensuring everything is ready for a smooth setup. Finally, we’ll walk you through installing the indoor unit and connecting the refrigerant lines, so you can start enjoying your new climate control solution with confidence. Let’s dive in and transform your living space into an oasis of comfort!
Choosing the Right Location
When it comes to installing a Pioneer mini split, one of the most crucial steps is choosing the right location. The placement of the indoor unit can significantly affect the system’s efficiency and your comfort level. Therefore, careful consideration should be given to ensure optimal performance.
Here are some key factors to keep in mind while selecting the location:
- Avoid direct sunlight: Placing the unit in direct sunlight can hinder its ability to cool efficiently. Finding a shaded area will maximize its performance.
- Consider air circulation: Ensure that the location allows for proper air flow from the mini split. Avoid placing it behind large furniture or in confined spaces.
- Height matters: Install the indoor unit high on the wall for better air distribution. Typically, a height of about 7-8 feet from the floor is ideal.
Additionally, make sure to place the unit away from any obstacles that may restrict airflow, such as curtains or shelves. Careful planning at this stage can save you headaches down the line, improving both efficiency and comfort in your space.
Proper Sizing of the Unit
When it comes to installing a Pioneer mini split system, proper sizing of the unit is crucial for achieving optimal performance and efficiency. Choosing a unit that is too small will not provide adequate heating or cooling, while a unit that is too large can result in increased energy bills and uncomfortable temperature fluctuations.
To determine the appropriate size for your mini split unit, you will need to consider the square footage of the space, insulation quality, number of windows, and the local climate. A commonly used method for calculating the right size is to use BTUs (British Thermal Units). Generally, you will need about 20 BTUs per square foot of living space.
Here’s a simple table to help you gauge the BTU requirements based on different room sizes:
| Room Size (sq ft) | Recommended BTUs |
|---|---|
| 100 – 300 | 7,000 – 9,000 |
| 300 – 600 | 9,000 – 12,000 |
| 600 – 1,000 | 12,000 – 18,000 |
| 1,000 – 1,200 | 18,000 – 24,000 |
In addition to the basic square footage requirement, you might want to adjust the BTUs based on factors like ceiling height and exposure to sunlight. For instance, if a room has high ceilings or large windows, you may need to increase the BTUs accordingly. Conversely, a room located in a shaded area could afford to use a unit with lower BTUs.
Preparing the Installation Area
Before diving into the installation of a Pioneer mini split system, it is crucial to adequately prepare the installation area. Doing this ensures the process runs smoothly and the unit performs efficiently. Here are key steps to consider.
1. Choose an Appropriate Location: Select a location that allows easy access for future maintenance. Make sure the indoor unit is positioned away from direct sunlight and heat sources. It’s also important to ensure that there’s enough space around the unit for airflow.
2. Ensure Structural Integrity: Verify that the wall or surface where the unit will be mounted can support the weight of the mini split. It may be necessary to reinforce the area if you’re mounting on drywall or other weak surfaces.
3. Clear the Area: Remove any obstacles from the installation site. This includes furniture, decorations, and other items that could interfere with the installation process. A clean area not only streamlines installation but also helps prevent damage and accidents.
4. Gather Tools and Materials: Prior to starting, gather all necessary tools and materials. This typically includes a drill, screwdriver, level, refrigerant lines, and mounting brackets. Having everything ready helps maintain an efficient workflow.
By taking these steps to prepare the installation area, you set the stage for a successful and efficient installation process for your Pioneer mini split system.
Installing the Indoor Unit
Installing the indoor unit of a Pioneer mini-split system is a crucial step that requires careful planning and execution. The indoor unit is responsible for distributing cooled or heated air throughout your living space, so its installation must be done with precision.
To begin, you need to choose an appropriate location for the indoor unit. Ideally, it should be placed on an interior wall that allows for optimal airflow. Ensure that there are no obstructions, such as furniture or plants, that can interfere with the air circulation. Additionally, consider the overall aesthetics of your room to maintain its visual appeal.
Once you’ve identified the location, follow these steps for the installation:
- Mounting the Bracket: Use the level to mark the bracket’s position on the wall. Drill holes and secure the bracket to the wall with appropriate anchors.
- Connecting the Drainage Pipe: Attach the drainage pipe to the indoor unit to allow for condensation to drain properly.
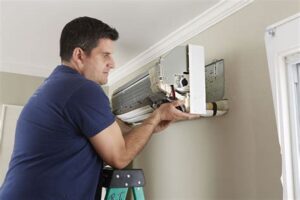
- Mounting the Indoor Unit: Carefully hook the indoor unit onto the bracket and ensure it is secure.
- Electrical Connections: Make sure to follow the manufacturer’s guidelines while connecting the power supply to the indoor unit.
Proper installation of the indoor unit not only enhances the system’s efficiency but also ensures optimum comfort in your home. Remember to double-check all connections and ensure that everything is securely fitted before proceeding to the next steps in your mini-split installation.
Connecting the Refrigerant Lines
Connecting the refrigerant lines is a critical step in the installation of your Pioneer mini split system. Properly executing this task ensures efficient operation and longevity of your unit. Let’s go through the necessary steps to connect the refrigerant lines effectively.
Before starting the connection process, you’re going to need the following materials:
- Refrigerant copper lines
- Isolation valves
- Insulation materials
- Torque wrench
- Refrigerant leak detector
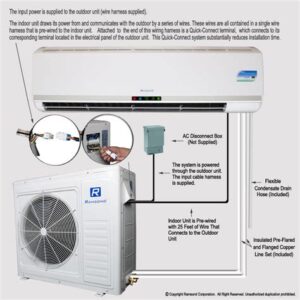
First, measure and cut your copper lines to the appropriate length, ensuring they are long enough to reach from the indoor unit to the outdoor unit without excessive bends. Next, attach the isolation valves to both the indoor and outdoor units. It is important to ensure that the connections are tight, as leaks can lead to inefficiency or even system failure.
Now, connect the refrigerant lines to their respective ports on the indoor and outdoor units. Make sure to use a torque wrench to tighten the connections according to the manufacturer’s specifications. After completing the connections, insulate the lines to prevent condensation and further increase the system’s efficiency.
Finally, check for leaks using a refrigerant leak detector. This step is crucial; any leaks can compromise the system’s performance and lead to costly repairs. If everything checks out, you’re now ready to move forward to the next stages of the installation!
Frequently Asked Questions
What tools do I need to install a Pioneer mini split?
You will need basic tools such as a drill, screwdrivers, pliers, a level, refrigerant gauge set, and a pipe cutter.
What is the first step in installing a Pioneer mini split?
The first step is to select an appropriate location for both the indoor and outdoor units, ensuring adequate airflow and structural support.
How do I mount the indoor unit of a Pioneer mini split?
Mount the indoor unit using brackets provided in the kit, ensuring it is level and securely attached to the wall.
What refrigerant lines need to be connected during installation?
You will need to connect the liquid line and the suction line from the indoor unit to the outdoor unit.
Do I need to vacuum the refrigerant lines before using the mini split?
Yes, it’s essential to vacuum the lines to remove any moisture and air before charging the system with refrigerant.
How do I connect the power supply for a Pioneer mini split?
Follow the manufacturer’s instructions to connect the electrical wires based on your local electrical code, typically connecting the indoor unit to a dedicated circuit.
What should I do after installing the Pioneer mini split?
After installation, check for leaks, confirm that the system is functioning properly, and set the desired temperature on the remote control.
