Learn how to install a mini split system with our step-by-step guide. From choosing the right location to troubleshooting, we’ve got you covered!Installing a MRCOOL mini split system can be a game-changer for your home, offering both comfort and energy efficiency. As more homeowners seek alternatives to traditional HVAC systems, mini splits have gained popularity for their flexibility and ease of installation. This blog post will guide you through the entire process, from understanding how the mini split system works to choosing the perfect installation location, gathering the necessary tools, and executing a step-by-step installation. We’ll also cover important tips for testing your system and troubleshooting any potential issues afterward. Whether you’re a seasoned DIY enthusiast or a first-time installer, this guide will help ensure your mini split system is set up effectively for optimal performance. Let’s dive in and transform your space with efficient heating and cooling!
Understanding the Mini Split System
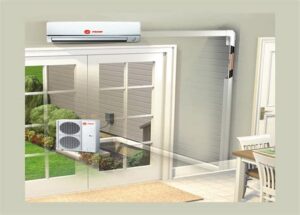
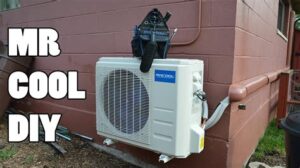
A mini split system is an efficient heating and cooling solution that consists of two main components: an indoor unit and an outdoor condenser. This system is highly favored for its flexibility in installation and energy efficiency compared to traditional HVAC systems. Mini splits are ideal for homes without ductwork, making them a popular choice for retrofitting older homes or adding climate control in new additions.
The indoor unit is responsible for distributing conditioned air throughout the space. It typically comes with a remote control and various settings for customized temperature control. The outdoor condenser, on the other hand, houses the compressor and is the part of the system that exchanges heat with the external environment. Together, these units work using a refrigerant to transfer heat efficiently. The system allows for zoned heating and cooling, meaning different areas of the home can be set to different temperatures according to individual preferences.
In addition to their basic components, mini split systems often include advanced features such as advanced air filtration, quiet operation, and smart technology compatibility, allowing users to control their systems from anywhere. Understanding how these components work together will help you get the most out of your Mrcool mini split system.
Choosing the Right Location for Installation
Choosing the right location for installing your MrCool Mini Split system is crucial for optimal performance and efficiency. An ideal installation site not only enhances the unit’s functionality but also simplifies maintenance and improves the overall aesthetics of the space.
When selecting a location, consider the following key factors:
- Indoor Unit Placement: The indoor unit should be installed high on the wall, preferably around 7–8 feet off the ground. This height allows for efficient air distribution and helps prevent cold spots.
- Outdoor Unit Proximity: The outdoor unit should be situated close to the indoor unit to minimize refrigerant line lengths. Aim to keep the distance under 25 feet for optimal effectiveness.
- Avoid Direct Sunlight: Direct sunlight can affect the performance of both units. If possible, install the units in shaded areas to maintain efficiency.
Other crucial considerations include ensuring there’s sufficient clearance around both units for airflow and maintenance access. It’s also vital to adhere to local building codes and regulations regarding the installation of HVAC systems.
Gathering Necessary Tools and Materials
Installing a Mrcool mini split system requires careful preparation and the right tools to ensure a successful setup. Before diving into the installation process, it’s essential to gather all necessary tools and materials. Below is a comprehensive list to help you prepare.
1. Tools Needed:
- Drill – For creating holes in walls.
- Screwdriver Set – For securing the mounting bracket and accessing the unit.
- Level – To ensure proper installation and alignment of the indoor unit.
- Pipe Cutter – For cutting the refrigerant lines to the desired length.
- Line Set Wrenches – To tighten the flare fittings on the refrigerant lines.
- Wire Strippers – To prepare electrical wiring for connections.
- Multimeter – For testing electrical connections.
2. Materials Required:
- Mounting Bracket – This is usually provided with the mini split system.
- Refrigerant Line Set – Essential for connecting the indoor and outdoor units.
- Drain Hose – To handle condensation from the indoor unit.
- Electrical Wiring – For connecting power to the indoor and outdoor units.
- Insulation Tape – To wrap refrigerant lines to prevent energy loss.
By ensuring you have these tools and materials on hand, you will create a more efficient and organized installation process for your Mrcool mini split system.
Step-by-Step Installation Process
Installing a Mrcool mini split system can seem daunting, but by following a structured process, you can ensure a successful installation. Below are the essential steps you need to follow:
- Choose the Ideal Location: Select a placement for the indoor and outdoor units that maximizes efficiency and avoids direct sunlight or obstructions.
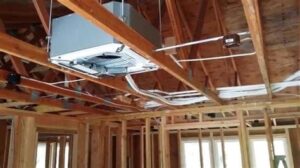
- Prepare the Wall: Drill a hole through the wall for the refrigerant lines, ensuring you provide a slope for drainage.
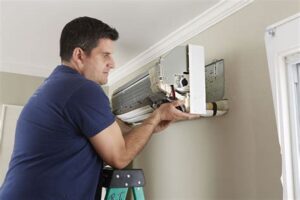
- Mount the Indoor Unit: Secure the mounting bracket to the wall and attach the indoor unit. Ensure it is level for optimal performance.
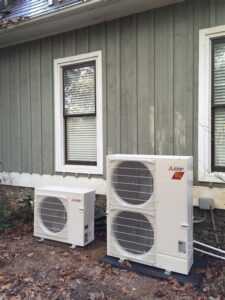
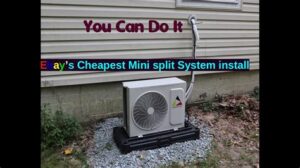
- Install the Outdoor Unit: Level and secure the outdoor unit on a stable surface, free from debris and wind exposure.
- Connect the Lines: Carefully connect the refrigerant lines and electrical wiring, ensuring all connections are airtight.
- Seal the Wall Opening: Use foam insulation to seal around the hole made for the refrigerant lines to prevent air leaks.
- Check the Installation: Inspect all connections and ensure the units are secured in place. Double-check that there are no obstructions around the outdoor unit.
- Power On the System: Switch on the power at the electrical panel, then power on the units to check for abnormal noises or leaks.
Make sure to read the manufacturer’s manual for specific instructions and safety precautions for your Mrcool mini split system. Remember that following each step carefully will contribute to the longevity and efficiency of your system.
Finally, if you have any doubts or encounter issues during the installation process, do not hesitate to contact a professional. It’s always better to err on the side of caution when it comes to home installations!
With these steps, you should now feel confident about installing your Mrcool mini split. Happy installing!
Testing and Troubleshooting after Installation
After successfully installing your MRCOOL Mini Split system, the next crucial step is to conduct thorough testing and troubleshooting. This ensures that the system is operating efficiently and effectively. Here’s how to systematically check the installation.
Start by powering on the unit. Make sure to set the remote control to the desired mode (heating or cooling) and adjust the temperature settings. Observe if the system responds accordingly. Check for the following:
- No unusual noises—Such as rattling or hissing that may indicate installation issues.
- Airflow—Ensure that air is flowing freely without any obstructions.
- Leaking fluid—Inspect for any signs of refrigerant or condensation leaks.
If you encounter any problems during the testing phase, consult the troubleshooting guide provided in the manufacturer’s manual. Common issues include:
| Problem | Possible Cause | Solution |
|---|---|---|
| No Cooling | Incorrect settings or low refrigerant | Reset the system or check refrigerant levels. |
| Weak Airflow | Blocked air filters | Clean or replace the air filters. |
| Frequent Cycling | Improper installation | Review installation guidelines and recalibrate as necessary. |
By performing these tests and addressing potential issues, you will ensure that your MRCOOL Mini Split system
Frequently Asked Questions
What tools do I need to install a MrCool mini split?
You will need a drill, level, tape measure, stud finder, wrenches, and screwdrivers, among other installation tools.
Do I need to hire a professional for the installation?
While MrCool mini splits are designed for easy DIY installation, it is advisable to hire a professional if you are unsure about HVAC systems or local building codes.
How do I choose the right location for the indoor unit?
The indoor unit should be installed in a central location, away from obstacles, ideally 7-8 feet above the floor, to ensure even airflow throughout the room.
Can I install the outdoor unit on the ground?
Yes, you can install the outdoor unit on the ground, but it needs to be placed on a sturdy base and must be at least few inches off the ground to allow for proper drainage.
What is the required power supply for a MrCool mini split?
Ensure that you have a dedicated 240V power supply for the MrCool mini split, as inadequate power can lead to system malfunction.
Is it necessary to connect the linesets to the outdoor unit tightly?
Yes, it’s crucial to connect the linesets tightly to prevent refrigerant leaks and ensure the system operates efficiently.
How do I test the installation after completing it?
After installation, turn on the unit and check for proper airflow, listen for unusual noises, and verify that the system cools or heats effectively to confirm successful installation.
