Learn how to install your air conditioning unit with our step-by-step guide covering location selection, tools needed, mounting, refrigerant connections, and troubleshooting tips.Are you looking to enhance your home’s comfort with a Mr. Cool mini split system? Installing a mini split can be a rewarding DIY project, providing efficient cooling and heating all year round. However, to ensure a successful installation, careful planning and execution are crucial. In this blog post, we’ll guide you through each essential step, from choosing the perfect location for your unit to gathering the necessary tools and installing the mounting bracket. We’ll also walk you through connecting the refrigerant lines, and offer tips for testing and troubleshooting to ensure everything runs smoothly. Whether you’re a seasoned DIY enthusiast or a first-time installer, our comprehensive guide will equip you with the knowledge you need to install your Mr. Cool mini split with confidence. Let’s get started!
Choosing the Right Location
When it comes to installing a Mr Cool mini split, selecting the right location is crucial for optimal performance and efficiency. A well-chosen installation site can significantly impact your unit’s ability to heat or cool a space effectively.
Here are some key considerations to keep in mind when determining the best location for your mini split:
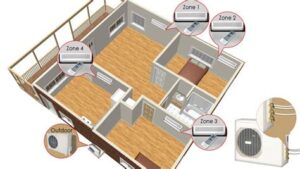
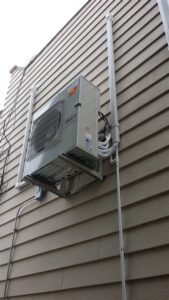
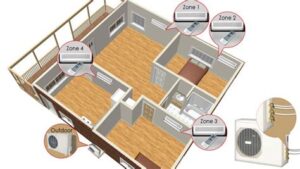
- Proximity to the Outdoor Unit: The indoor and outdoor units of your mini split system should be installed within a close range. This minimizes refrigerant line length and maximizes efficiency.
- Avoiding Direct Sunlight: Position the indoor unit where it won’t be directly exposed to sunlight. This can help prevent the unit from overworking and ensure consistent temperature control.
- Airflow Considerations: Ensure that the indoor unit is not obstructed by furniture, drapes, or other items. Proper airflow is essential for the unit to function effectively.
Ultimately, taking the time to assess your space and choose a strategic location for your Mr Cool mini split can lead to better comfort levels, improved energy efficiency, and a more effective heating and cooling system.
Gathering the Necessary Tools
Before diving into the installation of your Mr. Cool mini split, it is crucial to gather all the necessary tools. Having the right equipment on hand not only simplifies the process but also ensures a smooth installation. Below is a list of essential tools you will need:
- Drill – For drilling holes into the wall for the line set and mounting bracket.
- Measuring Tape – To accurately measure distance for mounting.
- Level – Ensures that the indoor and outdoor units are properly aligned.
- Wrench Set – For tightening connections on refrigerant lines.
- Screwdriver Set – To secure the mounting bracket and connect various components.
- Refrigerant Gauge Set – For measuring and adjusting refrigerant levels.
- PVC Pipe Cutter – To cut the drain line to size.
- Thermometer – To check the temperature settings for optimal performance.
Having these tools will not only make the installation of your Mr. Cool mini split more efficient but will also help to avoid unnecessary trips to the hardware store. Remember that using the right tools is paramount to achieving a professional-looking install.
Lastly, do not underestimate the importance of personal safety equipment. Make sure to have your safety goggles and gloves handy to protect yourself during the installation process. With all your tools gathered and safety measures in place, you are now ready to proceed to the next steps in installing your mini split system.
Installing the Mounting Bracket
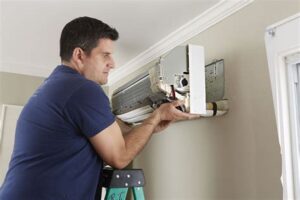
When it comes to installing a Mr Cool mini split system, one of the crucial steps is the installation of the mounting bracket. This bracket serves as the foundation for your indoor unit, ensuring it is securely fastened to the wall. Proper installation is essential for optimal performance and longevity of the HVAC system.
Follow these steps to ensure a successful installation of the mounting bracket:
- Choose the Right Location: Make sure the spot you select is free from obstructions and easy to access.
- Use a Level: It’s vital that the bracket is perfectly level so that the unit can drain correctly and function efficiently.
- Secure the Fasteners: Use appropriate fasteners based on your wall type—wood or masonry—and ensure they are fitted tightly.
Remember to refer to the manufacturer’s instructions for the specific measurements and guidelines. Proper attention to detail during this phase will lay a solid groundwork for the remaining steps in the Mr Cool mini split installation process.
Connecting the Refrigerant Lines
One of the crucial steps in installing a Mr Cool mini split system is the proper connection of the refrigerant lines. These lines play a vital role in transferring heat and keeping your indoor space comfortable. Here’s a detailed guide on how to effectively connect them.
Before starting, ensure you have the necessary tools like a wrench, nitrogen tank, and appropriate fittings. It’s also essential to wear safety gear, including gloves and goggles, to protect yourself while working with refrigerants.
Follow these steps to connect the refrigerant lines:
- Prepare the Lines: Cut the copper lines to the desired length with a tube cutter, making sure the cuts are clean and even.
- Deburr the Edges: Use a deburring tool to smooth the edges of the cut pipes, eliminating any sharp edges that could cause leaks.
- Connect the Lines: Insert the copper lines into the flare fittings, ensuring they are aligned correctly. Use a flare wrench to tighten them securely.
- Check for Leaks: Before charging the system, perform a leak test using nitrogen. This will ensure all connections are airtight.
By carefully following these steps and ensuring all connections are tight, you can successfully connect the refrigerant lines of your Mr Cool mini split system, leading to efficient cooling and heating performance.
Testing and Troubleshooting
After completing the installation of your Mr. Cool Mini Split system, it’s crucial to perform a thorough testing and troubleshooting phase to ensure everything is functioning correctly. This step is vital in confirming that your system operates efficiently and effectively.
Here are the key areas to focus on when testing your Mini Split system:
- Check for Leaks: Inspect all connections, including the refrigerant lines and the mounting brackets, to make sure there are no leaks. A simple soap solution can be used to identify any refrigerant leaks.
- Test the Power: Ensure that the unit is adequately powered. Verify that the circuit breaker is on, and the power supply is stable.
- Run the System: Turn on your Mini Split to observe its functionality. Pay attention to the cooling and heating capabilities, making sure that warm air is heated and cold air is cooled adequately.
In case you encounter issues during the testing phase, keep these troubleshooting tips in mind:
Common Issues:
- No Cool Air: This could indicate a refrigerant leak or an issue with the compressor.
- Unusual Noises: Check for loose parts or debris that may be interfering with the unit’s operation.
- Inconsistent Temperatures: Ensure that the installation height and angle are correct and that the unit is not obstructed by furniture or decor.
By thoroughly testing and troubleshooting your newly installed Mr. Cool Mini Split, you can ensure its longevity and efficiency in keeping your space comfortable.
Frequently Asked Questions
What is a Mr. Cool mini split system?
A Mr. Cool mini split system is a type of ductless heating and cooling system that provides efficient climate control for individual rooms or spaces.
What tools do I need to install a Mr. Cool mini split?
To install a Mr. Cool mini split, you will typically need a drill, stud finder, level, measuring tape, wrenches, and possibly a vacuum pump and manifolds for refrigerant lines.
Can I install a Mr. Cool mini split myself?
Yes, Mr. Cool mini splits are designed for DIY installation, but it’s important to follow the manufacturer’s instructions and local building codes for safety and efficiency.
What are the first steps to installing a Mr. Cool mini split?
First, choose an appropriate location for both the indoor and outdoor units, ensuring adequate space for airflow and easy access for maintenance. Then, mark the mounting points.
How do I connect the refrigerant lines for a Mr. Cool mini split?
After mounting the indoor and outdoor units, connect the refrigerant lines according to the manufacturer’s specifications, ensuring that all connections are tight and secure to prevent leaks.
Are there any special considerations for electrical connections?
Yes, ensure that the electrical connections comply with local codes and the installation manual. It’s often recommended to have a licensed electrician handle the wiring.
How do I test the system after installation?
Once installation is complete, turn on the system and check for proper operation. Test both heating and cooling functions, listen for unusual noises, and inspect for any refrigerant leaks.
