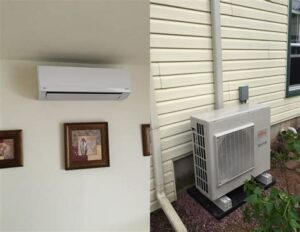
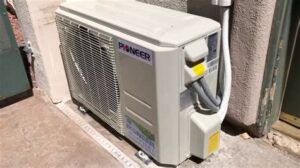
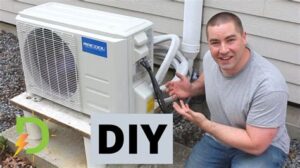
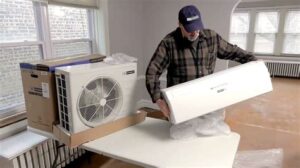
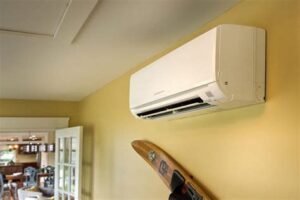
Learn how to install a mini split unit with our comprehensive guide, covering location selection, necessary tools, preparation, mounting, and system testing.Installing a mini split on an interior wall can seem like a daunting task, but with the right guidance, it can be a manageable DIY project. Mini splits are an efficient and effective way to regulate temperature in individual rooms, providing both heating and cooling without the need for bulky ductwork. In this blog post, we will walk you through the essential steps to successfully install your mini split unit on an interior wall. From choosing the perfect location to gathering necessary tools, and from preparing the wall to connecting and testing the system, each step will be broken down for clarity. Whether you’re a seasoned DIY enthusiast or a first-time installer, our comprehensive guide will ensure your mini split installation is smooth and successful, enhancing comfort in your living space. Let’s get started!
Choosing the Right Location
When it comes to installing a mini split system, selecting the right location is crucial to ensure optimal performance and efficiency. Here are some key points to consider:
- Proximity to an Electrical Source: Ensure that the location is near an electrical outlet to simplify the installation process, avoiding excessive wiring.
- Room Size and Layout: The unit should be placed in a way that allows for even air distribution throughout the space. Consider the layout of your room; avoid corners where airflow may be obstructed.
- Height and Accessibility: The ideal height for mounting the indoor unit is around 7 to 8 feet off the ground. This height allows warmer air to circulate efficiently, ensuring better cooling and heating.
- Avoid Direct Sunlight: Install the unit in a shaded area or use curtains to prevent direct sunlight from heating the area, as this can hinder the cooling efficiency.
- Noise Consideration: Choose a spot away from bedrooms or areas where quiet is essential, as the indoor unit will produce some operational noise.
By carefully evaluating these factors, you can make a sound decision on where to place your mini split system, leading to better performance and energy savings in the long run.
Remember, taking the time to choose an ideal location not only enhances comfort but also extends the life of your HVAC system.
Once you’ve identified the perfect spot, you’re one step closer to enjoying
Gathering Necessary Tools and Materials
Before you can successfully install a mini split unit on an interior wall, it’s essential to gather all the necessary tools and materials. This preparation will streamline the process and ensure a smoother installation. Below is a list of what you’ll need:
- Mini Split Unit – Ensure it’s the right size for your space.
- Mounting Bracket – This is essential for securely attaching the unit to the wall.
- Drill – For creating holes in the wall as needed.
- Screwdriver – To fasten screws for the mounting bracket and unit.
- Level – To ensure the unit is properly aligned.
- Refrigerant Lines – Necessary for connecting the indoor and outdoor units.
- Electrical Wiring – For powering your unit.
- Insulation Tape – To insulate the refrigerant lines.
- Measuring Tape – For accurate measurements while mounting.
- Safety Gear – Including goggles and gloves to protect yourself during the installation.
Having these tools and materials ready before you start will save you time and avoid unnecessary delays. Additionally, it’s beneficial to review the manufacturer’s instructions to ensure you have everything specific to your mini split unit.
Once you have all the necessary items gathered, double-check that you have the correct specifications for your room size, insulation, and the capacity of the unit you’re installing. This ensures optimal performance and efficiency.
In the next section, we will discuss the important steps for preparing the interior wall before mounting your mini split unit.
Preparing the Interior Wall
Before you can successfully install a mini split system on an interior wall, it’s crucial to properly prepare the interior wall. This step ensures that your installation goes smoothly and that the mini split functions efficiently. Below are key preparations to undertake:
- Choose the Right Spot: Identify the ideal location on the wall to install the mini split unit. This area should allow for unobstructed airflow and access to power.
- Clear the Wall Area: Remove any artwork, furniture, or obstructions around the chosen spot. This makes the installation process easier and ensures safety.
- Check Wall Structure: Examine the wall for any electrical wiring or plumbing that might be hidden. Use a stud finder to locate wooden studs and avoid drilling through them.
- Ensure Level Surface: Use a level to mark a straight line on the wall where the mounting bracket will go. This ensures that the unit is installed level, preventing dysfunction.
- Prepare Wall for Installation: If your wall needs any repairs or paint touch-ups, now’s the time to carry them out. A clean and secure surface promotes better adhesion for the mounting bracket.
By following these steps, you’ll ensure that your wall is adequately prepared for the mini split installation. Remember, a little preparation can go a long way in avoiding complications later on.
After the wall is prepared, it will be much more straightforward to proceed to the next steps of mounting the unit and connecting the system. Proper preparation of the interior wall can significantly impact the performance of your mini split system.
Taking the time to prepare properly not only makes the installation more efficient but also enhances the longevity and performance of your mini split system. Good preparation helps in troubleshooting any issues that may arise in the future.
Mounting the Mini Split Unit
When it comes to mounting the mini split unit, proper placement is crucial for optimal performance. Before you start, ensure that you have selected a location that allows for adequate airflow, is close to the outdoor unit, and is away from obstructions. This will ensure your system runs efficiently.
Begin by holding the mounting bracket against the wall. Use a level to ensure that it is perfectly horizontal. Mark the spots on the wall where you will drill. It’s important to use a drill suitable for your wall type, whether it be drywall, wood, or concrete. Once you’ve marked your holes, use a hammer or a drill to create the necessary holes for the anchors.
After drilling, secure the mounting bracket to the wall with appropriate anchors and screws, ensuring it is tightly fastened. Making sure the bracket is securely in place will prevent any potential issues when you attach the mini split unit. Finally, you can carefully lift the mini split unit and hang it on the bracket. Be cautious to avoid damaging the unit while doing this. Check to ensure it is secure a
Connecting and Testing the System
After successfully mounting your mini split unit on the interior wall, the next crucial step is connecting and testing the system to ensure it functions properly. This process involves electrical connections, refrigerant lines, and ensuring the overall system integrity.
Electrical Connections: Begin by connecting the power supply to the indoor unit. Carefully follow the manufacturer’s guidelines regarding voltage and wire connections. Typically, you’ll need to connect the indoor unit to a dedicated electrical circuit. Make sure to switch off the main power before starting the connections to avoid any accidents.
Refrigerant Lines: Next, connect the refrigerant lines that were installed earlier. Ensure that both the suction and liquid lines are securely attached, using the appropriate torque specifications to prevent leaks. After connecting, check all joints and connections for any visible signs of refrigerant leakage. A leak detector can be extremely helpful at this stage.
Testing the System: Once your connections are complete, it’s time to test the system. Turn the main power back on and activate the mini split unit. Observe the operation of the fans, check the temperature output, and listen for any unusual noises. If your unit has a diagnostic mode, use it to run a system check. This will help confirm that everything is functioning correctly.
After all tests are completed, monitor the unit for a few hours to ensure consistent cooling or heating performance. Pay attention to the settings and remote control functionality to confirm the system operates as expected. Address any issues immediately to ensure your investment in a mini split system is utilized effectively.
Frequently Asked Questions
What tools do I need to install a mini split on an interior wall?
You’ll need a drill, a stud finder, a level, a measuring tape, a wrench set, and possibly a screwdriver set to attach the mounting bracket and connect the lines.
How do I determine the best location for the indoor unit of a mini split?
Choose a location that allows for optimal airflow and is at least 7 feet above the floor. Avoid corners and places where furniture may obstruct airflow.
What are the steps for installing the mounting bracket of the mini split?
First, use a stud finder to locate the wall studs and mark their locations. Then, use a level to ensure the bracket is straight before drilling screws into the studs for support.
Do I need to drill holes in the wall for the refrigerant lines?
Yes, you will need to drill a hole through the wall to pass the refrigerant lines, condensate drain, and electrical wiring between the indoor and outdoor units.
How do I connect the refrigerant lines to the indoor unit?
Carefully connect the refrigerant lines to the indoor unit according to the manufacturer’s instructions, ensuring that all fittings are tight and there are no leaks.
What is the best way to secure the outdoor unit during installation?
Mount the outdoor unit on a sturdy platform, ensuring it is level and free from obstructions. Use vibration pads if necessary to minimize noise.
Are there any safety precautions I should take during installation?
Yes, always turn off power to the unit, wear safety goggles, and ensure you follow the manufacturer’s installation guidelines to avoid injury or damage.
