Learn how to effectively choose, install, and troubleshoot mini split systems in your garage for optimal comfort and efficiency.If you’re looking to transform your garage into a comfortable workspace, a mini split air conditioning system is an excellent option for efficient heating and cooling. Unlike traditional HVAC systems, mini splits offer flexibility, easy installation, and energy efficiency—perfect for a garage that may not have existing ductwork. However, the installation process can seem daunting at first glance, but with the right preparation and guidance, you can tackle it yourself. In this blog post, we’ll cover everything from choosing the right mini split unit for your needs to the step-by-step installation process, ensuring you set up a climate-controlled environment that enhances your garage’s potential. Let’s dive into the essentials of installing a mini split in your garage!
Choosing the Right Mini Split
When it comes to installing a mini split in your garage, the first step is to choose the right unit for your specific needs. Not all mini splits are created equal, and several factors can impact the efficiency and effectiveness of your air conditioning solution.
To make a well-informed decision, consider the following key aspects:
- BTU Capacity: The British Thermal Unit (BTU) rating indicates the cooling or heating capacity of a mini split. Calculate the necessary capacity based on the size of your garage to ensure optimal performance. A general rule of thumb is to have about 20 BTUs for each square foot of space.
- Energy Efficiency: Look for models that have a high SEER (Seasonal Energy Efficiency Ratio) rating. A higher SEER means better energy efficiency, which can save you money on utility bills over time.
- Single vs. Multi-Zone Systems: Determine if you need a single-zone mini split for just your garage or a multi-zone system if you plan to cool or heat multiple spaces. Multi-zone systems can be more expensive but offer flexibility.
- Aesthetics: Consider the design of the indoor unit. Choose a style that matches your garage decor and is practical for your installation.
Finally, take the time to read reviews and compare different brands. Some models offer additional features such as smart home compatibility or advanced filters for better air quality.
Preparing the Garage Space
Before you can successfully install a mini split system in your garage, it’s crucial to prepare the space properly. A well-prepared garage not only makes the installation process smoother but also helps in ensuring the efficiency of the unit after installation. Here are the essential steps to consider while preparing your garage space:
- Clear the Area: Remove any clutter, tools, or items that might obstruct the installation process.Ensuring a clean workspace will make it easier for you or the technician to work efficiently.
- Choose the Right Location: Decide where you want to install the indoor and outdoor units. The indoor unit should be positioned where it can effectively distribute air throughout the garage.
- Check for Insulation: Inspect the garage walls and ceiling. If your garage is not insulated, consider adding insulation to keep the space temperature-controlled and enhance the mini split’s performance.
Next, ensure that you have access to necessary utilities, such as a power source and necessary drainage for condensation. A stable power supply will ensure your mini split operates efficiently.
Additionally, if your garage has windows, plan to cover them with shades or curtains to prevent excess heat or cold from affecting the unit’s performance. Proper shading can help maintain the desired internal temperature, making your mini split more effective.
Finally, consider any local building codes or regulations that may impact your installation. It’s essential to be compliant with these guidelines to avoid any issues later on.
Installing the Indoor Unit
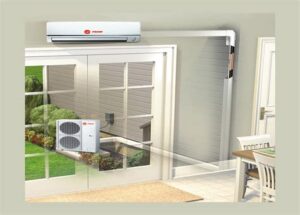
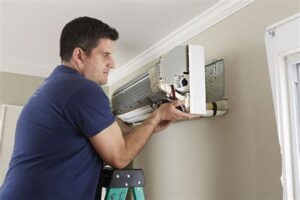
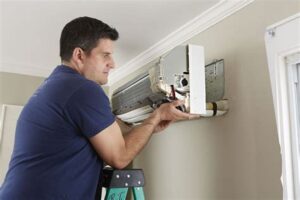
Installing the indoor unit of your mini split system is a crucial step that requires careful consideration and precision. This unit is responsible for cooling or heating your garage space effectively, so it’s important to ensure it’s installed correctly.
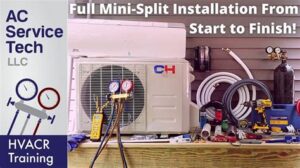
Before you begin, make sure you have all the necessary tools and materials. You will typically need a drill, level, screwdriver, and, of course, the mini split unit. Refer to the manufacturer’s instructions, as these may vary by model.
Follow these steps to install the indoor unit:
- Choose the Right Location: Select a spot on the wall that allows for optimal airflow and is away from any obstructions.
- Mounting Bracket Installation: Secure the included mounting bracket to the wall, ensuring it is level. This is critical for proper operation and efficiency.
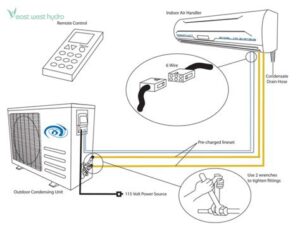
- Connect the Refrigerant Lines: Simply follow the manufacturer’s guidelines for connecting the refrigerant lines, ensuring there are no leaks.
Once you have installed the indoor unit, it’s important to double-check all connections and ensure everything is securely fixed. Proper installation will not only enhance the unit’s performance but also prolong its lifespan.
Positioning the Outdoor Unit
When installing a mini split in your garage, one of the most crucial steps is positioning the outdoor unit. Proper placement not only enhances the efficiency of your heating and cooling system but also ensures its longevity. There are several factors to consider when deciding where to install the outdoor unit.
Firstly, you should aim to place the unit on a solid, level surface such as a concrete pad. This prevents any shifting or vibrations that could cause damage over time. Additionally, if you are in a region with heavy snowfall, positioning the outdoor unit a few inches above ground level can prevent it from being buried under snow.
It’s also essential to consider clearance around the outdoor unit. Manufacturers typically recommend at least 12 inches of clearance on all sides. This allows for adequate airflow and prevents any obstructions that might hinder the unit’s performance. Moreover, avoid placing the unit near any heavy foliage or shrubbery that could block airflow or cause debris to accumulate.
Lastly, think about the noise levels. Being mindful of where you place the outdoor unit can help in minimizing noise disturbances inside your home or garage. Position it away from bedrooms and living spaces, if possible, for the most comfortable experience.
Testing and Troubleshooting
Once you have installed your mini split system in the garage, the next critical step is testing and troubleshooting the system to ensure optimal performance. Proper testing will help you identify any potential issues before they become major problems, ensuring your system operates efficiently.
First, it’s important to verify that the indoor and outdoor units are connected correctly. Check all connections to ensure there are no leaks and that electrical connections are securely fastened. After confirming these connections, turn on the system and set the thermostat to your desired temperature.
Observe the system’s operation for a few minutes. You should check for different performance attributes such as airflow, temperature change, and noise levels. If you notice any irregularities, refer to the following troubleshooting checklist:
| Issue | Possible Cause | Solution |
|---|---|---|
| No airflow | Clogged filters | Clean or replace the filters. |
| Inconsistent temperature | Refrigerant leak | Check for leaks and recharge refrigerant as necessary. |
| Excessive noise | Loose components | Tighten any loose screws or components within the unit. |
By carefully monitoring the performance of your mini split and addressing any issues as they arise, you can ensure its longevity and effectiveness in cooling your garage. Don’t hesitate to consult the manufacturer’s manual for detailed troubleshooting steps specific to your unit if necessary.
Regular maintenance is also key to avoiding future issues. Schedule seasonal checks and maintenance to ensure your mini split continues to run smoothly. Remember, a little attention can extend the life of your system, ultimately enhancing your garage’s comfort level.
Frequently Asked Questions
What is a mini split system?
A mini split system is a type of heating and cooling system that consists of an outdoor unit and one or more indoor air handlers. It’s designed to provide efficient climate control in specific areas, like a garage.
Why should I install a mini split in my garage?
Installing a mini split in your garage can provide consistent heating and cooling, making it a comfortable space for use year-round, whether for hobbies, storage, or as a workspace.
What tools do I need to install a mini split system?
To install a mini split system, you will typically need tools such as a drill, level, stud finder, pipe cutter, screwdrivers, and wrenches, along with safety gear like gloves and goggles.
What is the first step in the installation process?
The first step is to choose an appropriate location for the indoor unit in your garage, ensuring it is away from obstructions and provides efficient air distribution.
How do I connect the indoor and outdoor units?
You will connect the indoor and outdoor units using refrigerant lines, a drain line, and electrical wiring. Ensure all connections are secure and properly insulated to prevent leaks.
Do I need to hire a professional for installation?
While some handy homeowners can install mini split systems themselves, hiring a professional is recommended for those who are inexperienced with HVAC systems, especially for ensuring proper refrigerant handling.
What maintenance is required after installation?
After installation, regular maintenance includes cleaning the filters, checking and tightening electrical connections, and ensuring the outdoor unit is free from debris and obstructions for optimal performance.
