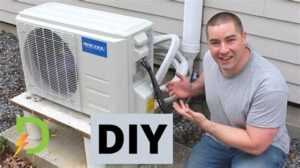
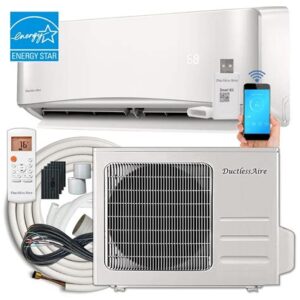
Learn how to install a mini split in your RV, from choosing the right unit to testing and troubleshooting for optimal performance.Are you ready to transform your RV into a comfortable oasis, no matter where your adventures take you? Installing a mini split air conditioning system is a fantastic way to boost temperature control and enhance your mobile living experience. From choosing the right mini split unit tailored to your RV’s size to preparing your space for installation, this guide will walk you through each step of the process. Whether you’re a seasoned DIY enthusiast or a first-time installer, we’ve got you covered with practical tips for successfully installing both the indoor and outdoor units. Plus, we’ll address any troubleshooting issues you may encounter along the way. Let’s dive in and make your RV the ultimate getaway!
Choosing the Right Mini Split
When it comes to installing a mini split in an RV, selecting the right unit is crucial for ensuring comfort and efficiency. With various brands, sizes, and features available, knowing what to look for can make the process much easier. Here are some essential factors to consider when choosing a mini split system:
- BTU Rating: The British Thermal Unit (BTU) rating indicates the cooling and heating capacity of the system. For RVs, a unit with a BTU rating between 9,000 and 12,000 is typically sufficient, depending on the size of your vehicle.
- Energy Efficiency: Look for models with a high Energy Efficiency Ratio (EER) or Seasonal Energy Efficiency Ratio (SEER). Higher ratings mean lower energy costs, which is especially important for RV use.
- Noise Level: Pay attention to the noise level of the indoor unit, measured in decibels (dB). A quieter unit will enhance your RV experience, allowing for peaceful enjoyment of the space.
Additionally, consider the installation requirements. Some mini split units might require a more complicated installation process than others. Be sure to choose a model that suits your skill level or budget for professional installation.
Finally, reading reviews and comparing models can give you valuable insights into the performance and reliability of various mini split systems. Make the right choice, and you’ll enjoy a comfortable climate in your RV for years to come!
By taking these factors into account, you can confidently select the most appropriate mini split system that will keep your RV comfortable during your travels.
Preparing the RV for Installation
Preparing your RV for a mini split installation is a crucial step that ensures the system functions effectively and efficiently. Proper preparation will not only streamline the installation process but also minimize any potential challenges that may arise later. Here’s a detailed guide to get your RV ready for this exciting upgrade.
1. Choose the Right Location: The first step is to identify the best spot for the indoor and outdoor units. Generally, the indoor unit should be mounted on an exterior wall for easy access to the outdoor unit. Ensure that this area is well-ventilated and free from obstructions. Avoid placing it near heat sources or other appliances that may affect its efficiency.
2. Clear the Installation Area: Before starting your installation, remove any items that may obstruct the installation or operation of the mini split system. This includes furniture, decorations, and any other personal belongings. A clean, clutter-free environment will help you work more effectively.
3. Check Electrical Requirements: Verify that your RV’s electrical system can support a mini split air conditioning unit. Most mini splits require a dedicated circuit, so ensure that you have the proper voltage and amperage. If you are unsure, consult with a licensed electrician who can assess your RV’s electrical capacity.
4. Insulation Assessment: Inspect the insulation in your RV. A well-insulated RV will help maintain climate control and improve the efficiency of the mini split system. If your insulation is lacking, consider adding additional layers to reduce energy loss and improve interior comfort.
5. Gather Necessary Tools and Materials: Prior to installation, make sure you have all the tools and materials you will need. This typically includes a drill, mounting brackets, level, screwdriver, and sealant. Having everything on hand will save you time and frustration during the installation process.
With your RV properly prepared for installation, you can proceed with confidence to install your mini split system. This careful preparation will enhance the performance of your unit and provide you with comfort on all your travels.
Installing the Indoor Unit
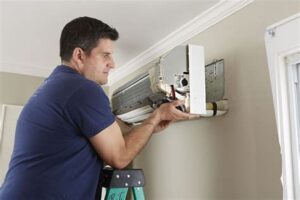
Installing the indoor unit of a mini split system in your RV is a critical step that requires careful consideration and precise execution. Here’s a comprehensive guide to help you successfully complete this task.
First, you’ll want to choose the right location for your indoor unit. It’s important to select an area that allows for even air distribution throughout the RV. Common spots include the ceiling or up high on a wall, as this can promote better airflow. Measure the dimensions of the unit and ensure there’s enough space for installation without obstructing windows or doors.
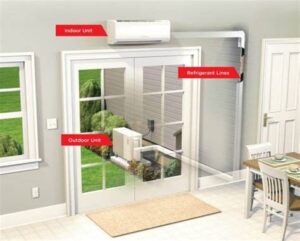
Next, you’ll need to prepare the installation location. This involves drilling holes for the refrigerant lines, drain line, and electrical connections. Make sure to have all necessary tools ready, such as a drill, screws, and a level. It’s crucial to properly seal any holes to prevent air leaks and ensure energy efficiency.
“Safety first! Always turn off power to the area before starting the installation.”
Once the area is prepared, now it’s time to mount the indoor unit. Follow the manufacturer’s instructions for securing the unit to the wall or ceiling. Use a level to ensure the unit is straight, which is essential for proper drainage and airflow. After mounting, connect the line set and electrical wiring while ensuring all connections are secure.
After the indoor unit is firmly in place, check all connections before powering on the system. Double-check for any leaks or loose connections. Taking these steps can help ensure your mini split operates efficiently and effectively within your RV.
Mounting the Outdoor Unit
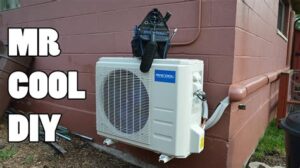
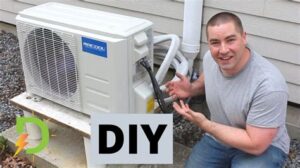
Mounting the outdoor unit of a mini split in your RV can be a crucial step in ensuring optimal performance and efficiency. This process requires careful planning and execution to securely attach the unit while also allowing for proper airflow and drainage.
Before starting, gather the necessary tools and materials. You will typically need a drill, water level, measuring tape, and appropriate mounting brackets. Take your time to choose a suitable location that is free from obstructions and provides adequate space for airflow.
Here’s a step-by-step guide to mount the outdoor unit:
- Select a Location: Find a spot on the RV where the outdoor unit won’t be obstructed by other components and has good airflow.
- Mark the Position: Use the measuring tape to measure and mark where the mounting brackets will go. Make sure the area is level using the water level.
- Drill Holes: Drill holes in the marked spots and insert wall anchors if necessary.
- Attach Brackets: Securely attach the mounting brackets to the RV wall using screws.
- Install the Unit: Carefully lift the outdoor unit onto the brackets and secure it according to the manufacturer’s instructions.
After mounting, check to ensure that all connections are tight and that the unit is stable. Properly mounting the outdoor unit will enhance the efficiency and longevity of your mini split system in your RV.
Testing and Troubleshooting
Once you have successfully installed your mini split system in your RV, it’s important to conduct thorough testing to ensure everything operates efficiently. Begin by examining the indoor and outdoor units for any visible issues. Check for proper airflow, unusual noises, or leaks which could indicate installation flaws or potential problems.
Next, run the system on both heating and cooling modes for several minutes. Monitor the thermostat settings and confirm that the indoor unit responds accurately. You should feel a noticeable difference in temperature when switching between modes. If you encounter inconsistencies, refer to the user manual for troubleshooting guidance.
If the mini split isn’t functioning as expected, consider these common troubleshooting tips:
- Ensure both the indoor and outdoor units are receiving power.
- Check if the air filters are clean and not blocking airflow.
- Inspect the refrigerant lines for any signs of damage.
By systematically addressing these aspects, you can ensure your mini split system operates efficiently and effectively in your RV.
Frequently Asked Questions
What tools are needed to install a mini split in an RV?
You will need basic tools such as a drill, screwdrivers, a level, a wrench set, and a vacuum pump for refrigerant lines.
Do I need any special permissions to install a mini split in my RV?
In most cases, you do not need special permissions, but it’s always a good idea to check local regulations and ensure your RV modifications comply with RV park rules if you plan to stay in one.
Where is the best location to install the indoor unit of a mini split in an RV?
The indoor unit should be installed in a central location for optimal airflow, preferably on an exterior wall to minimize refrigerant line length.
How do you handle the electrical connections for a mini split in an RV?
Ensure that the electrical supply can handle the mini split’s requirements; you may need to install a dedicated circuit and connect it to the RV’s electrical system.
Can a mini split work when the RV is parked and connected to a power source?
Yes, a mini split can operate while the RV is parked and connected to a suitable power source, providing efficient cooling and heating.
What maintenance is required for a mini split in an RV?
Regular maintenance includes cleaning or replacing the air filter, checking refrigerant levels, and ensuring that the outdoor unit is free of debris.
Are there any specific brands recommended for mini splits in RVs?
Some popular brands for mini splits suitable for RV use include Mitsubishi, Fujitsu, and LG, known for their reliability and efficiency.
