Discover the costs and factors affecting mini split installation, along with wiring, piping, DIY vs professional options, and average installation time.When considering the comfort of your home, mini split systems have become a popular choice due to their efficiency and versatility. However, understanding the costs associated with mini split installation is crucial for making an informed decision. This blog post will delve into the various factors that influence installation expenses, from equipment prices to labor costs. We will also explore the essential components of wiring and piping for these systems, and weigh the pros and cons of DIY versus professional installation. Additionally, we will outline the average installation time and process to give you a comprehensive overview of what to expect. Whether you’re upgrading your existing system or installing a new one, this guide aims to equip you with all the knowledge you need to navigate the mini split installation landscape effectively.
Cost of Mini Split Installation
The cost of mini split installation can vary significantly based on numerous factors. Generally, homeowners can expect to pay between $2,000 to $5,000 for a standard installation. This range includes the cost of the unit itself and the installation work, but the final price can depend on various aspects detailed below.
One of the primary factors affecting the installation cost is the size and capacity of the mini split system. Larger units that provide more cooling or heating power tend to be more expensive. Additionally, the complexity of the installation can impact the overall cost. For instance, if the installation site requires extensive modifications, such as new electrical wiring or additional insulation, this will increase the price.
Here’s a brief overview of some factors that can influence the installation costs:
| Factor | Impact on Cost |
|---|---|
| Size and Capacity of Unit | Higher capacity = higher cost |
| Installation Complexity | More complexity = increased labor cost |
| Labor Charges | Varies by region and contractor experience |
| Electrical and Plumbing Modifications | Needed upgrades can add to expense |
It’s essential for homeowners to obtain multiple quotes and consider all factors when budgeting for a mini split installation. By doing so, you can ensure that you’re getting the best value for your investment while enjoying the comfort and efficiency that a mini split system provides.
Factors Affecting Installation Costs
When considering the installation costs of a mini-split system, several factors come into play that can significantly influence the final price. Understanding these elements can help you make an informed decision and better manage your budget.
One primary factor is the size of the unit. Larger spaces require more powerful mini-split systems, which typically come with a higher price tag. Additionally, the configuration of the system—whether it’s a single-zone or multi-zone installation—also affects costs, as multi-zone systems can be more complex and expensive to install.
Another aspect to consider is the complexity of the installation environment. If your home has unique architectural features, challenges such as accessibility, or requires extensive wiring and ductwork, installation costs may increase. Furthermore, local labor rates can vary, leading to differences in installation pricing depending on your geographic location.
Finally, the brand and efficiency rating of the mini-split system itself can significantly influence costs. Higher-efficiency models tend to cost more upfront but can lead to better energy savings in the long run.
Mini Split Wiring and Piping
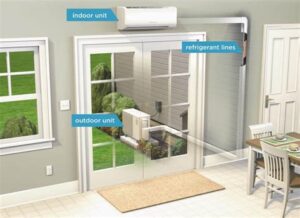
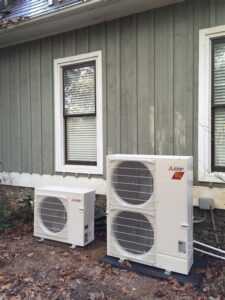
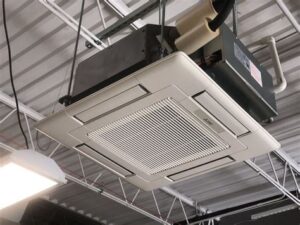
Understanding the wiring and piping of a mini split system is crucial for optimal performance and installation. Mini split systems consist of two main components: the indoor and outdoor units. These units are connected through copper piping that carries refrigerant between them, and electrical wiring that powers the system.
Typically, the mini split installation requires:
- Copper Refrigerant Lines: These are essential for the transfer of refrigerant between the indoor and outdoor units.
- Drain Hose: This removes condensation from the indoor unit to the outside, preventing water damage.
- Electrical Wiring: This provides necessary power to the outdoor unit, which in turn powers the indoor unit.
When planning for a mini split installation, be mindful of the installation location, as it affects the length of wiring and piping required. A straightforward installation usually requires a shorter distance between the outdoor and indoor units, while longer distances may increase costs due to additional materials and labor. Ensuring proper insulation and secure laying of pipes is also essential for efficiency and longevity of your mini split system.
DIY vs Professional Installation
When it comes to installing a mini split system, one of the primary considerations is whether to opt for DIY installation or hire a professional contractor. Each approach has its own set of advantages and drawbacks that homeowners should consider before making a decision.
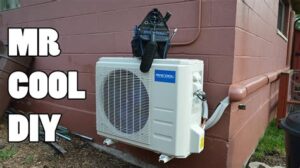
Choosing to go the DIY route can save you a significant amount of money on installation costs. However, it requires a certain level of technical skill and knowledge about HVAC systems. Homeowners must be comfortable with tasks such as wiring, piping, and ensuring that the unit is adequately mounted and leveled. Common tools needed for the job often include drills, levelers, and wrenches.
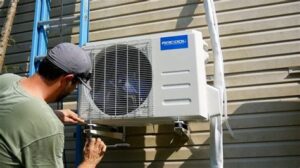
On the other hand, hiring a professional installer ensures that the job is done correctly and efficiently. Professionals are trained to handle the complexities involved in mini split installation, including refrigerant handling and electrical connections. Although this option tends to be more expensive, it can save you from potential issues down the line that could arise from improper installation.
| Factor | DIY Installation | Professional Installation |
|---|---|---|
| Cost | Lower | Higher |
| Skill Required | Moderate to High | Professional Expertise |
| Time Investment | Variable | Typically Faster |
| Warranty Considerations | May void warranty | Often upheld |
Average Installation Time and Process
When it comes to mini split installation, the average time can greatly influence your decision-making process. Generally, the installation of a mini-split system can take anywhere from 4 to 8 hours, depending on several factors related to the complexity of the installation and the specific system being installed. Below are the primary stages involved in the installation process:
- Preparation: This stage involves assessing the home layout, determining the best locations for indoor and outdoor units, and gathering necessary tools and materials.
- Mounting the Indoor Unit: The indoor unit is mounted on the wall, ensuring it’s level and securely attached, typically taking 1 to 2 hours.
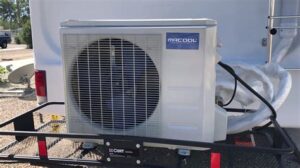
- Installing the Outdoor Unit: The outdoor compressor unit is placed in a proper location, connected to the indoor unit through insulation, wiring, and piping, usually taking 1 to 3 hours.
- Connecting Refrigerant Lines: Refrigerant lines are connected, ensuring there are no leaks and that the system is correctly charged, a task that can take around 1 hour.
- Testing the System: Once installed, the system is tested to ensure it operates efficiently, taking an additional 30 minutes to 1 hour.
It’s important to remember that while installation time varies, it can be influenced by several factors, such as the layout of your home, the number of units being installed, and the experience level of the installer. If you’re considering a mini split system, planning for a full day for the installation process is a good rule of thumb.
In some cases, if you’re also planning to upgrade electrical systems or make modifications to existing ductwork, this will extend the installation time. Always communicate these possibilities with your installer before the project begins to align expectations regarding the overall timeline.
Choosing a professional installer can streamline the process significantly, ensuring that everything is completed correctly and efficiently. Moreover, proper installation is crucia
Frequently Asked Questions
What factors influence the cost of mini split installation?
The cost of mini split installation can vary based on factors such as the size of the unit, the complexity of the installation, the location of the installation, and whether any modifications are needed for existing electrical or ductwork.
Are there any additional costs associated with mini split installation?
Yes, additional costs can include labor fees, permits, and any necessary upgrades to electrical systems or ductwork. Maintenance plans and warranties can also add to the overall cost.
How do I find a qualified contractor for mini split installation?
To find a qualified contractor, you can ask for recommendations from friends or family, check online reviews, and verify their licensing and insurance. It’s also beneficial to request multiple quotes to compare pricing and services.
Is a mini split system more energy-efficient than traditional HVAC systems?
Yes, mini split systems are generally more energy-efficient than traditional HVAC systems because they allow for zoned heating and cooling, which can reduce energy consumption and costs.
What is the typical range of costs for a mini split installation?
The typical range of costs for a mini split installation averages between $2,000 to $5,000, including the unit and installation fees, but this can vary widely based on the factors mentioned earlier.
How long does it take to install a mini split system?
Most mini split installations can be completed in a single day, typically ranging from 4 to 8 hours, depending on the complexity of the setup and the number of indoor units being installed.
What maintenance is required for a mini split system?
Regular maintenance for a mini split system includes cleaning the filters, checking for refrigerant leaks, cleaning the outdoor unit, and scheduling annual professional check-ups to ensure optimal performance.
