Discover the essentials of mini split installation, including time factors, average durations, professional vs. DIY approaches, and tips for a quicker setup.In today’s guide, we will explore the essential aspects of installing a mini split system, a popular choice for efficient heating and cooling in homes and offices. With growing interest in these versatile systems, understanding the installation process is crucial for homeowners considering an upgrade. This post will outline the general steps involved in mini split installation, delve into the factors that can impact the overall time required, and provide insights on the average installation duration. We’ll also compare the timeframes for professional versus DIY installations and share valuable tips to expedite the process, ensuring you have all the information you need for a smooth and efficient installation experience. Whether you’re a seasoned DIYer or planning to hire a professional, we’ve got you covered!
Mini Split Installation Overview
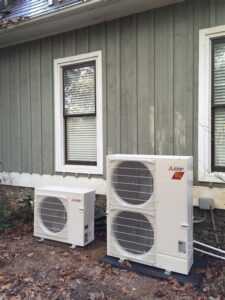
A mini split system is an efficient heating and cooling solution that provides flexibility and comfort in various spaces. These systems consist of an outdoor unit and one or more indoor air handling units. Unlike traditional HVAC systems, mini splits do not require ductwork, making them an attractive option for homes lacking existing ducts or for areas that need specific temperature control.
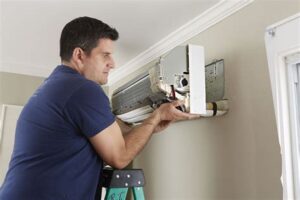
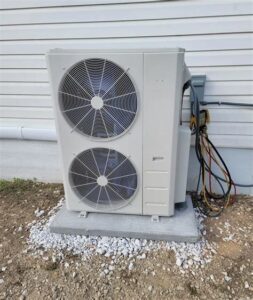
The installation of a mini split involves several key components, including the mounting of the indoor unit, the placement of the outdoor condenser, and the connection of refrigerant lines. Often, this process can seem daunting, but with the right preparation and approach, it can be completed efficiently.
During the installation, some of the critical factors to consider include the location of the indoor and outdoor units, the type of wall mounting, and adherence to local building codes. Additionally, it is essential to ensure proper insulation and sealing to maximize the efficiency of the system.
Factors Affecting Installation Time
When it comes to mini split installation, several factors can significantly influence the time it takes to complete the job. Understanding these factors can help homeowners and contractors plan their installations more effectively.
Here are some of the key elements that can affect installation time:
- Complexity of the Installation Site: If the installation site has obstacles like walls, roofs, or limited access, the overall installation process may take longer.
- Experience of the Installer: A professional installer with extensive experience can often complete the installation more quickly than a novice.
- Type of Mini Split System: Different systems may have varying installation requirements. For instance, a multi-zone system might require more time than a single-zone system.
- Electrical and Plumbing Requirements: If modifications to electrical or plumbing work are necessary, this can extend the installation duration.
- Weather Conditions: Inclement weather can lead to delays, especially if outdoor work is involved in the installation.
Understanding these factors can prepare you for the overall timeline of your mini split installation. Proper planning and communication with your installer can help mitigate some of these variables and lead to a smoother process.
Ultimately, each installation is unique, and being aware of the complexities involve
Average Time for Mini Split Installation
Understanding the average time it takes to install a mini split system is crucial for homeowners planning on upgrading their heating and cooling systems. The installation process can vary widely depending on several factors including the complexity of the job, the type of system being installed, and the experience of the installer.
Typically, the average installation time for a mini split system ranges between 4 to 8 hours for a professional installation. This timeframe can be affected by factors such as the number of indoor units, existing ductwork, and the location of the outdoor unit. For instance, installing a system with multiple indoor units may extend the time required due to the need for additional refrigerant lines and electrical connections.
In some instances, a straightforward installation may take as little as 3 hours, especially if the home is already suited for a mini split system. However, if there are complications such as wall obstructions, electrical upgrades, or specialized mounting requirements, it can take longer. Thus, it’s essential to consult with a professional to get a clearer picture of the expected installation time based on your specific situation.
Professional vs. DIY Installation Time
When it comes to installing a mini split system, one of the most significant decisions homeowners face is whether to hire a professional or undertake the project as a DIY endeavor. Understanding the time required for each option is crucial in making an informed choice.
Professional installation is typically the more efficient route. Skilled technicians have experience and are equipped with the right tools, allowing them to complete the job in a timely manner. On average, a qualified HVAC professional can install a mini split system in about 4 to 6 hours, depending on the complexity of the installation and factors like system size and the condition of the home.
In contrast, a DIY installation may take significantly longer, especially for those without experience in HVAC systems. It can take anywhere from 8 to 12 hours or even longer for beginners to successfully install a mini split system. This extended time frame accounts for the learning curve, potential troubleshooting, and the need for careful measurements and planning.
| Installation Type | Average Time Required |
|---|---|
| Professional Installation | 4 to 6 hours |
| DIY Installation | 8 to 12 hours (or more) |
While the appeal of saving money by doing it yourself may be strong, the time commitment and potential for errors should not be underestimated. For those without the skills or tools, hiring a professional can ultimately save time and ensure a properly installed mini split system.
Tips to Speed Up Mini Split Installation
Installing a mini split system can be a time-consuming process, but with the right strategies, you can significantly reduce installation time. Below are some effective tips that can help you speed up the mini split installation process.
1. Plan Ahead
Before starting the installation, take the time to carefully plan the layout. Decide the perfect locations for the indoor and outdoor units and consider the necessary ductwork and electrical connections. A detailed plan will help you avoid unnecessary delays during the installation.
2. Gather Necessary Tools and Materials
Ensure you have all the required tools and materials ready before you begin the installation. This may include a drill, level, refrigerant pipes, electrical wiring, and a vacuum pump. Having everything on hand will save you from making last-minute trips to the hardware store.
3. Follow Manufacturer Instructions
Each mini split unit comes with specific manufacturer instructions that outline the installation process. By following these guidelines closely, you can avoid common mistakes that might slow you down. It’s also crucial to ensure that you meet local building codes and regulations.
4. Enlist Help
Having an extra pair of hands can greatly expedite the installation process. Collaborating with a friend or a professional technician can help in lifting heavy units and managing multiple tasks at once, leading to a faster and smoother installation.
5. Test the System Thoroughly
After installing the unit, take the time to thoroughly test the mini split system. Make sure everything is functioning correctly before considering the job complete. This will save you future hassle and ensure optimal performance.
By implementing these tips, you can significantly cut down on the time it takes to install your mini split system while ensuring that the job is done correctly and efficiently.
Frequently Asked Questions
What is a mini split system?
A mini split system is a type of heating and cooling system that consists of an outdoor compressor unit and one or more indoor air handling units, allowing for zoned temperature control.
How long does it generally take to install a mini split?
The installation of a mini split system typically takes between 4 to 8 hours, depending on the complexity of the installation and the number of indoor units.
What factors can affect the installation time of a mini split?
Factors that can affect installation time include accessibility to installation locations, pre-existing ductwork, the number of indoor units, and any necessary electrical or plumbing modifications.
Do I need a professional to install a mini split?
It is highly recommended to hire a professional HVAC technician for the installation of a mini split system, as they have the expertise to ensure proper installation and compliance with local regulations.
Can I install a mini split system myself?
While some DIY enthusiasts may attempt to install a mini split themselves, it requires specific technical knowledge and skills related to electrical, plumbing, and refrigerant handling, making it challenging for most homeowners.
What are the benefits of installing a mini split system?
Benefits of installing a mini split system include energy efficiency, quiet operation, individual zone control, and flexibility in terms of installation in various types of spaces.
Is there any preparation needed before mini split installation?
Yes, before installation, it’s essential to assess the space where the mini split will be installed, measure for appropriate placement, and ensure access to electrical connections and drainage systems.


