Discover the mini split installation process, factors influencing timeline, professional vs DIY options, and efficient installation tips for a seamless setup experience.When considering a mini split air conditioning system for your home, one of the most common questions homeowners have is, “How long does it take to install a mini split?” This question is essential not just for planning purposes, but also for understanding the overall process involved in upgrading your home’s climate control. The installation timeline can vary significantly based on various factors, including the complexity of the system and the specifics of your home. In this blog post, we’ll delve into the mini split installation process, explore the factors that can impact installation time, compare professional to DIY installation options, and share practical tips for ensuring a smooth and efficient installation. Whether you’re a seasoned DIYer or considering professional help, we’ll guide you through what to expect when installing a mini split system.
Mini Split Installation Process
The mini split installation process is an essential guide for homeowners and contractors alike, as it helps ensure that heating and cooling systems operate efficiently. Installing a mini split involves a series of steps that must be performed with care. Below are the main phases of the installation process:
| Step | Description |
|---|---|
| 1. Site Evaluation | Assess the location where the mini split will be installed, ensuring optimal air flow and accessibility. |
| 2. System Selection | Choose the right mini split model based on the size of your space and your heating/cooling needs. |
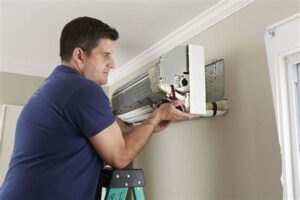
| 3. Mounting the Indoor Unit | Secure the indoor unit to the wall, ensuring it is leveled and properly positioned. |
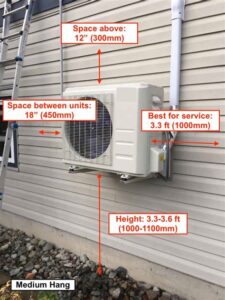
| 4. Installing the Outdoor Unit | Place the outdoor unit on a stable base, ensuring that it is level and adequately ventilated. |
| 5. Line Set Connection | Connect the refrigerant lines and electrical wiring between the indoor and outdoor units. |
| 6. Vacuuming the System | Evacuate the lines to remove air and moisture before adding refrigerant. |
| 7. Testing the System | Check for leaks and ensure that the system is functioning properly. |
Each of these steps plays a critical role in the overall efficiency and performance of your mini split system. Skipping or rushing through any part of the process might not only lead to inefficiencies but can also cause potential damage or require costly repairs down the line.
Understanding the mini split installation process can help you prepare better and select the right professionals or DIY methods. Always remember that safety and compliance with local building codes should be a priority during installation.
In conclusion, whether you’re a seasoned contractor or a first-time DIYer, being informed about the mini split installation process
Factors Affecting Installation Time
Installing a mini split system can vary significantly in installation time depending on several factors. Understanding these factors can help homeowners and installers better prepare for the process. Here are the main aspects to consider:
- Complexity of the System: The more zones or units involved, the longer the installation will take. A single-zone system is generally quicker to install than a multi-zone system.
- Location of the Indoor and Outdoor Units: If the indoor and outdoor units are far apart, the installation will require more time for refrigerant line extensions and electrical connections.
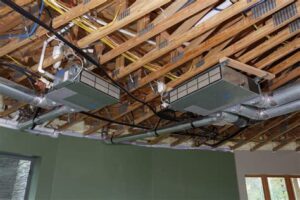
- Type of Installation: Simple installations, like wall-mounting, are usually faster than those requiring ceiling mounts or intricate ductwork.
- Experience of the Installer: Professional installers will typically complete the job more quickly and efficiently than DIY enthusiasts who may lack the necessary experience.
- Local Building Codes: Compliance with local building codes and regulations may require additional steps in the installation process, extending the overall time.
It’s essential to review these factors before beginning the project to have realistic expectations for the timeframe involved in the installation. Proper planning can lead to a smoother and quicker installation process.
If hiring professionals, discussing the specifics of your installation needs will help estimate a more accurate timeline. For those considering a DIY approach, make sure to account for the learning curve and potential troubleshooting, which may extend the overall duration.
By analyzing these factors, you can ensure that you are better prepared for the mini split installation process and optimize your time management effectively.
Typical Installation Timeline
When considering the installation of a mini split, understanding the typical installation timeline is crucial for any homeowner. The overall duration can vary based on several factors, but generally, the process can be broken down into specific stages that give an idea of how long you might expect to wait.
The overall timeline for a mini split installation usually spans 1 to 2 days. This includes several steps: equipment delivery, pre-installation preparation, actual installation, and testing and adjustments. Let’s delve deeper into each of these phases:
| Phase | Estimated Time |
|---|---|
| Equipment Delivery | 1 Day |
| Pre-Installation Preparation | 2-3 Hours |
| Installation | 4-8 Hours |
| Testing and Adjustments | 1-2 Hours |
It’s essential to note that while the installation itself can often be completed in a single day, delays may occur depending on accessibility, site preparation, or unforeseen complications. Therefore, planning ahead and ensuring all necessary materials are readily available can greatly improve efficiency.
Overall, if you’re looking to install a mini split system, aiming for a timeframe of one to two days allows you to foresee and prepare for any potential hurdles in the installation process.
Professional vs DIY Installation
When considering the installation of a mini split system, one of the pivotal decisions homeowners face is whether to opt for a professional installation or take the DIY route. Each option carries its own set of advantages and disadvantages, which can significantly affect both the installation process and the system’s performance.
Here are some factors to consider:
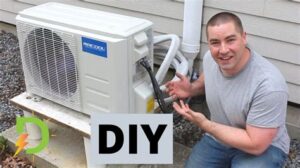
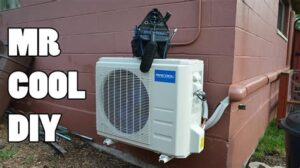
- Experience and Skill Level: Installing a mini split system requires a certain level of HVAC knowledge. Professionals have the necessary expertise, while DIY enthusiasts may lack specific training.
- Time and Effort: A professional installation is generally quicker, as experienced technicians work efficiently. In contrast, a DIY installation might take longer if you’re unfamiliar with the process.
- Cost: Hiring a contractor can be more expensive upfront. However, a professional installation might prevent future issues that could arise from improper setup, saving money in the long run.
Additionally, many manufacturers require a professional installation for warranty purposes. This means that if you opt for DIY and encounter issues later, you may void your warranty, leaving you responsible for any repairs.
In summary, while the DIY installation may appear cost-effective and rewarding, it’s essential to weigh your skills, the complexity of the installation, and the potential long-term benefits of hiring a professional. The choice you make can greatly influence not only your immediate savings but also the ov
Tips for Efficient Installation
Installing a mini split system can be a rewarding experience, but it’s important to approach the installation process with care and thorough preparation. Here are some effective tips to ensure a smooth and efficient installation.
1. Plan and Prepare: Before you start the installation, take time to plan the layout and determine the best location for both the indoor and outdoor units. Consider factors like accessibility, airflow, and proximity to power sources.
2. Gather Necessary Tools: Ensure you have all the required tools handy before beginning. Typical tools include a drill, wrenches, level, and a vacuum pump. Having everything ready can significantly speed up the installation process.
3. Follow Manufacturer Instructions: Each mini split system comes with detailed installation instructions. Adhering to these guidelines can help avoid common pitfalls and ensure the system functions properly.
4. Double Check Your Work: After installation, take the time to review your connections and checks for leaks. A well-done installation will pay off in terms of efficiency and longevity of your mini split system.
5. Seek Professional Help if Necessary: If you encounter any challenges, don’t hesitate to consult a professional or consider hiring an installer. Sometimes, investing in a bit of help can save you time and ensure quality work.
Frequently Asked Questions
What is a mini split system?
A mini split system is a type of heating and cooling system that allows for individual temperature control in different areas or rooms of a building. It consists of an outdoor compressor and one or more indoor units.
What factors influence the installation time of a mini split?
Factors that can influence installation time include the complexity of the installation, the number of indoor units being installed, the type of building, and the experience level of the installer.
How long does a typical installation of a mini split take?
A typical installation of a mini split can take anywhere from 4 to 8 hours, depending on various factors including the number of indoor units and the existing infrastructure.
Can I install a mini split system myself?
While it is possible for a knowledgeable DIYer to install a mini split system, it is recommended to hire a professional to ensure proper installation and compliance with local codes.
Are there any permits required for installing a mini split?
Yes, you may need to obtain permits for installing a mini split system, depending on local regulations. It’s essential to check with your local building authority before proceeding.
What preparations are needed before the installation of a mini split?
Before installation, you should review the installation location, ensure access to electrical power, and decide on the placement of both the indoor and outdoor units.
How can I ensure a successful mini split installation?
To ensure a successful installation, it is best to hire a licensed HVAC professional, perform thorough planning, and discuss any specific concerns or requirements prior to the installation.
