How Hard Is It to Install a Mini Split System

Discover essential tips and insights for a successful mini split system installation, including challenges, factors impacting complexity, and expert advice for your project.Are you considering upgrading your home’s heating and cooling system with a mini split system? While these versatile units offer energy efficiency and flexibility, the installation process can be daunting for many homeowners. This blog post will explore everything you need to know about installing a mini split system, from understanding its complexity to the various factors that can impact the difficulty of the installation. We’ll also discuss common challenges you may encounter and provide practical tips to ensure a successful setup. Whether you’re a DIY enthusiast or planning to hire a professional, gaining insight into the installation process can help you make informed decisions and achieve optimal comfort in your living space. Let’s dive in!

Mini Split System Installation: What to Know

Installing a mini split system can be a rewarding yet complex task. Understanding the intricacies of the installation process is crucial for ensuring a successful setup and optimal performance. With a mini split, you have the convenience of both heating and cooling in one integrated system, but is it difficult to install?

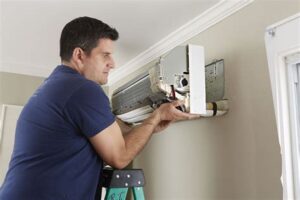
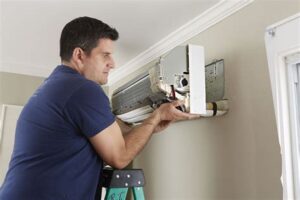
The installation of a mini split system typically involves several key components: the indoor unit, the outdoor condenser, and the connecting refrigerant lines. While some homeowners opt to hire professionals for this task, DIY enthusiasts may attempt the installation themselves. It’s important to note that although the process can be broken down into manageable steps, it also requires a solid understanding of HVAC concepts and electrical systems.

Factors influencing the difficulty of installation include the complexity of your home’s layout, accessibility to installation sites, and the specific model of the mini split system. Additionally, local building codes and regulations may present challenges for those looking to install a mini split system without professional help.

Here are some important factors to consider:

  • Accessibility: Ensure that both indoor and outdoor units have easy access during installation.
  • Power Source: A dedicated electrical line might be necessary for optimal performance.
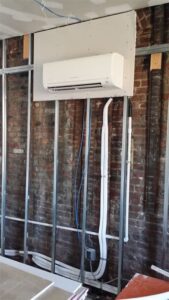
  • Refrigerant Lines: Properly routing these lines is critical to avoid leaks and inefficiencies.

In summary, while it is possible to install a mini split system on your own, the installation process can be intricate. It requires careful planning and consideration of various factors to ensure you achieve the best results.

Understanding the Complexity of Installation

Installing a mini split system can seem straightforward, but it actually involves a variety of complexities that must be addressed. The process includes not only setting up the indoor and outdoor units but also ensuring proper electrical connections, refrigerant line routing, and ductwork considerations if applicable. Understanding these factors is crucial for a successful installation.

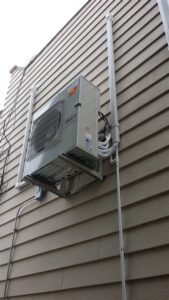
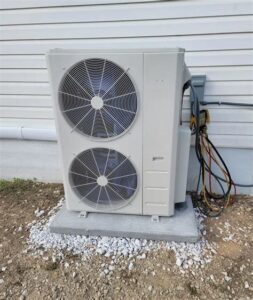
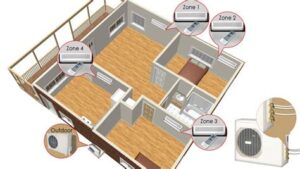
One of the primary complexities lies in the placement of the indoor and outdoor units. The outdoor unit must be located in a position that provides adequate airflow and accessibility for maintenance, while the indoor unit should be strategically placed for optimal cooling and heating throughout the space. This might require careful planning and sometimes even structural considerations.

Furthermore, the installation involves working with refrigerant lines and electrical wiring, which can be hazardous if not handled properly. For those without experience in HVAC systems, learning how to handle these components safely can add significant complexity to the task. It’s not just about hanging a unit on the wall; it requires a comprehensive understanding of how mini split systems operate.
Factors Influencing Complexity Explanation
Unit Size and Type The size and configuration of the mini split system can affect the installation process.
Existing Infrastructure Whether prior systems are in place can dictate additional installation requirements.
Local Building Codes Understanding local

Factors Impacting Installation Difficulty

When considering a mini split system installation, several key factors can impact the overall difficulty level of the installation process. Understanding these factors can help homeowners and technicians better prepare for a successful installation.

One of the primary factors is the location of the installation. Hard-to-reach areas, such as high walls or confined spaces, can complicate the process. It’s essential to assess whether the site can accommodate the necessary equipment and if there’s sufficient space for airflow.

Another critical aspect to consider is the existing infrastructure. Older homes might require additional modifications to accommodate the new system. This can include updating electrical systems or ensuring proper insulation. Additionally, the number of indoor units and their configuration will also affect the complexity of the installation process.

Lastly, the skill level of the installation team is crucial. If the installers have extensive experience, they may navigate challenges more efficiently. However, for less experienced technicians, unforeseen complications can arise that prolong the installation.

In summary, the difficulty of installing a mini split system can vary significantly based on location, existing infrastructure, and the expertise of the installation team.

Common Challenges During Mini Split Installation

Installing a mini split system can be an excellent choice for efficient heating and cooling in a variety of spaces. However, during the mini split installation, there are several common challenges that homeowners and technicians may encounter. Understanding these challenges can help in planning and executing a successful installation.

One of the primary challenges is ensuring the proper placement of the indoor and outdoor units. Both units need to be located in areas that maximize airflow and efficiency while also being accessible for maintenance. This often requires careful measuring and sometimes modifications to the surrounding area.

Another significant hurdle is the complexity of the refrigerant lines and electrical wiring. Ensuring that the lines are adequately installed can be tricky; any mistakes can result in inefficiencies or even system failure. Furthermore, dealing with existing electrical setups might necessitate hiring a qualified electrician, adding to the installation cost.

Also, if the installation requires drilling through walls or making alterations to the structure, it can lead to additional headaches. Proper sealing and insulation must be accounted for to prevent air leaks and maintain system efficiency.

Finally, it’s important to consider the actual time commitment. Depending on the layout of your home and the number of units being installed, this task can take longer than initially anticipated. Patience and proper planning are essential to navigate these common challenges successfully.

Tips for Successful Mini Split Installation

Installing a mini split system can be a complicated task, but with the right planning and knowledge, it can be much easier. Here are some tips to ensure a successful installation:

1. Read the Manual: Before starting the installation process, be sure to thoroughly read the manufacturer’s manual. This will provide you with crucial information specific to your mini split system.

2. Choose the Right Location: The location of both the indoor and outdoor units is essential to the efficiency of the system. Ensure that the indoor unit is installed in a spot that allows for optimal air distribution, while the outdoor unit needs ample space for airflow and maintenance access.

3. Gather Necessary Tools: Make sure you have all the tools you need before starting. This may include a level, measuring tape, drill, and wrench set, among others.

4. Understand the Electrical Work Required: Mini split installations often require electrical work. Make sure you’re comfortable handling electrical components or hire a licensed electrician if necessary.

5. Insulate Properly: Proper insulation of the refrigerant lines is crucial to prevent energy loss. Ensure that you use the correct insulation material and technique for the best results.

6. Test the System Post-Installation: Once the installation is completed, run the system to check for any issues. Listen for unusual sounds and check for leaks around the connections.

By following these tips, you can simplify the process and enjoy the benefits of your new mini split system sooner!

Frequently Asked Questions

What is a mini split system?

A mini split system is a type of air conditioning and heating system that consists of an outdoor compressor unit and one or more indoor air handling units, allowing for flexible temperature control in different zones of a building.

What tools do I need to install a mini split system?

You typically need a drill, level, wrenches, screwdriver, refrigerant gauges, and a vacuum pump to install a mini split system.

Is professional installation recommended for mini split systems?

While it is possible for skilled DIYers to install a mini split system, professional installation is highly recommended to ensure that the system is correctly and safely installed, which can prevent potential issues down the line.

What are some common challenges when installing a mini split system?

Common challenges include correctly sizing the system, properly routing refrigerant lines, ensuring adequate drainage for condensation, and finding suitable locations for indoor units.

How long does it take to install a mini split system?

Depending on the complexity of the installation and the number of indoor units, it can take anywhere from a few hours to a full day to install a mini split system.

Can I install a mini split system myself?

If you have experience with HVAC systems and the necessary tools, you can consider a DIY installation; however, many local codes and warranties may require professional installation.

What should I do after installing a mini split system?

After installation, you should check for leaks in the refrigerant lines, ensure proper operation of the system, and perform maintenance tasks such as cleaning filters and checking drainage periodically.

Leave a Comment

We use cookies in order to give you the best possible experience on our website. By continuing to use this site, you agree to our use of cookies.
Accept