Explore essential insights on mini split systems, from installation challenges and location selection to professional versus DIY installation options for success.Installing a mini split system can seem daunting at first, but understanding its ins and outs can make the process much more manageable. These versatile heating and cooling systems offer numerous benefits, such as energy efficiency and personalized temperature control, which have made them increasingly popular in homes and businesses alike. However, potential installers often grapple with questions regarding the complexity of the installation process. This blog post will guide you through the essential aspects of mini split installation, from understanding the system’s components to assessing potential challenges, selecting an ideal location, and outlining successful installation steps. Additionally, we’ll weigh the pros and cons of professional installation versus DIY approaches, ensuring that you are well-equipped to make informed decisions about your project. Let’s dive in and demystify the process of installing a mini split system!
Understanding the Mini Split System
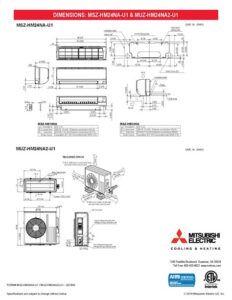
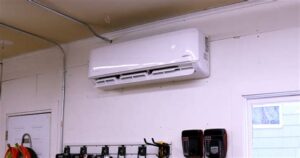
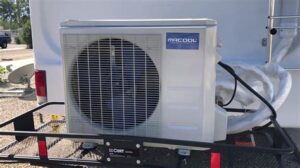
A mini split system is a type of heating and cooling system that offers flexibility and efficiency for temperature control in various spaces. Unlike traditional HVAC systems, a mini split consists of two main components: an indoor unit and an outdoor compressor unit, allowing for targeted heating or cooling.
These systems are particularly advantageous in situations where ductwork is not feasible. The indoor units can be installed in different rooms, making it easy to control the temperature in specific areas of your home or office. This capability significantly enhances the overall energy efficiency of the system, often leading to lower utility bills.
Furthermore, mini splits are known for their quiet operation, making them ideal for residential and commercial applications where noise may be a concern. With various models available, including wall-mounted, ceiling-mounted, and floor-mounted options, homeowners can select a design that best fits their aesthetic and functional needs.
Assessing Installation Challenges
When considering the installation of a mini split system, it is vital to assess the installation challenges that could arise. While mini splits are favored for their flexibility and efficiency, improper installation can lead to various issues that compromise their efficiency and lifespan. Understanding these challenges can save you time, money, and future frustrations.
One key aspect of the installation process is the complexity of the system itself. Mini split systems consist of multiple components, including indoor and outdoor units, refrigerant lines, and electrical connections. Each of these components must be carefully installed to ensure they work harmoniously together. This requires a good grasp of HVAC principles and potentially some specialized tools.
Another challenge to consider is the location of the installation. Finding the ideal spot for both the indoor and outdoor units is crucial. Factors such as proximity to power sources, drainage options, and aesthetic considerations can complicate the installation process. Additionally, obstacles like trees, structural elements, or other equipment might hinder accessibility and require creative solutions.
| Challenges | Potential Solutions |
|---|---|
| Indoor Unit Placement | Evaluate airflow and use wall-mounted brackets |
| Outdoor Unit Accessibility | Choose a location with adequate space for maintenance |
| Electrical Requirements | Hire an electrician to address power needs |
| Refrigerant Line Routing | Plan the route in advance to minimize bends |
By thoroughly assessing these challenges before starting the installation process, you can create a plan that mitigates potential issues. Whether you decide to take on the task yourself or hire a professional, understanding the hurdles can lead to a more successful installation experience.
Selecting the Right Location
Choosing the right location for your mini split system is crucial for optimal performance and efficiency. A well-placed unit can enhance heating and cooling capabilities while minimizing energy consumption. Here are some essential factors to consider:
1. Room Size and Layout: Ensure that the location allows for adequate coverage of the space. The unit should be installed where it can distribute air evenly across the room. Avoid placing it too close to walls, furniture, or any obstructions that may affect airflow.
2. Proximity to Outdoor Unit: The distance between the indoor and outdoor units plays a significant role in installation difficulty and system efficiency. Ideally, keep the two components as close as possible while adhering to manufacturer guidelines.
3. Ceiling Height: Install the mini split unit higher up on the wall, ideally closer to the ceiling, which allows for better air circulation. The height can significantly impact the cooling and heating efficiency of the system.
4. Access to Power Supply: Ensure that the installation location has easy access to a power source. Proper electrical connections are vital for the unit’s operation and safety. If additional wiring is needed, consult a professional electrician.
5. Aesthetic and Practical Considerations: Consider the visual impact of the indoor unit. Select a location that minimizes exposure to heat-generating devices, direct sunlight, or excessive humidity while also respecting the design of your space.
In summary, selecting the right location for your mini split system involves careful consideration of various factors. By keeping these elements in mind, you can ensure improved comfort and efficiency for your home or office.
Steps for Installation Success
Installing a mini split system can seem daunting, but breaking it down into manageable steps can make the process much easier. Here are the key steps to ensure a successful installation:
- Choose the Right Equipment: Begin by selecting a mini split unit that suits your heating and cooling needs. Consider factors like size, efficiency ratings, and installation requirements.
- Gather Tools and Materials: You’ll need basic tools such as a drill, wrench, and screwdriver, along with installation materials including refrigerant lines, electrical wiring, and mounting brackets.
- Select an Appropriate Location: Identify an ideal location for both the indoor and outdoor units. Ensure there’s sufficient space for air circulation and easy access for maintenance.
- Prepare the Installation Spot: Prepare the area by clearing any obstructions and marking where the mounting brackets will go. You may need to drill holes for refrigerant lines and electrical wiring.
- Install the Indoor Unit: Secure the indoor unit to the wall by attaching the mounting bracket. Make sure it’s level and properly positioned.
- Connect Refrigerant Lines: Carefully run the refrigerant lines from the indoor unit to the outdoor unit, ensuring there are no kinks and the connections are secure.
- Set Up the Outdoor Unit: Place the outdoor unit on a solid base that’s level and stable. Connect the refrigerant lines and electrical connections as per the manufacturer’s guidelines.
- Test the System: Once everything is connected, turn on your system to test its functionality. Check for any leaks and ensure it is operating correctly.
Following these steps systematically can help streamline the installation process of your mini split system. Don’t forget to refer to the manufacturer’s installation manual for specific instructions and safety precautions.
If you encounter any issues or feel unsure about any of the steps, it might be advisable to consult with or hire a professional to ensure that your mini split system is installed safely and efficiently.
With the right preparation and attention to detail, you can achieve success in your mini split installation project!
Professional Installation vs. DIY
When it comes to installing a mini split system, one of the critical decisions homeowners face is whether to go for professional installation or attempt a DIY approach. Both options have their pros and cons, and understanding these can help you make an informed choice that suits your budget, skill level, and overall comfort.
Opting for professional installation can ensure that the system is set up correctly and efficiently. Professionals have the experience and knowledge necessary to handle complex aspects such as electrical connections, refrigerant handling, and local code adherence. Moreover, a professionally installed system often comes with warranties that can protect you against future issues.
On the other hand, DIY installation can save costs and provide a sense of achievement. However, it’s crucial to be aware that improper installation can lead to inefficiency or even damage to the system. Therefore, if you choose to go the DIY route, ensure you thoroughly research the installation process, have the right tools, and are comfortable working with HVAC systems. In the end, weighing your skills and safety concerns against potential savings could influence your decision greatly.
Frequently Asked Questions
What tools are needed to install a mini split system?
You will typically need a level, power drill, wrenches, screwdrivers, and possibly a vacuum pump and refrigerant gauge for the installation.
Do I need a professional to install a mini split?
While some skilled DIYers can manage the installation, hiring a licensed HVAC professional is recommended to ensure safety and compliance with local codes.
How long does it take to install a mini split system?
The installation process generally takes between 4 to 8 hours, depending on the complexity of the setup and if any electrical work is required.
What are common mistakes to avoid when installing a mini split?
Common mistakes include improper placement of the indoor and outdoor units, incorrect refrigerant handling, and neglecting adequate insulation in the refrigerant lines.
Can I install a mini split in any room?
Most rooms can accommodate a mini split, but it’s important to consider the room’s size, insulation, and sun exposure to determine the right capacity units.
What are the advantages of a mini split system?
Mini split systems provide flexible cooling and heating options, energy efficiency, and individual climate control for different rooms without requiring ductwork.
How do I maintain a mini split system once it’s installed?
Regular maintenance includes cleaning or replacing the air filters, checking the outdoor unit for obstructions, and scheduling annual professional inspections.


