Discover the benefits of mini split systems, installation tips, and maintenance advice for optimal performance and efficiency in this comprehensive guide.Installing a mini split system can be a game-changer for your home’s comfort and efficiency, offering a modern solution to heating and cooling needs without the complications of traditional systems. In this blog post, we’ll explore the numerous benefits of mini split systems, including their energy efficiency and flexibility in temperature control. We’ll guide you through the crucial steps of choosing the right location for your unit, ensuring optimal performance and aesthetics. Preparation is key, so we’ll cover what you need to do before installation begins. You’ll find a comprehensive step-by-step guide to help you install your mini split with ease. Lastly, we’ll share essential tips on testing your system and maintaining it for long-lasting performance. Whether you’re a DIY enthusiast or simply looking to enhance your home’s climate control, this guide will equip you with all the information you need for an easy install.
Benefits of Mini Split Systems
Mini split systems have gained popularity for both residential and commercial heating and cooling solutions due to their many benefits. One of the primary advantages of a mini split system is its energy efficiency. Unlike traditional HVAC systems, mini splits allow for targeted heating and cooling, which means you can control the temperature of each room individually, leading to significant energy savings.
Another notable benefit is their versatile installation options. Mini split systems do not require ductwork, making them an ideal choice for homes without existing ducts or for those looking for a retrofit solution. This also allows homeowners to install units in specific locations, optimizing the system’s functionality and appearance.
Lastly, mini split systems operate quietly compared to traditional systems. The indoor units are designed to function at low noise levels, allowing you to enjoy a comfortable environment without the disturbance of loud mechanical sounds. This makes mini splits a perfe
Choosing the Right Location
When it comes to installing a mini split system, one of the most important considerations is the location. The placement of both the indoor and outdoor units can significantly affect the system’s efficiency and performance. Here are several key factors to keep in mind when deciding on the best spot for your mini split system.
First, ensure that the indoor unit is installed in a central location within the room. This will facilitate optimal air distribution, allowing cool or warm air to circulate evenly throughout the space. Avoid placing the unit directly near heat sources such as fireplaces, stoves, or large electronic appliances, as these can negatively affect the system’s performance.
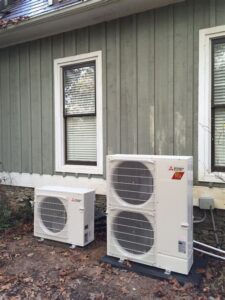
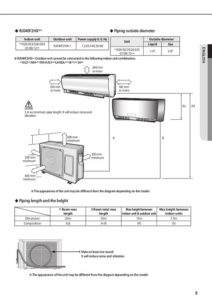
Next, consider the outdoor unit’s location. It should be placed on a solid, level surface with ample space around it for airflow. Avoid locations near dense vegetation or obstacles that could block the ventilation. Additionally, make sure that the unit is not installed in a location that can be exposed to extreme weather conditions, such as heavy rain or snow, to ensure longevity and reliability.
Finally, check any local codes or regulations regarding the installation of HVAC systems. Some areas may have specific guidelines regarding the distance between the outdoor unit and property lines, or restrictions on placement in certain locations. Consulting with a professional can help you navigate these requirements and choose the
Preparation for Installation
Installing a mini split system can be a straightforward process if you take the time to prepare adequately. Proper preparation is crucial to ensuring that the installation goes smoothly and efficiently. Here are the key steps you need to follow before getting started.
1. Gather the Necessary Tools and Materials
- Mini split system unit
- Drill and drill bits
- Level
- Screwdrivers
- Pipe cutter
- Refrigerant line
- Thermal insulation
- Electrical wiring tools
Make sure to have all these tools on hand beforehand to avoid any interruptions during the installation process.
2. Read the Manufacturer’s Instructions
Before starting, it is essential to read the manufacturer’s instructions carefully. This will give you a thorough understanding of how to install the system correctly and safely, including any specific requirements that must be met.
3. Choose the Right Location
Decide on the most suitable location for both the indoor and outdoor units of your mini split system. Ensure that the placement allows for optimal airflow and accessibility for maintenance. Additionally, consider local regulations or guidelines regarding the installation of HVAC systems.
By following these preparation steps, you can set yourself up for a successful and efficient mini split installation.
Step-by-Step Installation Process
Installing a mini split system can be a straightforward process if you follow the right steps and take necessary precautions. This guide will walk you through the step-by-step installation process for your mini split system, ensuring optimal performance and efficiency.
Before you begin the installation, gather the necessary tools and materials. You will need a drill, level, measuring tape, refrigerant lines, mounting brackets, and a vacuum pump. Once you have your tools ready, you can start the installation.
Here’s a simple breakdown of the installation process:
- Choose the Right Location: Ensure the indoor and outdoor units are properly spaced and away from obstructions.
- Install the Mounting Bracket: Secure the mounting bracket for the indoor unit to the wall, ensuring it’s level.
- Drill a Hole: Drill a hole through the wall for the refrigerant lines and drain pipe.
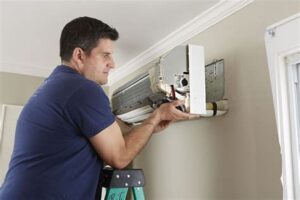
- Connect the Indoor Unit: Attach the refrigerant lines and drain pipe to the indoor unit, then hang it on the mounted bracket.
- Install the Outdoor Unit: Set up the outdoor unit on a stable surface, ensuring it has adequate ventilation.
- Connect Electrical Wiring: Make the necessary electrical connections for both units, following all safety protocols.
- Test the System: Once everything is connected, turn on the system to ensure it’s functioning correctly.
Following these steps will help you successfully install your mini split system with minimal hassle. Always consult local codes and guidelines, and consider seeking professional
Testing and Maintenance Tips
Regular testing and maintenance are crucial for ensuring the longevity and efficiency of your easy install mini split system. By following a few simple guidelines, you can prevent potential issues and keep your system operating at its best. Here are some key tips for maintaining your mini split system:
- Check and Replace Air Filters: Dirty air filters can block airflow and reduce efficiency. Regularly inspect and replace them every 1-3 months, depending on usage.
- Clean the Outdoor Unit: Ensure that the outdoor unit is free from debris, such as leaves and dirt, to maintain proper airflow and prevent overheating.
- Inspect Refrigerant Lines: Check for any signs of wear or damage to the refrigerant lines. Proper insulation is essential for energy efficiency.
- Test the Thermostat: Make sure your thermostat is functioning correctly. Programming the thermostat for energy-saving modes can help reduce overall costs.
It’s also important to schedule a professional maintenance visit at least once a year. A certified technician can perform detailed inspections and cleanings, ensuring your mini split operates at peak performance. These experts are trained to identify potential issues that you might miss during routine checks.
Finally, always keep an eye on your system’s performance. If you notice any unusual sounds, smells, or changes in airflow, it may be time to consult a professional. Taking a proactive approach with your easy install mini split wi
Frequently Asked Questions
What is a mini split system?
A mini split system is a type of heating and cooling system that consists of an outdoor compressor unit and one or more indoor air-handling units. They are known for their energy efficiency and ability to provide zone-specific temperature control.
What are the benefits of installing a mini split system?
The benefits include energy efficiency, flexibility in installation, reduced noise levels compared to traditional HVAC systems, and the ability to heat and cool specific zones within a home.
How do I determine the correct size mini split system for my space?
To determine the correct size, you can calculate the BTU (British Thermal Unit) requirements based on the square footage of the area you want to heat or cool. It’s also important to consider insulation, ceiling height, and climate conditions.
Is it difficult to install a mini split system?
While installing a mini split system can be more straightforward than other HVAC systems, it still requires some technical knowledge, particularly for electrical and refrigerant lines. Many homeowners opt to hire a professional for installation.
What tools are needed for a DIY mini split installation?
Basic tools required include a power drill, wrenches, a level, measuring tape, and possibly a vacuum pump for the refrigerant lines. Additional tools may be needed depending on the specifics of the installation.
What are some common mistakes to avoid when installing a mini split system?
Common mistakes include improper placement of the indoor unit, incorrect sizing, neglecting insulation, and failure to adequately seal connections. Always ensure you follow the manufacturer’s guidelines.
How do I maintain my mini split system after installation?
To maintain your mini split system, regularly clean or replace the filters, check for any blockages around the outdoor unit, periodically inspect the refrigerant lines for leaks, and schedule professional maintenance annually.


