Learn how to choose, prepare, and install a ducted mini-split system, and understand the importance of maintenance for optimal performance.When it comes to efficient heating and cooling solutions, ducted mini splits stand out as a flexible option suitable for various spaces. This blog post will guide you through the crucial steps of ducted mini split installation, ensuring that you make informed decisions from start to finish. We’ll explore how to choose the right system for your needs, the importance of preparing your installation site, and selecting compatible ductwork and fittings. Additionally, we’ll discuss the differences between professional and DIY installation, helping you determine which route is best for you. Finally, we’ll highlight the significance of ongoing maintenance to keep your system running smoothly and efficiently. Whether you’re a homeowner looking to upgrade your comfort system or a DIY enthusiast ready to take on a new project, this guide will equip you with the knowledge to make your installation a success.
Choosing the right ducted mini split system
When it comes to selecting the right ducted mini split system for your home or office, several crucial factors come into play. First and foremost, it’s essential to evaluate the size of the space you intend to cool or heat. An oversized unit may cycle on and off too frequently, while an undersized unit will struggle to achieve desired temperatures.
Another vital aspect to consider is the energy efficiency of the unit. Look for systems with a high SEER (Seasonal Energy Efficiency Ratio) rating. Higher ratings indicate better energy performance, leading to cost savings in the long run.
Additionally, consider the brand reputation and warranty coverage. Reliable manufacturers often provide better after-sales services and extended warranties, which can be crucial for long-term satisfaction. Some of the top-rated brands in the market include Mitsubishi, Fujitsu, and Daikin, known for their quality and innovation.
| Feature | Consideration |
|---|---|
| Size | Match unit capacity with space requirements |
| Energy Efficiency | Choose a higher SEER rating |
| Brand Reputation | Select trusted manufacturers |
Preparing the installation site
Preparing the installation site for a ducted mini split system is a crucial step that directly impacts the efficiency and performance of the system. Proper preparation ensures that the system operates effectively and runs smoothly over time. Here are some important considerations to keep in mind when getting your site ready.
Firstly, you need to evaluate the space availability. Ensure there is enough space for the indoor and outdoor units, allowing for proper airflow and maintenance access. The placement should be away from obstructions such as trees, fences, or other buildings that could interfere with air movement. Additionally, the interior areas should be free from clutter to facilitate easy installation.
Next, it’s essential to check the electrical requirements. A suitable electrical supply should be established close to the installation site to avoid complicated connections. Consult with a professional to ensure that your electrical system can support the load requirements of the ducted mini split system. Lastly, clear the area of debris and obstructions
Selecting appropriate ductwork and fittings
When it comes to installing a ducted mini split system, one of the critical aspects to consider is selecting appropriate ductwork and fittings. The effectiveness and efficiency of your HVAC system greatly depend on the quality and type of ductwork used. Here, we will explore several important factors that should guide your decisions.
1. Duct Material: The material used for the ductwork can significantly impact the overall performance of your system. Common materials include galvanized steel, aluminum, and flexible plastic. Each material has its advantages:
- Galvanized Steel: Known for its durability and resistance to corrosion.
- Aluminum: Lightweight, non-corrosive, and easy to install.
- Flexible Plastic: Cost-effective and easy to maneuver in tight spaces.
2. Duct Size: Choosing the right size of ductwork is crucial. Oversized ducts can result in air leakage and decreased efficiency, while undersized ducts can restrict airflow, leading to increased energy consumption. Use the correct calculations to determine the right duct size based on the required CFM (Cubic Feet per Minute) for your system.
3. Fittings and Accessories: The type of fittings you use, such as elbows, tees, and transitions, also plays a vital role. Ensure that any fittings used are compatible with the duct size and material. Proper fittings help to reduce air resistance and improve overall airflow efficiency.
By thoughtfully selecting the appropriate ductwork and fittings, you can optimize the performance of your ducted mini split installation, ensuring a comfortable and energy-efficient environment for your space.
Professional vs. DIY installation
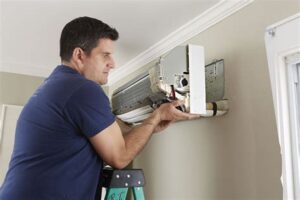
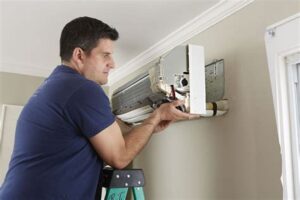
When it comes to ducted mini split installation, homeowners often face the dilemma of choosing between hiring a professional or attempting a DIY installation. Each option has its merits and potential drawbacks that should be carefully considered.
Opting for a professional installation typically ensures that the system is set up correctly and efficiently. Professionals bring experience, specialized tools, and all the necessary permits that might be required. They can also quickly troubleshoot any issues that arise during the installation process. However, this option can be significantly more expensive.
- Benefits of Professional Installation:
- Expertise in handling complex systems
- Warranty coverage and assurance of quality work
- Time-efficient – professionals can complete the installation in less time
- Drawbacks of Professional Installation:
- Higher costs compared to DIY
- Scheduling around availability of the service provider
On the other hand, a DIY installation can be a rewarding experience for those who are handy and willing to learn. It allows for cost savings and gives you a sense of accomplishment. However, if you’re not well-versed in HVAC systems, the risk of improper installation can lead to decreased efficiency, future repair costs, and potential safety hazards.
- Advantages of DIY Installation:
- Lower installation costs
- Flexibility in scheduling
- Opportunity to learn about HVAC systems
- Challenges of DIY Installation:
- Possible risks of errors and complications
- Time-consuming, particularly without experience
- No professional warranty or support
In summary, whether you choose professional installation or DIY installation, it’s imperative to weigh the pros and cons of each method. Consider your budget, skill level, and the complexity of the ducted mini split system you wish to install. Whatever path you choose, ensuring proper installation will ultimately
Ensuring proper maintenance after installation
Once you have successfully installed your ducted mini split system, the journey does not end there. Ensuring proper maintenance is crucial for the longevity and efficiency of your system. Regular upkeep will not only help maintain the system’s performance but also extend its life and reduce energy bills.
To keep your ducted mini split system running smoothly, consider these essential maintenance steps:
- Regular Cleaning: Clean the filters every month to prevent dust accumulation, which can hinder airflow and efficiency.
- Check the Ducts: Inspect the ductwork for any leaks or blockages that could affect the system’s performance.
- Professional Servicing: Schedule professional maintenance at least once a year. Technicians can perform thorough inspections and cleanings that you may not be able to manage on your own.
By following these maintenance tips, you can ensure that your ducted mini split system continues to operate at its best. Consistent attention will not only save you money on repairs in the long run but will also guarantee a comfortable living environment year-round.
Frequently Asked Questions
What is a ducted mini split system?
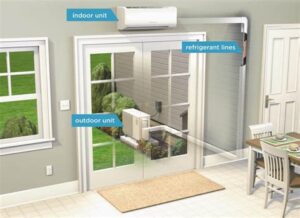
A ducted mini split system is a type of HVAC system that provides heating and cooling without the need for ductwork, utilizing a network of individual units connected to a single outdoor compressor.
What are the benefits of ducted mini split installation?
The benefits include improved energy efficiency, flexible zoning options, between rooms, quieter operation, and the ability to maintain comfortable temperatures in larger spaces.
What tools are needed for installing a ducted mini split system?
Essential tools include a drill, level, measuring tape, refrigerant gauge, pipe wrenches, and electrical tools for connecting components.
How do you choose the right size ducted mini split system for your space?
Choosing the right size involves calculating the BTU requirements based on your room size, insulation, and local climate conditions.
Can I install a ducted mini split system myself?
While some homeowners may opt for DIY installation, it is generally recommended to hire a professional to ensure proper installation, compliance with local codes, and optimal system performance.
How long does a ducted mini split installation typically take?
A typical installation can take anywhere from several hours to a few days, depending on the complexity of the system and the specific requirements of the home.
What maintenance is required for a ducted mini split system?
Regular maintenance includes cleaning or replacing filters, checking refrigerant levels, and scheduling professional inspections annually to ensure efficient operation.
