Learn how to install Daikin mini split systems efficiently with our comprehensive guide, including preparations, step-by-step instructions, tips, and troubleshooting advice.If you’re considering installing a Daikin mini split system, you’ve made a wise choice for efficient heating and cooling in your home. These systems offer flexibility, energy efficiency, and exceptional comfort, making them a popular option for many homeowners. However, a successful installation requires careful planning and a thorough understanding of the process. In this blog post, we will guide you through everything you need to know about installing a Daikin mini split system, from the basics of how these systems work to detailed preparations and a step-by-step installation guide. We’ll also share helpful tips to ensure an efficient installation and troubleshoot common issues that may arise during the process. Whether you’re a DIY enthusiast or looking to hire a professional, this guide will equip you with the knowledge to navigate your installation with confidence. Let’s get started!
Understanding Daikin Mini Split Systems
Daikin Mini Split Systems are versatile heating and cooling solutions designed for both residential and commercial use. These systems consist of two main components: an outdoor compressor unit and one or more indoor air handlers. This configuration allows for efficient temperature control in specific zones of a building, optimizing comfort while minimizing energy consumption.
One of the primary advantages of Daikin Mini Split Systems is their energy efficiency. They utilize inverter technology, which adjusts the compressor speed based on the current heating or cooling demand. This means that rather than operating at full power constantly, these systems can run at lower capacities when less heating or cooling is needed, reducing energy costs significantly.
Another significant feature of Daikin Mini Split Systems is their flexibility in installation. Unlike traditional HVAC systems, mini splits do not require ductwork, making them an ideal choice for homes without existing ducts or for room additions. Installation can be simpler, as it typically involves mounting the indoor unit on a wall and connecting it to the o
Preparations for Installation
Before embarking on your Daikin mini split installation, it’s vital to ensure you have adequately prepared. Proper preparation not only streamlines the process but also enhances efficiency and minimizes the chances of errors. Here’s a comprehensive checklist to assist you in this stage.
First and foremost, you need to gather all the necessary tools and materials. This includes items such as a drill, screwdriver, level, measuring tape, and a refrigerant gauge. Additionally, make sure you have your Daikin mini split system components, including the indoor and outdoor units, mounting brackets, and any hardware that comes with the system.
It’s equally important to choose the right location for the installation. Both the indoor and outdoor units require ample space for proper airflow and accessibility for future maintenance. Ensure there are no obstructions and that you comply with the manufacturer’s guidelines regarding clearances. Once your area is selected and tools are ready, you can proceed with confidence into t
Step-by-Step Installation Guide
Installing a Daikin mini split system can seem daunting, but with the right step-by-step installation guide, the process becomes manageable. Below is a detailed outline for successfully installing your mini split system.
Preparation
- Read the manual carefully to understand the unit features.
- Gather all necessary tools: drill, wrenches, refrigerant gauge, and measuring tape.
- Determine the optimal location for the indoor and outdoor units.
Installation Steps
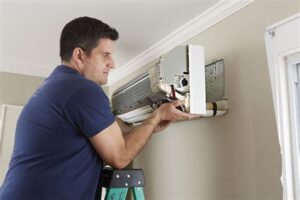
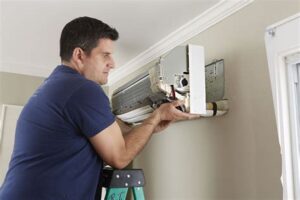
- Mount the indoor unit on the wall, ensuring it is level and doesn’t obstruct airflow.
- Drill a hole for the refrigerant lines and drainage.
- Install the outdoor unit on a stable surface or mounting bracket.
- Connect the refrigerant lines and electrical wiring between the indoor and outdoor units.
- Seal the hole with insulation to prevent air leaks.
- Test the system to ensure it cools or heats properly.
Always refer to the Daikin installation manual for specific instructions tailored to your model. Following these steps carefully will lead to an effective installation.
If you encounter any issues, don’t hesitate to consult a professional or revisit the troubleshooting section of your manual, as many common problems can arise during installation.
By taking the time to understand each step, you’ll ensure that your Daikin mini split system operates efficientl
Tips for Efficient Installation
When it comes to installing a Daikin Mini Split System, maximizing efficiency is key to ensure optimal performance and longevity. Here are some valuable tips to help you achieve a successful and efficient installation.
1. Choose the Right Location
Selecting an appropriate location for your indoor and outdoor units is crucial. Ensure that the indoor unit is placed where it can circulate air freely throughout the room, avoiding obstacles like furniture or curtains. The outdoor unit should be positioned on a stable surface with adequate ventilation, away from direct sunlight and harsh weather conditions.
2. Gather Necessary Tools
Before starting the installation, make sure you have all the necessary tools. This typically includes a drill, level, pipe cutter, tubing wrenches, and a refrigerant scale. Having everything ready beforehand can save you time and prevent unexpected interruptions during the installation process.
3. Follow Safety Precautions
Always prioritize safety when handling electrical components and refrigerants. Wear appropriate safety gear like gloves and goggles. Additionally, ensure the power is turned off before connecting or disconnecting any electrical wires.
4. Utilize Professional Guidance
If you’re unsure about any part of the installation process, don’t hesitate to consult the Daikin Mini Split Install Manual or seek help from certified professionals. Their expertise can help ensure that the system is installed correctly and efficiently.
| Tip | Description |
|---|---|
| Location | Choose a spot with good airflow and minimal obstacles. |
| Tools | Have all necessary tools ready before you start. |
| Safety | Always prioritize safety and wear protective gear. |
| Professional Help | Consult professionals if unsure about the installation. |
Following these tips will not only facilitate a smoother installation but also enhance the overall efficiency of your Daikin Mini Split System. Remember, the goal is to enjoy optimum comfort while reducing energy consumption.
By taking the time to prepare and understanding the installation process, you can ensure that your mini split system operates at its best, providing comfort and efficiency for years to come.
Lastly, regular maintenance and inspections will help keep your system running efficiently and effectively, so it’s crucial to incorporate those practices into your routine post-installation.
Troubleshooting Common Installation Issues
When installing a Daikin mini split system, you may encounter a few common issues that can hinder the installation process. Understanding these problems in advance can save you valuable time and ensure a smoother installation experience. Here are several troubleshooting tips to consider:
- Insufficient Power Supply: Ensure that the electrical supply is adequate for the system’s power requirements. This may involve checking the circuit breaker and the dedicated wiring.
- Piping Leaks: Inspect the refrigerant lines for any signs of leakage. Properly tighten connections and ensure that insulation is applied where necessary.
- Incorrect Drainage: Make sure that the condensate drain is installed correctly and is free of clogs. Ensure the drain pan is pitched to allow proper flow.
- Incorrect Remote Control Settings: Double-check that the remote control is functioning properly and set to the correct mode for your system.
In case you face any of these issues, refer to the installation manual for troubleshooting steps specific to your Daikin mini split system. There may also be additional guidelines depending on the model you are working with.
Lastly, don’t hesitate to reach out to the Daikin customer support or consult an HVAC professional if the problems persist. Having expert advice can often prevent lar
Frequently Asked Questions
What are the key components of a Daikin mini split system?
The key components include the indoor unit, outdoor unit, refrigerant lines, electrical connections, and a remote control.
What tools are necessary for installing a Daikin mini split system?
Essential tools include a drill, screwdriver, level, stud finder, pipe cutter, and vacuum pump.
How do I determine the proper location for the indoor unit?
The indoor unit should be placed high on a wall, away from obstructions, and in an area where airflow won’t be hindered.
What is the first step in the installation process?
The first step is to mount the indoor unit bracket on the wall securely and ensure it is level.
Are there any specific electrical requirements for installation?
Yes, you need a dedicated electrical circuit that meets the specifications outlined in the installation manual.
How can I ensure the refrigerant lines are properly connected?
Ensure all connections are tight and use the proper torque specifications as indicated in the manual to prevent leaks.
What should I do after the installation is complete?
After installation, double-check all connections, test the system for proper operation, and follow the manufacturer’s commissioning procedures.
