Learn essential steps for a successful HVAC installation, from choosing the right location to connecting refrigerant lines and final testing.Installing a Costway 12,000 BTU mini split system can significantly enhance your home’s comfort, providing efficient heating and cooling tailored to your needs. However, the installation process may seem intimidating for beginners. This guide aims to simplify the steps involved, ensuring that you choose the right location for your unit, gather all necessary tools, and prepare the mounting area effectively. We’ll walk you through the essential steps of connecting the refrigerant lines and testing your system to ensure optimal performance. Whether you’re a seasoned DIY enthusiast or a first-time installer, this blog post will equip you with the knowledge and confidence to tackle your mini split installation project. Let’s get started on making your home a more comfortable space!
Choosing the Right Location
When it comes to the costway 12000 BTU mini split installation, one of the most critical factors is choosing the right location for both the indoor and outdoor units. The placement affects the efficiency and effectiveness of the system. Here are some key considerations:
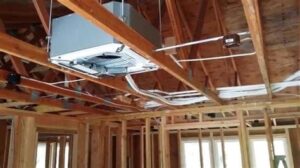
- Indoor Unit: Ideally, place the indoor unit in a central location within the main living area. This ensures even air distribution throughout the room.
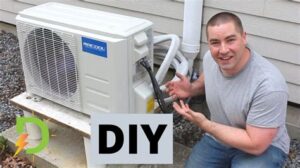
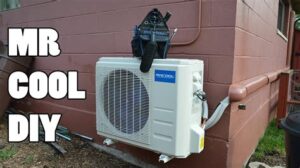
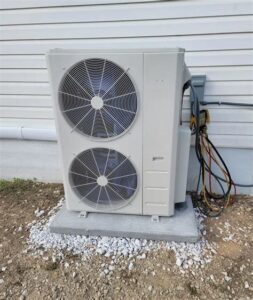
- Outdoor Unit: The outdoor unit should be installed on a solid foundation, such as a concrete pad or a mounting bracket. It should also be in an area with sufficient airflow and away from obstacles that could obstruct air circulation.
- Sunlight Exposure: Avoid locations that receive direct sunlight, as this may cause the unit to work harder and reduce its efficiency. Shade from trees or other structures can help.
- Proximity to Power Source: Ensure that both units are not too far from electrical outlets and that power lines can safely connect without any issues.
- Noise Considerations: Be mindful of where you place the outdoor unit to minimize potential noise disturbances to neighbors or within your own living space.
By taking the time to choose the right location, you can maximize the performance and longevity of your mini split system, ensuring comfort in your home year-round.
Once you’ve selected a suitable spot, it’s essential to assess further details, such as wall stud locations and existing wiring, to facilitate a smooth installation process.
Proper planning in this initial step will not only make the costway 12000 BTU mini split installation more straightforward but also enhance the unit’s efficiency, saving you money in the long run.
Gathering the Necessary Tools
When it comes to the installation of your Costway 12000 BTU mini split, having the right tools on hand is essential for a successful and smooth process. Below is a list of the necessary tools you will require to effectively complete the installation:
- Refrigerant Gauges – For monitoring the pressure of the refrigerant during and after installation.
- Wrench Set – Necessary for tightening bolts and fittings on the mini split unit.
- Drill and Drill Bits – To create holes for mounting the indoor and outdoor units as well as for the refrigerant lines.
- Pipe Cutter – Essential for cutting the refrigerant lines to the correct length.
- Level – To ensure that both indoor and outdoor units are properly aligned for optimal performance.
- Tape Measure – For accurate measurements when determining placement and installation points.
- Vacuum Pump – To evacuate air and moisture from the refrigerant lines before adding refrigerant.
- Safety Gear – Includes gloves and goggles to protect yourself during the installation.
Make sure to gather these tools before you begin the installation of your Costway 12000 BTU mini split. Having everything you need within arm’s reach will streamline the process and minimize frustration.
Additionally, it’s worthwhile to check that all your tools are in good working condition. For instance, ensure that the vacuum pump functions properly and that the pipe cutter is sharp. This attention to detail will save you time during the actual installation.
In essence, being prepared with the proper tools not only boosts your efficiency but also contributes to the overall quality of your mini split installation. So, taking a moment to gather and check your tools is certainly worth the effort!
Preparing the Mounting Area
Before diving into the installation of your Costway 12000 BTU mini split, one of the crucial steps is to ensure that you accurately prepare the mounting area. This process not only guarantees a secure installation but also enhances the efficiency of your air conditioning system.
Follow these essential steps to prepare the mounting area effectively:
- Select a suitable wall: Choose a location that can handle the weight of the indoor unit and is close to the outdoor unit.
- Check for obstructions: Ensure that there are no barriers like furniture, curtains, or other obstructions that could block airflow and affect performance.
- Verify the structural integrity: Make sure the wall is sturdy enough to support the unit. You may need to use additional support brackets if the wall is not solid.
Additionally, you should be mindful of the wiring and refrigerant line routing. Plan the paths the lines will take carefully to avoid any potential complications during the installation.
Once your area is adequately prepared, you will have a much smoother time with the installation process, and your mini split system will perform optimally.
Connecting the Refrigerant Lines
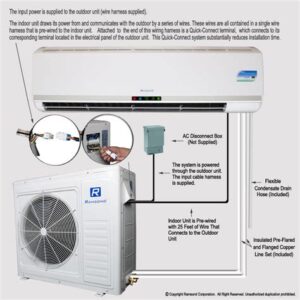
Once you have selected the perfect location for your Costway 12000 BTU mini split installation and prepared the mounting area, the next essential step is connecting the refrigerant lines. This process is crucial for the efficient operation of your mini split system, ensuring that it provides optimal cooling or heating as needed.
Before you start, make sure you have all the necessary tools at hand, including a tubing cutter, wrenches, and flare fittings. Refer to the manufacturer’s manual for the exact specifications regarding the refrigerant line installation. It’s essential to use the correct diameter and type of refrigerant line to prevent any leaks and ensure energy efficiency.
To connect the refrigerant lines, follow these steps:
- Cut the refrigerant lines to the required length using a tubing cutter.
- Deburr the edges of the cut tubing to prevent damage to the flare fitting.
- Attach the flare fittings carefully, ensuring a tight seal without overtightening.
- Connect the lines at both the indoor and outdoor units, being cautious not to introduce any moisture into the system.
After the connections are secure, check for leaks using a soap solution. If bubbles form, there may be a leak that needs to be addressed before proceeding to the next steps of the installation. Taking the time to properly connect the refrigerant lines is vital in ensuring the longevity and effectiveness of your Costway mini split system.
Testing and Finishing Installation
After successfully installing your Costway 12000 BTU mini split system, the next crucial step is testing and finishing installation. This phase ensures that your system operates efficiently and effectively, providing optimal heating or cooling for your space.
First, ensure that all electrical connections are secure and meet safety standards. Check the circuit breaker and make sure it’s properly defined for your unit. It’s important that all wiring is correctly insulated to prevent any potential hazards. Once electrical connections are verified, it’s time to assess the refrigerant lines.
To test the system, turn on the power and set the thermostat to your desired setting. Monitor the operation of the unit for at least 15-20 minutes. It’s essential to observe if the air blowing from the unit is significantly cool or warm, based on your settings. If you notice any unusual noises or inconsistent airflow, it could indicate an issue that requires immediate attention. Finally, seal up any access points around the refrigerant lines and ensure that all installation panels are
Frequently Asked Questions
What is a 12000 BTU mini split system?
A 12000 BTU mini split system is a type of air conditioning unit that can cool or heat an area of up to 550 square feet efficiently. It operates through an indoor and outdoor unit connected by refrigerant lines.
What are the benefits of installing a mini split system?
Mini split systems offer several benefits including energy efficiency, flexibility in installation, individual room temperature control, and reduced noise levels compared to traditional HVAC systems.
What tools do I need for the installation of a Costway 12000 BTU mini split?
For installation, you’ll typically need a drill, wrenches, screwdrivers, level, measuring tape, and safety gear such as gloves and goggles. An HVAC gauge set can also be helpful for checking refrigerant levels.
What are the basic steps in installing a mini split system?
The basic steps include selecting an appropriate location for the indoor and outdoor units, mounting the indoor unit, installing the outdoor unit, connecting the refrigerant lines, and then wiring the electrical connections.
Is professional installation recommended for a mini split system?
While some experienced DIYers can install a mini split system, hiring a professional is recommended to ensure the system is installed correctly and meets local building codes.
How long does it typically take to install a mini split system?
Installation time can vary but typically lasts between 4 to 8 hours for a standard installation, depending on the complexity and the number of units being installed.
What maintenance is required for a mini split system after installation?
Regular maintenance includes cleaning or replacing air filters every few months, checking the outdoor unit for debris, and ensuring drain lines are clear to prevent water buildup.
