Discover key insights on choosing the ideal location, installation planning, concealed piping, sealing techniques, and essential testing and maintenance for mini split systems.When it comes to achieving efficient heating and cooling in your home, concealed mini split systems are a stylish and practical choice. Unlike traditional units, these systems can be discreetly integrated into your interiors, maximizing both comfort and aesthetics. However, the success of your installation hinges on careful planning and execution. In this blog post, we will guide you through the essential steps of concealed mini split installation, starting with choosing the optimal location for your unit. From there, we’ll discuss how to plan the installation process, the ins and outs of concealed piping, effective sealing and insulation techniques, and vital testing and maintenance tips to keep your system running smoothly. Whether you’re a DIY enthusiast or hiring a professional, this comprehensive guide will ensure your mini split installation is as seamless as it is efficient.
Choosing the Right Location
When it comes to concealed mini split installation, one of the most critical factors for success is the location. Proper placement not only ensures efficient operation but also contributes to the aesthetics of your space. Here are some key considerations when choosing the right location for your mini split system:
- Indoor Unit Positioning: The indoor unit should be installed in a location that allows for optimal airflow throughout the room. Ideally, it should be elevated a few feet from the floor and away from any obstructions, such as furniture or curtains.
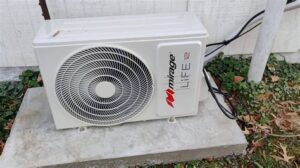
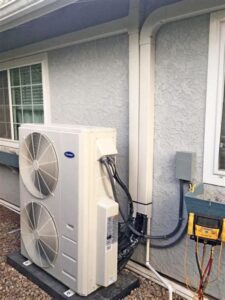
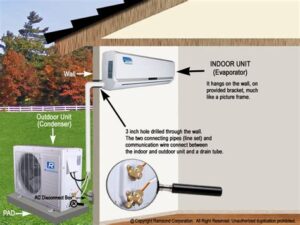
- Outdoor Unit Accessibility: The outdoor unit needs to be easily accessible for maintenance and repairs. Ensure there’s enough clearance around the unit for both air circulation and service access.
- Distance Between Units: The distance between the indoor and outdoor units affects efficiency. The longer the line set, the more energy it takes to operate. Therefore, aim to keep them as close together as possible while considering other installation factors.
Additionally, think about the exposure to sunlight. Avoid installing units in direct sunlight as this can affect their performance. Instead, try to find a location that offers some shade. A well-chosen spot can help your mini split function efficiently and provide comfort year-round.
Finally, consult with a professional if you’re uncertain about the perfect location. They can provide valuable insights tailored to your specific needs, ensuring a successful installation that maximizes comfort and efficiency.
Planning the Installation Process
When it comes to concealed mini split installation, careful planning of the installation process is essential for a successful setup. The right planning ensures an efficient installation, reduces potential delays, and helps avoid unnecessary costs. Here, we’ll outline the key steps you should consider.
1. Assess Your Space: Before installation, evaluate the area where the unit will be placed. Consider factors such as ceiling height, walls, and available space for the indoor and outdoor units. Ensure that your chosen location meets the requirements for optimal airflow and efficiency. Additionally, check if any structural modifications are needed.
2. Design the Layout: Create a detailed design layout that highlights the placement of the indoor and outdoor units. This includes planning for the ductless lines, mounting brackets, and electrical connections. An effective layout not only enhances aesthetics but also optimizes the performance of your mini split system.
3. Secure Necessary Permits: Depending on local regulations, you may need to obtain permits before starting the installation. Having the right permits ensures that the installation adheres to building codes and safety protocols, which is crucial for both operation and insurance purposes.
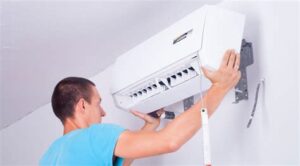
4. Choose Skilled Professionals: If you’re not experienced with HVAC systems, hiring qualified professionals can save you a lot of time and potential trouble. Look for technicians who have experience specifically in mini split installations to ensure they understand the nuances of this type of system.
5. Gather Supplies and Equipment: Finally, ensure you have all necessary materials and tools on hand before initiating the installation. This includes the mini split system itself, piping materials, electrical components, tools for cutting and securing, and insulation materials for sealing.
By following these steps and focusing on meticulous planning, your concealed mini split installation will be well-prepared, leading to a smoother and more efficient process.
Concealed Mini Split Piping
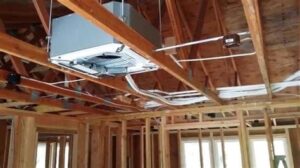
When it comes to concealed mini split installation, one of the most critical aspects is the piping layout. The way the refrigerant lines and drainage are routed can significantly affect the system’s efficiency and aesthetic appeal. Proper planning for the concealed piping not only ensures the system operates optimally but also keeps your space looking clean and uncluttered.
Benefits of Concealed Piping:
- Aesthetically pleasing: Concealing pipes reduces visible clutter in interior spaces.
- Improved Airflow: Well-planned piping can enhance the system’s airflow and efficiency.
- Protection from Damage: Hidden piping is less likely to be damaged during everyday activities.
To achieve effective concealed mini split piping, it is essential to consider the following techniques:
| Technique | Description |
|---|---|
| Wall Cavities | Running the pipes through wall cavities allows for a seamless look. |
| Drop Ceilings | Utilizing a drop ceiling can hide pipes while also allowing for easy access if needed. |
| Chases | Building a chase to house the pipes can be an effective way to keep them out of sight. |
Implementing these methods will not only ensure that the mini split system is functional but also maintain the aesthetic integrity of your home. Remember, proper design of the concealed piping enhances system reliability while reducing maintenance issues down the line.
Sealing and Insulation Techniques
When it comes to concealed mini split installation, ensuring proper sealing and insulation is essential for maximizing efficiency and comfort. Here are some techniques to consider:
- Use High-Quality Insulation Materials: The choice of insulation will significantly impact the performance of your mini split system. Opt for materials that have a high R-value for optimal thermal resistance.
- Seal All Ducts and Connections: Ensure that all ductwork and connections are properly sealed. Leaks can cause significant energy loss, leading to higher utility bills and reduced system efficiency.
- Insulate Refrigerant Lines: The refrigerant lines that connect the indoor and outdoor units should be insulated. This helps to maintain the temperature of the refrigerant and prevents condensation, which can lead to water damage.
In addition to the above techniques, always pay attention to the location of your insulation. Ensure there are no gaps or unsealed areas that could allow air leakage. This is crucial for maintaining the desired temperature and improving the overall efficiency of the system.
Moreover, incorporating a vapor barrier in areas prone to moisture can help protect your installation from mold and mildew. This is particularly important if the unit is installed in a basement or other damp areas.
Lastly, regular checking of the seals and insulation is recommended as part of your testing and maintenance plan. Over time, materials can degrade or displace, leading to reduced performance. By staying proactive, you can maximize the lif
Testing and Maintenance Tips
To ensure your concealed mini split installation operates at peak efficiency, consistent testing and maintenance are crucial. Regular checks will not only prolong the lifespan of your system but also maintain optimal performance. Here are some essential tips to help you keep your system in top shape:
- Regular Filter Checks: Clean or replace the filters every 1-3 months, depending on usage and the environment. This prevents dust and allergens from circulating in your space.
- Inspect Ductwork: Even with concealed installations, it’s vital to examine the ductwork for any leaks or blockages. Seal any openings to improve energy efficiency.
- Check Thermostat Settings: Ensure that your thermostat is functioning correctly and is set to the desired temperature. Consider upgrading to a smart thermostat for enhanced control.
Additionally, during peak usage months, pay attention to unusual noises or changes in performance, which may indicate a need for professional servicing. It’s advisable to schedule an annual check-up with a qualified technician, especially for systems that are heavily used.
Moreover, keep an eye on the refrigerant levels in your mini split system. Low refrigerant can lead to inefficient cooling and can cause long term damage. A professional will be able to identify and rectify any issues related to refrigerant quickly.
Following these maintenance tips will help you enjoy the benefits of your concealed mini split installation for years to come, ensuring your environment remains comfortable throughout the seasons.
Frequently Asked Questions
What is a concealed mini split system?
A concealed mini split system is a type of ductless air conditioning and heating system that is designed to be discreetly installed in ceilings or walls, providing climate control without the need for bulky indoor units.
What are the benefits of installing a concealed mini split system?
The benefits include improved aesthetics as units are hidden from view, enhanced energy efficiency, flexibility in installation, and the ability to control the temperature in specific areas or rooms.
How is the installation process different from traditional HVAC systems?
The installation of concealed mini splits typically involves less complex ductwork since they are ductless, allowing for easier installation in various spaces, and usually requires only a small hole for refrigerant lines.
What tools are needed for the installation of a concealed mini split?
Installing a concealed mini split usually requires tools such as a measuring tape, drill, wrenches, screwdrivers, pipe cutters, and a vacuum pump, among others.
Can I install a concealed mini split system myself?
While some homeowners may attempt DIY installation, it is generally recommended to hire a professional HVAC technician to ensure proper installation and compliance with local building codes.
How do I decide where to install the indoor unit of a concealed mini split?
Consider factors such as airflow direction, proximity to electrical sources, accessibility for maintenance, and aesthetic preferences when determining the ideal location for the indoor unit.
What maintenance is required for a concealed mini split system?
Maintenance typically includes cleaning or replacing filters, checking refrigerant levels, ensuring drainage is clear, and having regular professional inspections to maintain efficiency and longevity.
