Discover essential tips on selecting locations, preparing for installation, understanding mini split components, and fine-tuning your concealed duct mini split system for optimal efficiency.Installing a concealed duct mini split system can be a game-changer for your home’s heating and cooling needs, offering both efficiency and aesthetics. Unlike traditional units, concealed duct systems provide a seamless integration into your living spaces, allowing for improved air distribution without compromising on style. In this blog post, we will guide you through the essential steps involved in the installation process, from selecting the optimal location and preparing your space to understanding the key components that make up the system. Additionally, we will provide an overview of the installation process itself and cover crucial tips for testing and fine-tuning your mini split system after it’s been set up. Whether you’re a seasoned DIY enthusiast or a homeowner looking to hire professionals, this comprehensive guide will equip you with the knowledge you need for a successful installation.
Choosing the Right Location
When it comes to installing a concealed duct mini split system, the importance of selecting the right location cannot be overstated. Proper placement is essential for ensuring optimal performance and efficiency of your heating and cooling system. Below are key factors to consider when determining the best location for your unit.
- Space for Components: Ensure there is adequate space for all components, including both the indoor and outdoor units. The indoor unit requires enough clearance for air circulation and access for maintenance.
- Airflow Considerations: Avoid obstructions that may hinder airflow. Placing the unit in a location that is open and away from furniture or decor will promote better air distribution throughout the room.
- Access to Power Supply: The mini split system needs proximity to a power source. Ensure that electrical wiring is feasible at the installation site, as this can affect installation costs and overall efficiency.
Additionally, keep in mind the aesthetic aspect of the installation. Since the concealed duct system is often hidden within ceilings or walls, consider how the chosen location aligns with your interior design. It’s beneficial to discuss your preferences with the installation team to find a balance between functionality and appearance.
Finally, don’t forget to consider potential future uses of the space. Choosing a location that meets current heating and cooling needs while accommodating for future changes can save you both time and money on future upgrades or modifications.
Preparation and Planning
Before embarking on the journey of installing a concealed duct mini split system, thorough preparation and planning are crucial to ensure a smooth and successful installation. This stage involves understanding the specific requirements needed for your space and selecting the appropriate system size and components. The planning phase not only saves time but also ensures the utmost efficiency and performance of your HVAC system.
Begin by conducting a thorough assessment of the space in which the mini split will be installed. Take measurements to determine the layout and to identify potential obstacles such as walls, doors, and windows. Based on this assessment, you’ll be able to make informed decisions about the placement of the indoor and outdoor units. Additionally, consider the insulation of the area as it will significantly influence the efficiency of your HVAC system.
After the initial assessment, the next step is to gather all necessary tools and materials. This may include ductwork, the mini-split unit, a programmable thermostat, and any additional accessories required for optimal functionality. Ensuring that you have everything ready before starting the installation process can help alleviate potential interruptions and delays.
Concealed Duct Mini Split Components
When setting up a concealed duct mini split system, understanding its components is crucial for efficient operation and maintenance. A well-functioning system relies on various parts working in harmony to deliver optimal heating and cooling. Below is a breakdown of the primary components used in these systems.
1. Indoor Unit: The indoor unit is usually installed in the ceiling or wall, out of sight, and is responsible for distributing conditioned air throughout the space. Many modern models come with variable speed fans for better air flow control.
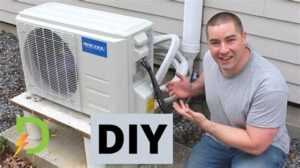
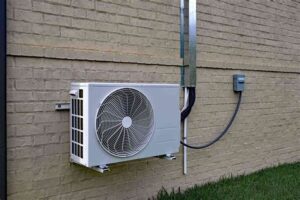
2. Outdoor Unit: The outdoor unit absorbs heat from the outside air (for heating) or releases it (for cooling). Typically, it houses the compressor, condenser coil, and fan, and operates quite effectively even in extreme weather conditions.
3. Ductwork: The ductwork connects the indoor unit to the areas needing climate control. It is designed to minimize air loss and ensure even temperature distribution, often requiring insulation to avoid any energy loss.
4. Remote Control/ Thermostat: Many concealed duct mini split systems feature a remote control or smart thermostat for easy operation. These devices allow you to set temperatures and manage different zones of your space from a distance.
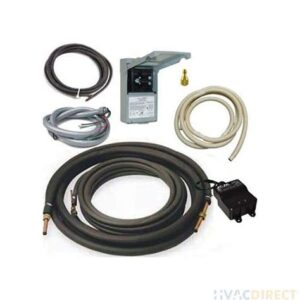
5. Refrigerant Lines: The refrigerant lines transfer the refrigerant between the indoor and outdoor units, facilitating the heat exchange process. Proper insulation and positioning of these lines are vital for system efficiency.
Understanding these components and their interaction lays the groundwork for effective installation and maintenance of a concealed duct mini split system. Always consult with a professional to ensure that each part is correctly installed and functioning as intended.
Installation Process Overview
The installation process for a concealed duct mini split system involves a series of crucial steps that ensure efficient operation and optimal comfort. It is essential to follow a structured approach to avoid common pitfalls and enhance performance.
Firstly, you’ll need to select the appropriate location for the indoor and outdoor units. The indoor unit should be placed in an area that allows for effective air distribution, while the outdoor unit requires sufficient clearance for proper airflow.
Once the locations have been established, the installation typically includes the following key steps:
- Mounting the Indoor Unit: Secure the indoor unit to the wall or ceiling using the mounting brackets.
- Connecting the Refrigerant Lines: Properly insulate and connect the refrigerant lines between the indoor and outdoor units.
- Electrical Connections: Make necessary electrical connections to both units, ensuring compliance with local codes.
- Drain Line Installation: Route the condensate drain line from the indoor unit to an appropriate drainage point.
- Testing for Leaks: Once all connections are made, perform a pressure test to check for leaks in the system.
Finally, after confirming that everything is installed correctly, the system can be powered on. It’s important to run the system through various settings to ensure all components function as e
Testing and Fine-Tuning
Once the concealed duct mini split system is installed, it’s crucial to conduct comprehensive testing and fine-tuning to ensure optimal performance. This stage involves verifying that the system operates efficiently and delivers the desired comfort levels.
To begin with, start by checking the thermostat settings. Ensure that the temperature settings match the preferences of the occupants and that the thermostat is functioning properly. Adjust the settings as necessary for a comfortable environment.
Following that, inspect the airflow through the ducts. Use an anemometer to measure the airflow velocity and make adjustments to the duct dampers if required. This step is vital for maintaining an even distribution of conditioned air throughout the space.
Lastly, conduct a performance check of the system components, including the condenser and indoor units. Monitor the system’s ability to maintain temperature and humidity levels. If discrepancies are found, consider recalibrating the system or consulting with a professional for further adjustments.
Frequently Asked Questions
What is a concealed duct mini split system?
A concealed duct mini split system is a type of heating and cooling system that hides ductwork within walls or ceilings, providing a discreet way to distribute conditioned air throughout a space.
What are the benefits of installing a concealed duct mini split?
Benefits include improved aesthetics due to hidden ducts, energy efficiency, individualized temperature control in different rooms, and quieter operation compared to traditional HVAC systems.
How do I choose the right size for my concealed duct mini split?
To choose the right size, perform a load calculation based on the size of the space, insulation quality, and local climate. It’s essential to consult with an HVAC professional to ensure proper sizing.
What materials are needed for the installation of a concealed duct mini split?
Materials needed include the mini split units, insulated refrigerant lines, ductwork, a condensate drain line, mounting brackets, and various electrical components.
Can I install a concealed duct mini split system myself?
While DIY installation is possible, it is highly recommended to hire a licensed HVAC technician to ensure proper installation, compliance with local codes, and optimal system performance.
How long does it usually take to install a concealed duct mini split?
On average, installation can take between 4 to 8 hours, depending on the complexity of the system, the number of zones being installed, and the experience of the installer.
What maintenance is required for concealed duct mini split systems?
Regular maintenance includes cleaning or replacing filters, inspecting duct connections, and ensuring that the outdoor unit is free from debris. Annual professional servicing is also recommended.
