Explore mini split systems, learn installation preparation, find the ideal location, and follow our step-by-step process for seamless setup and maintenance tips.Installing a mini-split air conditioning system can be a game changer for your home, providing efficient climate control without the hassle of ductwork. As more homeowners seek energy-efficient solutions to stay comfortable year-round, understanding how to install a mini-split becomes essential. This blog post will guide you through everything you need to know, from the basics of mini-split systems and how to choose the right location for optimal performance, to detailed preparation steps and a comprehensive step-by-step installation process. We will also touch on testing and maintenance tips to ensure your system runs smoothly for years to come. Whether you’re a seasoned DIY enthusiast or a novice looking to enhance your home’s comfort, this guide is here to help you every step of the way. Let’s dive in and transform your living space!
Understanding Mini Split Systems
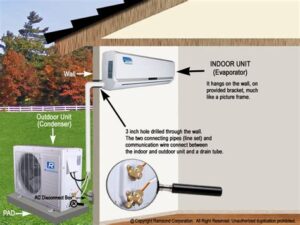
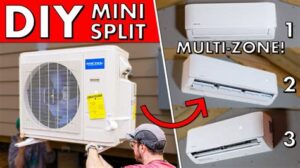
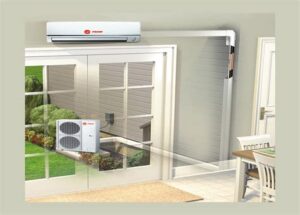
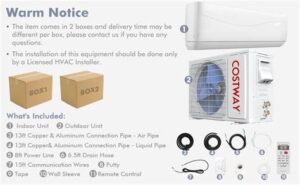
A mini split system is an efficient and versatile option for heating and cooling individual rooms or entire homes without the need for traditional ductwork. This type of system consists of two main components: an outdoor unit and one or more indoor air handling units. Each unit operates independently, allowing for customized temperature control in different zones.
One of the significant advantages of mini split systems is their energy efficiency. They often use inverter technology, which adjusts the compressor speed to maintain the desired temperature while consuming less energy. This feature not only reduces electricity bills but also contributes to a lower carbon footprint.
Additionally, mini split systems are easier to install than conventional HVAC systems. The installation process involves minimal disruption to your home, as small holes are made for the refrigerant lines and electrical connections. This flexibility and ease of installation make them an excellent choice
Choosing the Right Location
When considering how to install a mini split system, one of the most critical decisions is selecting the right location for the indoor and outdoor units. The placement directly affects the system’s efficiency and your overall comfort. Here are some crucial factors to take into account:
- Indoor Unit Placement: The indoor unit should ideally be installed in a central location within the room to ensure optimal air distribution. Avoid corners or locations obstructed by furniture.
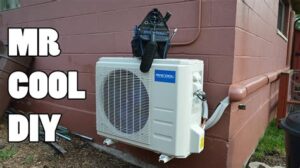
- Outdoor Unit Placement: The outdoor unit should be placed in a well-ventilated area, away from direct sunlight and debris. Ensure it has adequate clearance around it for proper airflow.
- Distance Between Units: Keep the distance between the indoor and outdoor units within the manufacturer’s recommended range to maintain system efficiency. Excessively long lines can impact performance.
Additionally, it is advisable to avoid installing the indoor unit near sources of heat, such as ovens or radiators, as this could lead to inaccurate temperature readings.
Finally, ensure that the location is accessible for future maintenance. You might require regular filters cleaning or system checks, so having clear access is essential.
Preparation for Installation
Before diving into the installation of a mini split system, proper preparation is essential for ensuring a smooth and successful setup. Taking the time to prepare properly will save time and prevent headaches later on. Here are some crucial steps to consider:
- Location Selection: Choose an optimal location for both indoor and outdoor units. The indoor unit should be placed where it can circulate air effectively, while the outdoor unit needs sufficient clearance for ventilation.
- Tools and Materials: Gather all necessary tools and materials before you start. This typically includes a drill, level, screwdriver, tubing, and the mini split unit itself.
- Power Source: Ensure that there is an appropriate electrical power source near the installation site. It should meet the electrical requirements specified by the manufacturer.
After you’ve completed these steps, it’s important to review your local building codes and regulations regarding the installation of mini split systems. Some areas may have specific requirements or require permits.
Lastly, it’s advisable to have a few extra hands available during installation to help with lifting and positioning the units. Having someone to assist not onl
Step-by-Step Installation Process
Installing a mini split system can enhance your home’s comfort and energy efficiency. Below is a step-by-step process to guide you through the installation, ensuring that you correctly set up your system for optimal performance.
1. Gather Required Tools and Materials
Before starting the installation, you’ll need to gather certain tools and materials. Here’s a quick list:
- Stud finder
- Drill and drill bits
- Level
- Measuring tape
- Pipe wrenches
- Insulation tape
- Wall brackets
- Electrical wire and connectors
2. Choose Your Location
Next, it’s crucial to select a suitable location for the indoor and outdoor units. Ensure there’s ample clearance around both units for air circulation. The indoor unit should be placed about 7 to 8 feet from the ground, while the outdoor unit should be in a shaded area to avoid overheating.
3. Install the Indoor Unit
Begin by mounting the indoor unit on the wall using the wall bracket. Use the level to ensure it’s straight, then mark the screw holes and proceed to drill them. Secure the bracket and attach the indoor unit.
4. Create the Wall Hole
Next, you’ll need to create a 3-inch hole in the wall for the refrigerant lines and drain line. Use a drill with a hole saw bit to make this hole as it provides a clean cut.
5. Connect the Lines
Run the refrigerant lines through the wall hole. Connect the lines to the indoor unit, making sure to follow the manufacturer’s instructions for each specific connection. Tighten using a pipe wrench to prevent leaks.
6. Install the Outdoor Unit
Now, move on to the outdoor unit. Find a stable surface to mount it, ensuring it’s level and securely installed. Again, allow for ample air circulation around the outdoor unit.
7. Connect Power Supply
With both units installed, it’s time to connect the power supply. Make sure to follow local electrical codes while wiring the system. It’s advisable to consult a licensed electrician if you’re unsure about any electrical connections.
8. Test the System
Once everything is installed and connected, turn on the power to the outdoor unit. Check all the connections for leaks and listen for unusual sounds. If everything is functioning properly, your mini split system is now ready to use!
Remember, correctly following these steps will not only ensure your mini split system runs efficiently but also prolong its lifespan. If you encounter any difficulties during installation, don’t hesitate to reach out to professionals for assistance.
By adhering to this step-by-step installation guide, you’ll create a comfortable environment in your home while taking advantage of the benefits that a mini split system offers.
Testing and Maintenance
Regular testing and maintenance of your mini split system are essential to ensure its longevity and efficiency. Just like any other HVAC system, a mini split requires timely checks to function optimally. Failing to maintain your system can lead to decreased performance and increased energy costs.
Here are some vital maintenance tasks that should be performed:
- Check Air Filters: Clean or replace air filters monthly to maintain airflow and improve air quality.
- Inspect Outdoor Unit: Ensure that the outdoor unit is free from debris and obstructions to promote airflow.
- Check Drainage Lines: Inspect and clean the condensate drain line to prevent clogs that can lead to water damage.
For effective testing, consider the following procedures:
1. Temperature Check: Measure the temperature difference between the air entering and leaving the unit, which should be around 20°F.
2. Noise Assessment: Note any unusual noises that might indicate mechanical issues.
3. Control Functionality: Test the remote control and internal settings to ensure they function correctly.
By performing these testing and maintenance tasks regularly, you will keep your mini split system running smoothly, ensuring comfort in
Frequently Asked Questions
What tools do I need to install a mini split system?
You will need a drill, screwdrivers, level, pipe wrenches, a vacuum pump, and refrigerant gauges among other tools.
How do I choose the right location for the indoor unit?
Select a location for the indoor unit that allows for optimal airflow, close to the ceiling, and away from direct sunlight or heat sources.
What steps are involved in installing the outdoor unit?
The outdoor unit should be mounted on a stable surface, connected to the indoor unit via refrigerant lines, and wired to the electrical supply.
Do I need to hire a professional for the installation?
While some individuals attempt DIY installations, hiring a professional is recommended to ensure proper handling of refrigerants and electrical connections.
How long does it typically take to install a mini split system?
A standard installation usually takes around 4 to 6 hours, depending on the complexity of the setup and the number of indoor units.
What maintenance is required after installation?
Regular maintenance includes cleaning the filters, checking for refrigerant leaks, and ensuring the outdoor unit is clear of debris.
Are there any permits required for installing a mini split?
Check with local building codes and regulations, as some areas may require permits for HVAC installations.
