Learn how to choose, install, and optimize mini split systems for efficient heating and cooling in your home.Are you considering upgrading your home’s cooling and heating system? A mini-split installation, particularly a ceiling cassette model, could be the perfect solution for efficient and discreet temperature control. These innovative systems offer versatile comfort options while saving space and energy. In this blog post, we’ll guide you through each step of the ceiling cassette mini-split installation process. From understanding how mini-split systems work to selecting the right unit, preparing the installation area, and executing the installation process, we’ll cover everything you need to ensure a successful setup. Finally, we’ll touch on how to test and fine-tune your new system for optimal performance. Let’s dive in and transform your indoor climate with this modern heating and cooling solution!
Understanding Mini Split Systems
A mini split system is a highly efficient solution for heating and cooling specific areas of a home or business. Unlike traditional HVAC systems that rely on ductwork, mini split systems offer a ductless option that provides better temperature control and energy efficiency.
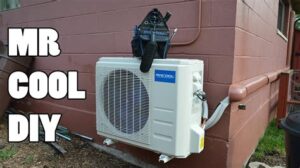
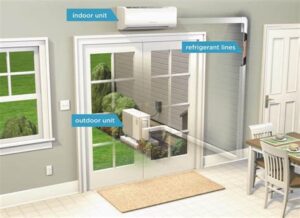
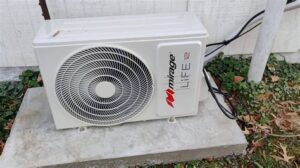
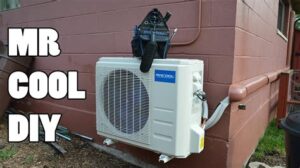
These systems consist of two main components: an indoor unit and an outdoor unit. The indoor unit is typically mounted high on a wall or even on the ceiling, while the outdoor unit is installed outside the building. The two units are connected via refrigerant lines, allowing for flexible installation in various spaces.
Mini splits are available in various configurations, including wall-mounted, floor-mounted, and ceiling cassette units. Ceiling cassettes are particularly beneficial for spaces with limited wall and floor space, as they blend seamlessly into the ceiling while distributing air effectively. Understanding the functions and capabilities of mini split systems can help you select the right unit for your needs.
Selecting the Right Mini Split Unit
When it comes to choosing the right mini split unit, there are several factors to consider to ensure optimal performance and efficiency. First and foremost, you’ll need to assess the size of the space you are cooling or heating. Mini split systems come in various capacities, measured in BTUs (British Thermal Units). Choosing a unit with the appropriate BTU rating is critical to maintaining a comfortable indoor environment.
Next, think about the system type you prefer. Mini splits are available in different configurations, such as wall-mounted, floor-mounted, and ceiling cassette units. Each type has its own advantages; for instance, a ceiling cassette installation can be ideal for spaces with limited wall space. Consider the layout of your room to determine which installation type will work best for your needs.
Additionally, pay attention to the energy efficiency ratings of the units you are considering. Look for units that have a high SEER (Seasonal Energy Efficiency Ratio) and EER (Energy Efficiency Ratio) as these ratings indicate better performance and lower operational costs. Investing in an energy-efficient model can lead to significant savings on your utility bills over time.
Lastly, don’t forget to evaluate the brand reputation and warranty options. Researching user reviews and ratings can help you identify reliable manufacturers. Ensure that the unit you choose comes with a good
Preparing the Installation Area
When it comes to installing a ceiling cassette mini split system, properly preparing the installation area is crucial for ensuring efficient operation and longevity of the unit. A well-prepared space allows for better airflow and reduces the chance of potential issues once the system is operational.
Start by assessing the ceiling height and structure where the unit will be installed. Make sure that there are no obstructions, such as ceiling beams or light fixtures, that could interfere with the airflow from the unit. It’s also essential to ensure that the unit has enough clearance on all sides for maintenance access and optimal performance.
Next, consider the electrical requirements. Ensure that there is an adequate power supply near the installation site. It’s a good idea to consult an electrician to verify that your electrical setup can handle the demands of the mini-split system. Moreover, check for any nearby outlets or considerations for the refrigerant lines and drainage. Clear the area of any furniture, tools, or debris to create a safe and clean work environment.
Lastly, always refer to the manufacturer’s guidelines for specific recommendations regarding the installation area. Proper preparation will not only streamline the installation process but also enhance the efficiency and effectiveness of your ceiling cassette mini split system.
Ceiling Cassette Installation Process
Installing a ceiling cassette mini split system can be a highly efficient way to maintain comfortable temperatures in your space. This type of system offers discreet installation while efficiently distributing air. Below are the detailed steps to guide you through the installation process.
Tools and Materials Needed:
- Ceiling cassette unit
- Refrigerant lines
- Drain line
- Electrical wiring
- Copper tubing bender
- Drill
- Level
- Measuring tape
- Safety goggles
- Hangers and brackets for support
Installation Steps:
- Select the location for the ceiling cassette unit, ensuring there is sufficient space for air circulation and easy maintenance access.
- Prepare the installation area by drilling a hole for the refrigerant lines, drain line, and electrical connection.
- Mount the wall brackets by securing them into the ceiling structure for optimal support.
- Install the ceiling cassette unit by carefully placing it into the pre-mounted brackets and ensuring it is level and securely attached.
- Connect refrigerant lines and the drain line, ensuring there are no kinks or sharp bends in the tubing.
- Wire the unit to the electrical supply, following local codes and manufacturer instructions.
- Seal the openings around the refrigerant and drain lines to prevent air leaks.
- Test the system for functioning and look for leaks in the connections.
Once the installation is complete, ensure to follow operational guidelines to maximize the life and efficiency of your ceiling cassette mini split system. Regular maintenance can also help prevent any issues in the future!
Testing and Fine-Tuning the System
After the installation of your ceiling cassette mini split system, the next crucial step is testing and fine-tuning the system. This process ensures that your unit operates efficiently and effectively, providing optimal heating and cooling. Here are some key steps to follow during this phase:
- Check the electrical connections: Ensure that all the electrical connections are secure and correctly installed according to the manufacturer’s specifications.
- Inspect refrigerant levels: Use pressure gauges to check the refrigerant levels. The readings should be within the manufacturer’s recommended range to ensure optimal performance.
- Test the air flow: Verify that the airflow from the ceiling cassette is unobstructed and adequate. Adjust the settings if necessary to enhance air distribution.
- Monitor the thermostat: Ensure the thermostat is functioning correctly and accurately reflecting the desired temperature settings. Any discrepancies can affect the overall performance.
Additionally, it’s essential to run the system in both heating and cooling modes to confirm that it responds appropriately to temperature changes. Observe the noise levels, as unexpected sounds may indicate underlying issues that need to be addressed.
Finally, consider utilizing a data logging tool to assess energy usage over the first few weeks. Monitoring the system’s performance can help in making necessary adjustments to maximize efficiency and comfort. This fine-tuning phase is vital for ensuring the longevity and
Frequently Asked Questions
What is a ceiling cassette mini split?
A ceiling cassette mini split is a type of ductless heating and cooling system that is installed in the ceiling, distributing air evenly throughout the room.
What are the benefits of installing a ceiling cassette mini split?
Benefits include improved aesthetics, space-saving design, quiet operation, and energy efficiency compared to traditional HVAC systems.
How do I choose the right size ceiling cassette mini split for my room?
To select the right size, calculate the room’s BTU requirements based on its square footage, insulation, and climate conditions.
What tools do I need for the installation of a ceiling cassette mini split?
Essential tools include a drill, level, screwdriver, measuring tape, and various hand tools for electrical and refrigerant connections.
Is professional installation recommended for ceiling cassette mini splits?
Yes, professional installation is often recommended to ensure proper setup, refrigerant handling, and compliance with local building codes.
What is the typical installation time for a ceiling cassette mini split?
Installation typically takes a few hours to a full day, depending on the complexity of the setup and the conditions of the installation site.
What maintenance is required for ceiling cassette mini splits?
Regular maintenance includes cleaning or replacing filters, checking refrigerant levels, and ensuring that the indoor and outdoor units are free of debris.
